Create an online store and sell digital products, courses and subscriptions using Lemon Squeezy
Running an online business can be hard work. Besides creating popular products (which can be a challenge in itself!), you still have to manage taxes, legal requirements, security, payment processors, fraud prevention and more. All these extra responsibilities can add up and become overwhelming, especially for new businesses. Fortunately, there is another way. In this article, we will discuss an eCommerce solution called Lemon Squeezy. Lemon Squeezy allows you to sell digital products, software, courses and subscriptions online easily and securely. Lemon Squeezy are the merchant of record for all sales, which means they handle all taxes and VAT involved with selling online. They also offer an increasing list of other cool features including the ability to manage promotions, marketing and customer accounts. We use Lemon Squeezy here at Coders' Guidebook because they handle all the tricky aspects of running our site and allow us to spend more time creating content for you. If you decide to join us and sign up for Lemon Squeezy too, we would appreciate it if you use our link to let them know we sent you 🙂 Currently, they offer a 14-day free trial (no card details required).

No tax headache! Lemon Squeezy is the merchant of record
One of the most complex and confusing aspects of running an online store is taxes. Almost every country in the world has different legal requirements regarding tax rates and thresholds concerning the sale of digital products. And even if you can wrap your head around the requirements of each country, there's still the matter of registering with their tax authority and calculating and paying the tax you owe. Lemon Squeezy fixes this. They are the merchant of record for all sales through your store, which means they are responsible for collecting and paying taxes. When a customer orders from your store, Lemon Squeezy automatically calculates and applies the appropriate tax based on the customer's location. Lemon Squeezy later pay that tax to the relevant authority without you having to do a thing. Simple!
In addition to handling all your taxes, Lemon Squeezy offer many other features to help you run your business. Several of the most useful features are included below. New features are released regularly, as you can see from their blog, and their service is only getting better with time.
- Lemon Squeezy securely store and deliver your products
- Customers can pay using PayPal or their debit/credit card
- You can generate and customise discount codes. For example, you could offer a 10% discount to the first 100 customers that use your code
- Forgotten basket emails. If a customer enters their email in the checkout but does not complete their purchase, Lemon Squeezy will send them a reminder email
- Customisable pricing methods such as pay what you want pricing and lead magnets (offering a product for free in exchange for contact information such as an email address)
- API and Webhook capabilities to facilitate communication between Lemon Squeezy and your website
Creating an online store with Lemon Squeezy
After reading all the information about Lemon Squeezy, if you think it could help your business then sign up for an account and create your store. To add a product to your store, simply press the plus icon in the top right corner of your account dashboard and fill in the required details. For example, you will be asked to provide the title of the product, a short description (several sentences), images of the product, and any associated files. For example, if you are selling a music album then you should upload the audio files (or a ZIP folder containing the audio files). Also, don't forget to set the price you would like to sell the product for and the pricing method (one-off payment, lead magnet, subscription etc.).
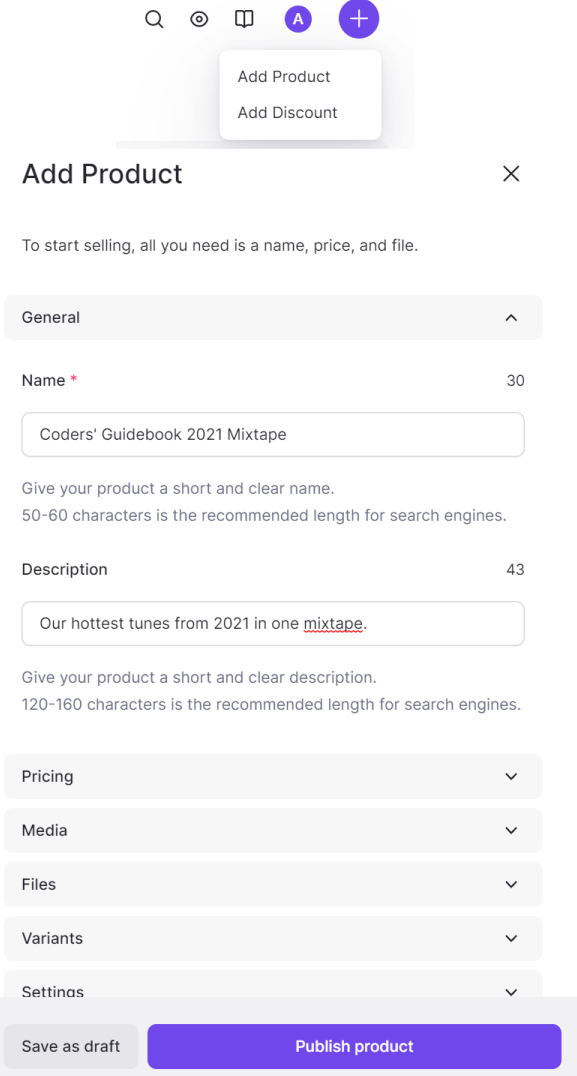
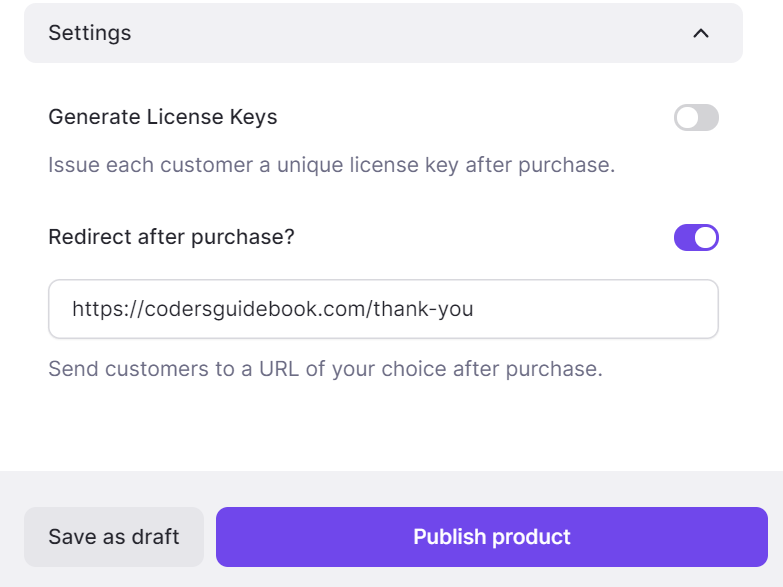
In the Settings section of the Add Product form, you will find the option to add a redirection URL. If you set a redirection URL, Lemon Squeezy will direct the customer there following a successful payment. This is a great opportunity to thank the customer for their purchase and perform post-order processes.
There are a few other things you might want to take care of in your Lemon Squeezy account. For instance, you will likely want to add a payment method so Lemon Squeezy can pay you your hard-earned cash. However, once you've added a few products to your store you are ready to progress to the next step: integrating Lemon Squeezy with your website.
Incorporate Lemon Squeezy into your website using HTML and JavaScript
By default, Lemon Squeezy will host your store on a subdomain of their website; however, you may prefer to sell products through your website. For this purpose, you can add checkout buttons to your web pages using HTML code or Lemon Squeezy's dedicated WordPress plugin.
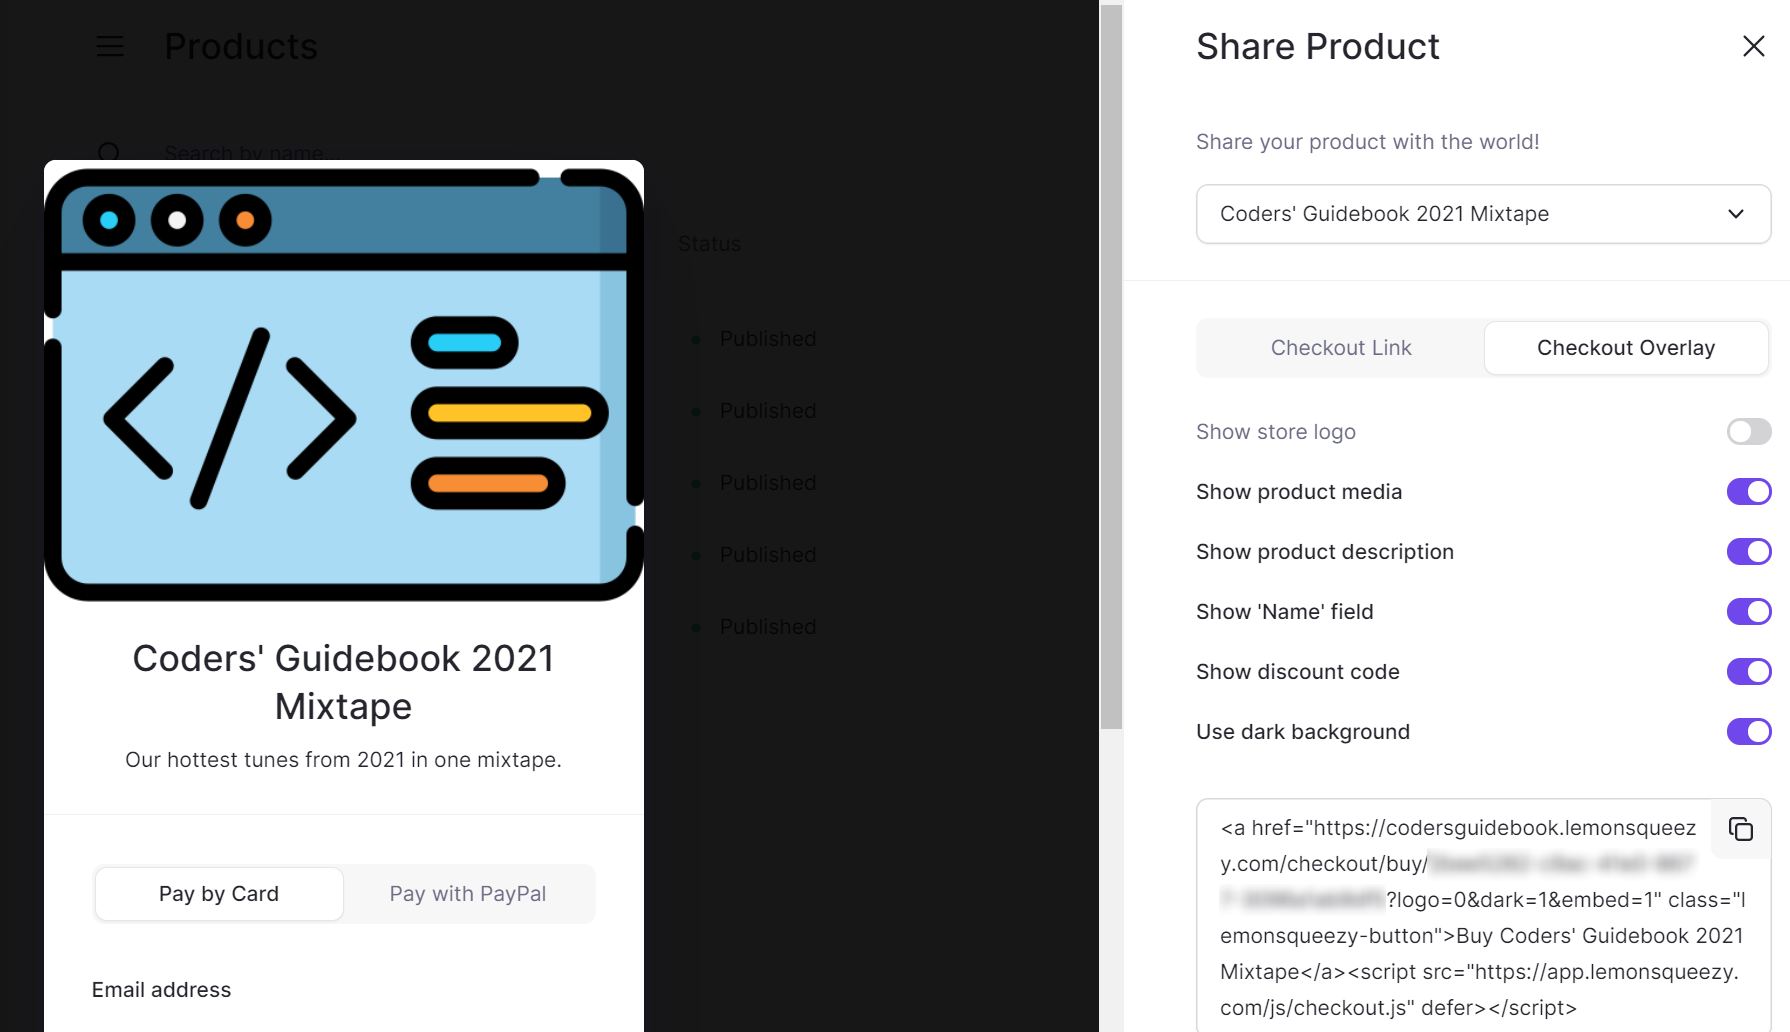
You can add checkout buttons to any page on your website. The checkout buttons will either direct the customer to your Lemon Squeezy store to complete their purchase or open a modal checkout overlay that allows the customer to pay for their order without leaving your site. To generate the HTML and JavaScript code required for the checkout buttons, head to the Products section of your Lemon Squeezy account dashboard, find the product that you would like to generate a checkout button for, and click Share.

You will have the option to generate a checkout link or a checkout overlay. The checkout link will direct customer's to your Lemon Squeezy store, while the checkout overlay will create a modal window that allows the user to complete their purchase on their current web page. For this tutorial, we will create a checkout overlay because the overlay allows the customer to complete their order without leaving your website. You can customise the overlay. For example, you can select what information you would like to display, as shown below.
Once you're happy with the checkout overlay, copy the code shown below the overlay preferences. The code consists of an anchor tag, which will load the checkout overlay when clicked, and a JavaScript script that enables the Lemon Squeezy functionality. Insert the anchor element at the position in the web page where you want to display the checkout button. Each anchor element is specific to a particular product, so you will have to repeat the above steps to create anchor elements for each product that you wish to display. Meanwhile, the JavaScript script only needs to be added to the web page once, regardless of how many products you are listing. You can either include the script in the head element or below the anchor element, as shown below:
<!DOCTYPE html>
<html lang="en-GB">
<head>
    <!-- The contents of the head element will go here -->

    <!-- Location option 1 for the Lemon Squeezy JavaScript script -->
    <script src="https://app.lemonsqueezy.com/js/checkout.js" defer></script>
</head>
<body>
    <!-- The contents of your web page will go here -->

    <!--
        The anchor element that will load the checkout button.
        Include a separate anchor element for each product that you wish to display
    -->
    <a href="https://codersguidebook.lemonsqueezy.com/checkout/buy/111aabbgghh?logo=0&dark=1&embed=1" class="lemonsqueezy-button">Buy Now</a>

    <!-- Location option 2 for the Lemon Squeezy JavaScript script -->
    <script src="https://app.lemonsqueezy.com/js/checkout.js" defer></script>
</html>
You can change the message that is displayed in the checkout button by editing the text that is enclosed between the opening <a> and closing </a> anchor tags. Also, you may like to customise the appearance of the checkout button. The Lemon Squeezy checkout button has the HTML class lemonsqueezy-button, which means you can style it using CSS. For more information about this, then check out our CSS tutorials.
Incorporate Lemon Squeezy into your website using WordPress
Alternatively, if your website was built using WordPress, then you can use Lemon Squeezy's dedicated plugin to sell your products. No coding is required! The plugin connects to your Lemon Squeezy store and allows you to add checkout buttons to your website. You can configure the checkout buttons to redirect the customer to your Lemon Squeezy store in a new tab or display a modal window that allows the customer to complete their order on your website.
You can sell products on your website via Lemon Squeezy by using their WordPress plugin. WordPress is a content management system that developers can use to build websites with minimal to no coding required. It is possible to build your entire site using WordPress or isolate WordPress to a subdirectory or subdomain.
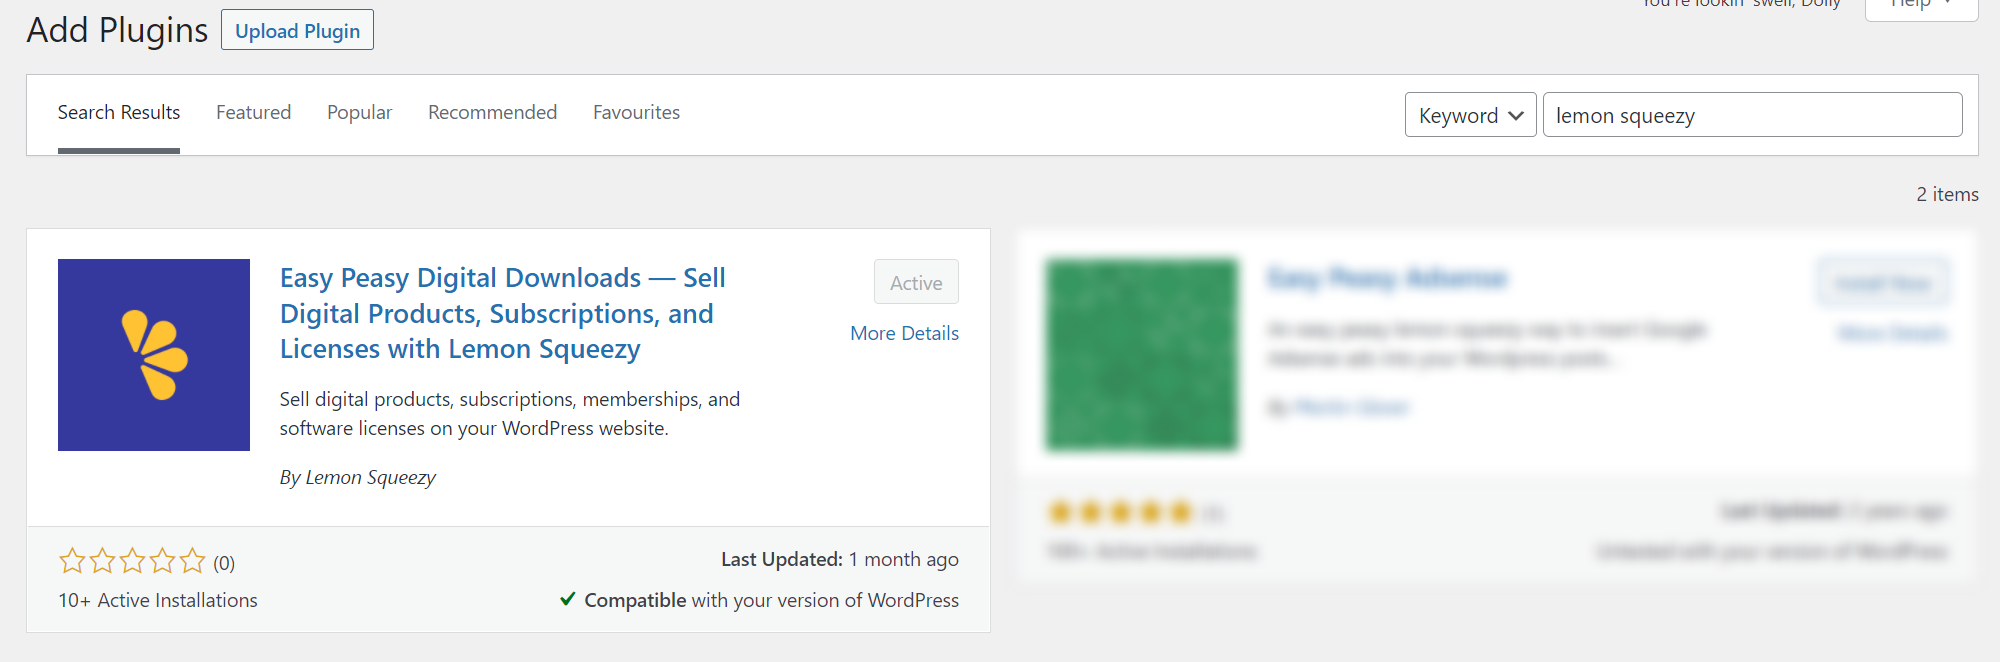
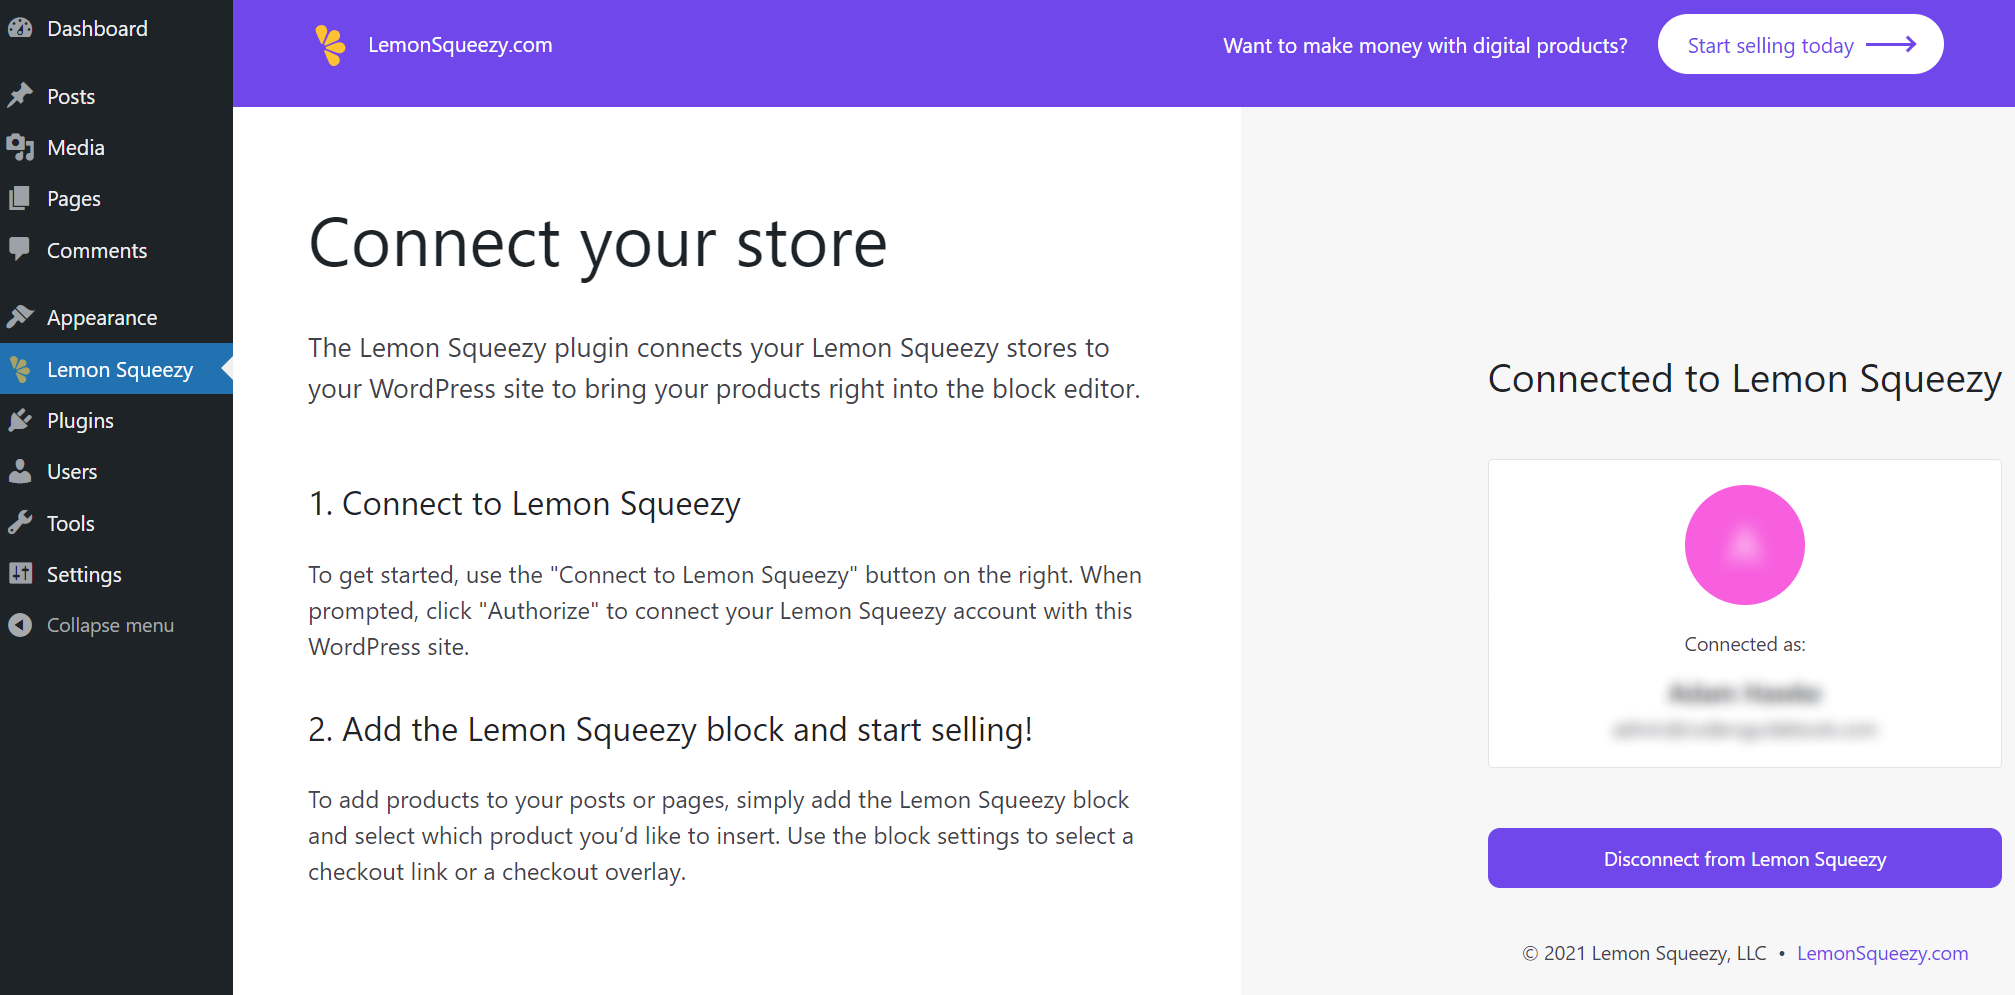
To add the Lemon Squeezy plugin to your WordPress site, navigate to the Plugins section of your WordPress site manager then search for, install and activate the Lemon Squeezy plugin.
You should notice a tab on the left-hand side navigational panel for the newly installed Lemon Squeezy plugin. Click the tab and you will be directed to a page where you can link the plugin with your Lemon Squeezy account.
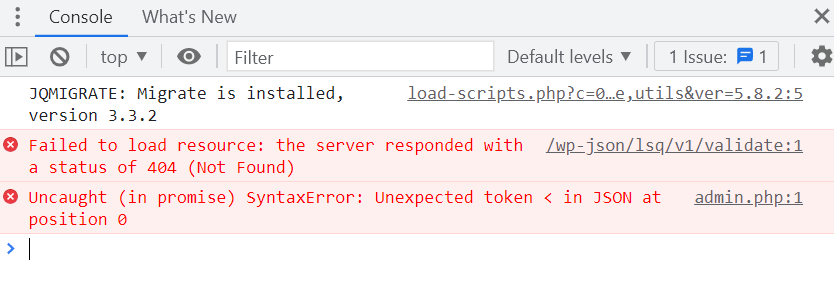
 What to do if the Lemon Squeezy plugin cannot connect (Failed to load resource 404 error). If you install WordPress in a subdirectory on your website, you may find the plugin authentication page does not load correctly. For example, it might continuously display a message such as 'Connect to Lemon Squeezy' or 'Connecting'.

If this happens to you, then investigate the developer console logs by right-clicking the webpage, pressing inspect and checking if you see any errors in the console. For example, you may see an error that reads /wp-json/lsq/v1/validate:1 Failed to load resource: the server responded with a status of 404 (Not Found)
The above error occurs because you have installed WordPress in a subdirectory, and a parent directory (likely the root directory) contains a .htaccess file that conflicts with the WordPress directory's .htaccess file. In case you're wondering, .htaccess files contain instructions for configuring aspects of your server including URL structure and redirections. If you encounter the 404 error shown above, then this means you have a .htaccess file in a directory above your WordPress directory, and this parent .htaccess file is manipulating your website's URL structure in a way that means your site cannot communicate with Lemon Squeezy.
Fortunately, this 404 error is quite easy to fix. All you need to do is open the .htaccess file from your WordPress directory then copy and paste its contents into the parent directory .htaccess file that is causing the conflict. An example of the code you may need to add to the parent .htaccess file is included below. The example code assumes your WordPress site is in a subdirectory called store.
<IfModule mod_rewrite.c>
RewriteEngine On
RewriteRule .* - [E=HTTP_AUTHORIZATION:%{HTTP:Authorization}]
RewriteBase /store/
RewriteRule ^index\.php$ - [L]
RewriteCond %{REQUEST_FILENAME} !-f
RewriteCond %{REQUEST_FILENAME} !-d
RewriteRule . /store/index.php [L]
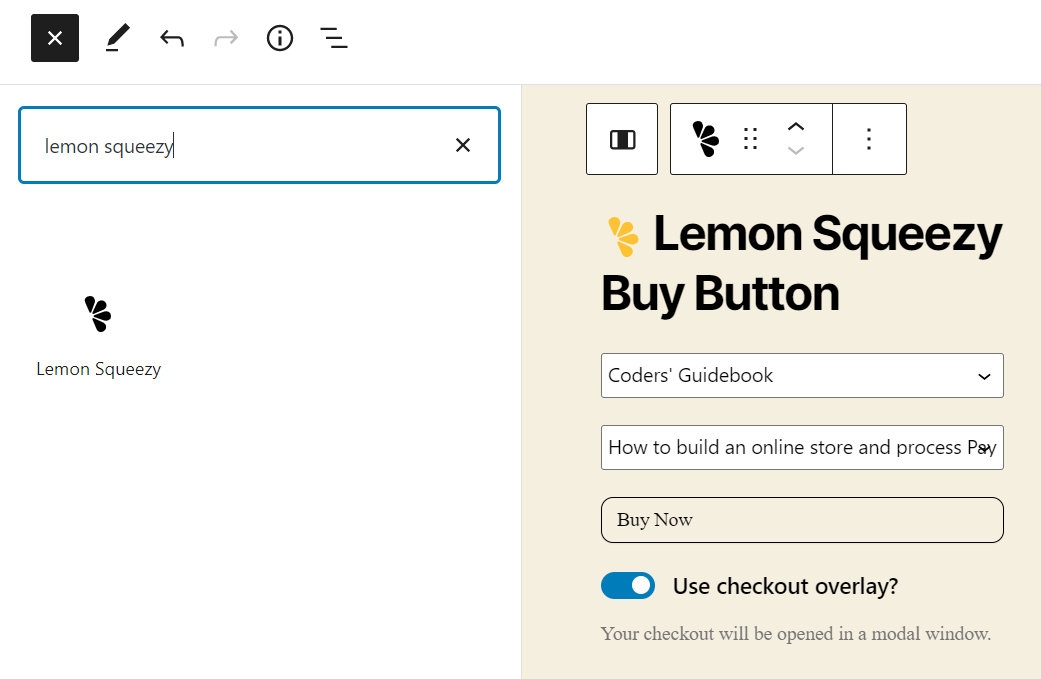
</IfModule>Once you have successfully activated the plugin, you can begin to list products on your website. To do this, use the WordPress management console to locate the web page you wish to add your product to. Next, click the button to add a new block to the web page and search for Lemon Squeezy. Add the Lemon Squeezy block to the web page and customise it to fit your needs. For example, you can select which product you would like to associate the button with, edit the button's text, and decide whether you would like customers to complete their purchase using the checkout overlay (the customer remains on the current web page) or your Lemon Squeezy store (the customer will be redirected to your lemonsqueezy.com domain).
Congratulations! You have successfully incorporated Lemon Squeezy into your website. You can now sell products quickly, securely and without any of the extra headaches such as sales tax. There are likely a few extra tweaks you may need to make. For example, the Lemon Squeezy block simply displays the checkout button. You will likely want to add further product information around the button such as the product's name, price and image. Also, you may like to customise the appearance of the checkout button. The Lemon Squeezy checkout button has the HTML class lemonsqueezy-button, which means you can style it using CSS. For more information about this, then check out our CSS tutorials.