How to publish an Android application to the Google Play store
Once you have finished developing an application, you may like to share your hard work with the world. For this purpose, the Google Play store is the most popular distributor of Android applications and will help you reach the widest audience possible. In this tutorial, we will cover how to bundle your application for distribution and publish it on the Google Play store.
To publish an application to the Google Play store, you will require a Google Play Developer account. Before you can create a Google Play Developer account, you must pay a one-time fee, which is currently $25. For more information about the registration fee, then visit Google Play’s Support page.
Preparing your application for publication
Before you publish an application, you should thoroughly test it to ensure it is easy to use, bug-free and does not crash. Ideally, you should test the application on at least one physical device (the more the better); however, as described in a previous tutorial, you can also test your application using Android Studio’s virtual device emulator. The virtual emulator allows you to install your application on various virtual device types and models, including phones, tablets and wearable devices.
Once you have thoroughly tested the app and ensured its features work correctly, there are several other checks you should perform to ensure your project’s code is ready for deployment. First, if you log any messages to the console or Logcat, then you should remove those calls from your code. For example, the following is a Log call that would need to be deleted:
Log.d("debug", "Log this message to the Logcat")Next, open the Module-level build.gradle file (Project > Gradle Scripts) and locate the defaultConfig element. You should find two properties called versionCode and versionName.
android {
   ...

   defaultConfig {
       versionCode 1
       versionName "1.0"

       ...
   }
}
The first time you upload your application to Google, the versionCode value should be 1. For each subsequent application update, you will need to increase the versionCode value incrementally by 1 because Google does not permit two versions of your application to share the same version code. Devices use the versionCode value to protect against downgrades. In case you’re curious, the maximum permissible versionCode value is 2100000000. That’s a lot of updates!
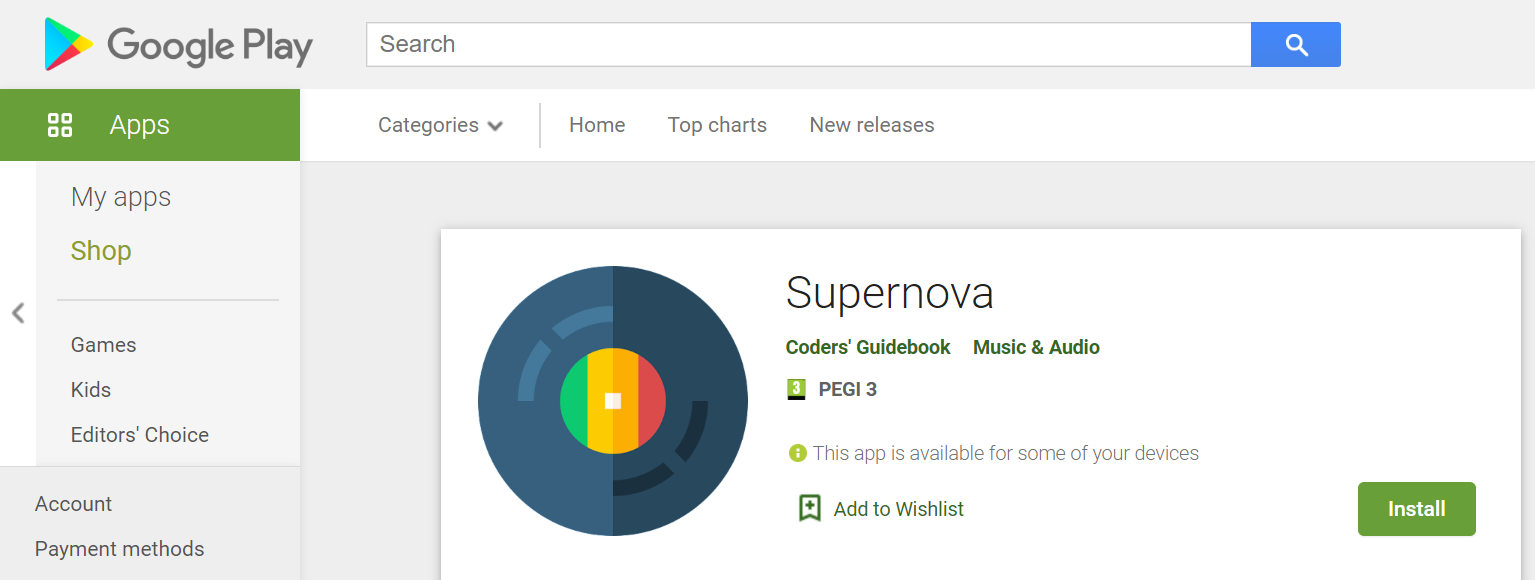
The versionName property is for user and developer reference only. Unlike the versionCode property, the versionName property will be displayed in the Google Play store listing. By convention, the version name is reported in
Creating an Android Application Bundle
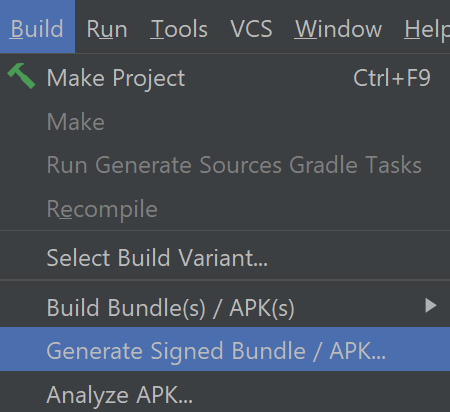
To distribute your application via the Google Play store, you will need to package your application in an Android App Bundle. For Google to accept an Android App Bundle, it must be accompanied by a certificate to prove that the application is authentic. To generate the necessary certificate, you must configure a key store using Android Studio. First, select Build > Generate Signed Bundle / APK…
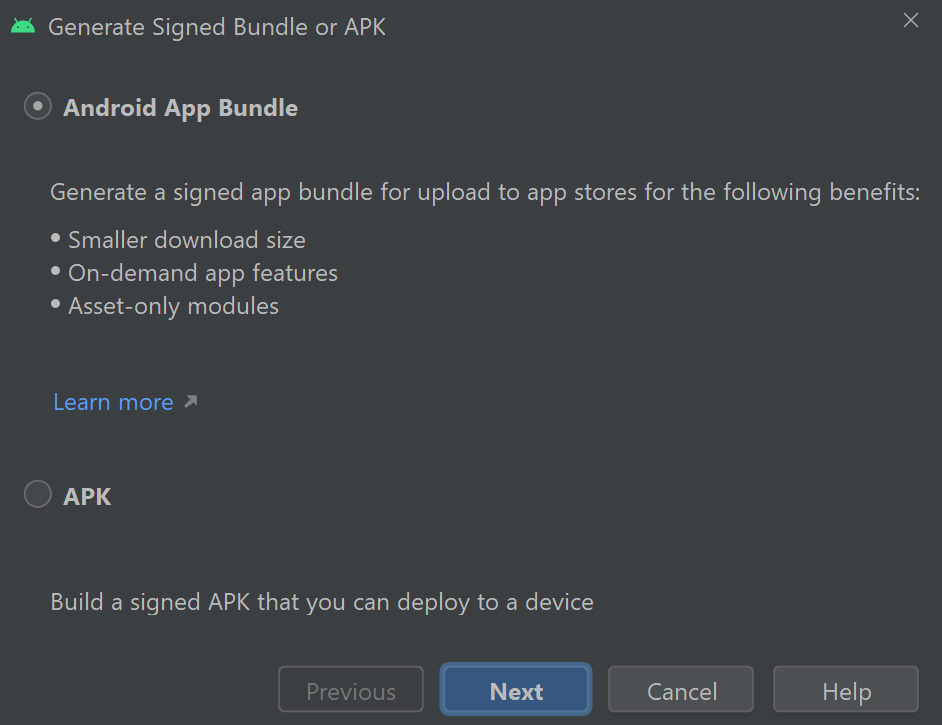
Select Android App Bundle and click Next.
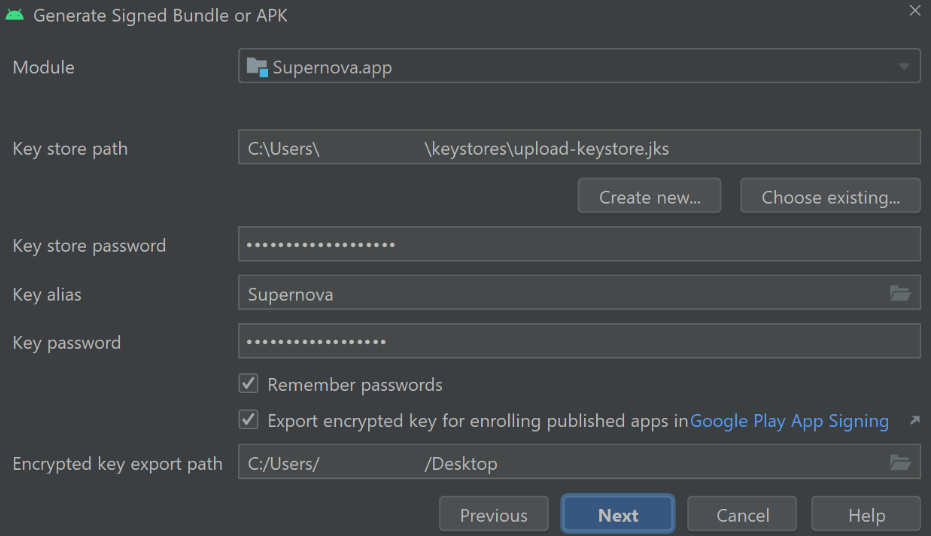
In the Generate Signed Bundle or APK window, click the Create New… button under the Key store path field.
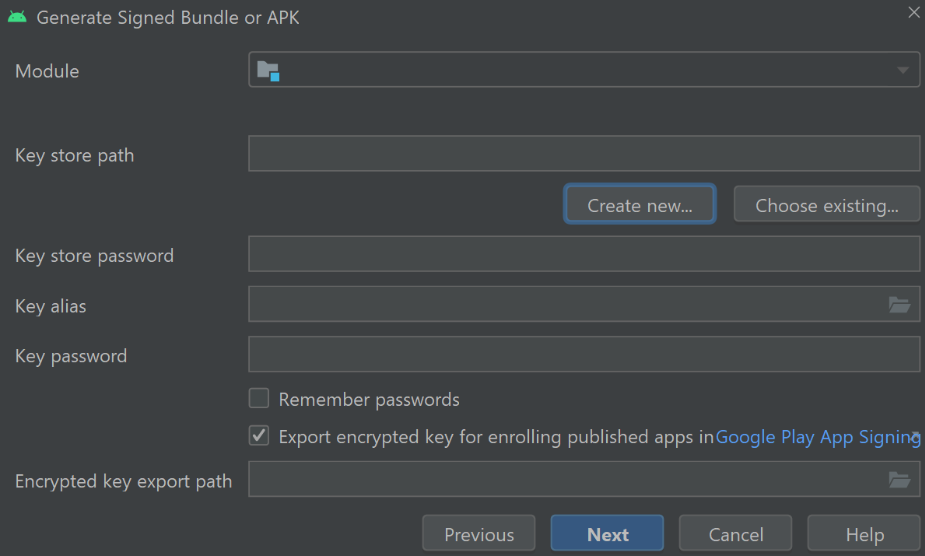
In the New Key Store window, you will be invited to define a name and password for the key store and create a key for your app.
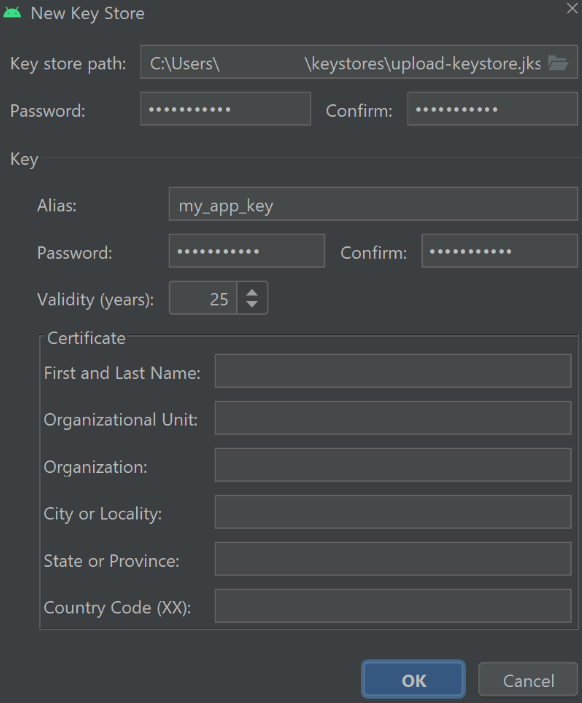
When completing the form in the New Key Store window, you should look to provide the following information:
- Key store path - The location on your computer where the .jks file for your key store will be stored. Typically, the key store file will be saved under the home directory for your user in a folder called key stores. You can use the same key store for multiple apps.
- Key store password - Input a secure password for your key store.
- Key alias - Enter an identifying name for your key. The key alias will be associated with this application only.
- Key password - Enter a password for the key. It is usually fine to enter a unique password; however, if you encounter a ‘Key was created with errors’ error then you will need to use the same password as the key store. This is a known issue that you can read about in the official Android documentation.
- Key validity (years) - Set how many years the key should be valid. Typically, the validity is 25 years because the key should be valid for the lifetime of the application.
- Certificate - Enter the required details about yourself or your organisation. This information will not be displayed in the app but is included in the signing certificate that is packaged with the Android App Bundle.
Once you have provided all the required details, click OK to create the key store file and register a key for your application. When you return to the Generate Signed Bundle or APK window, check that the Key store path, Key store password, Key alias and Key password fields are all correct given the key store and key you just created. If you ever need to create a new key for another app or select an existing key, then press the folder icon in the Key alias field.
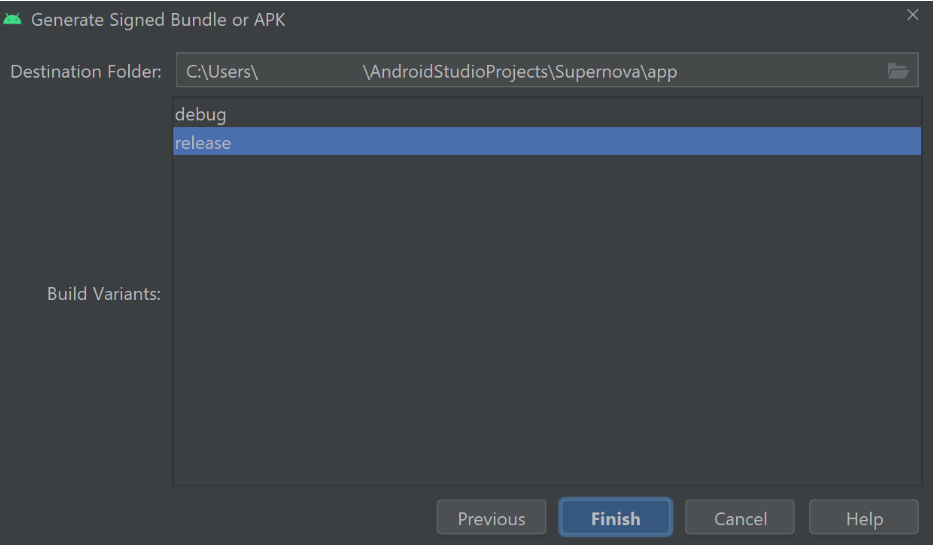
Once you’ve entered all the required details for your key store and application key, click Next. In the Generate Sign Bundle or APK window, select the Build Variant that you would like to create an Android App Bundle for. When you are publishing an application to the Google Play store, you will usually want to select the release build variant. Next, press Finish and Android Studio will compile your project code and create an Android App Bundle file.
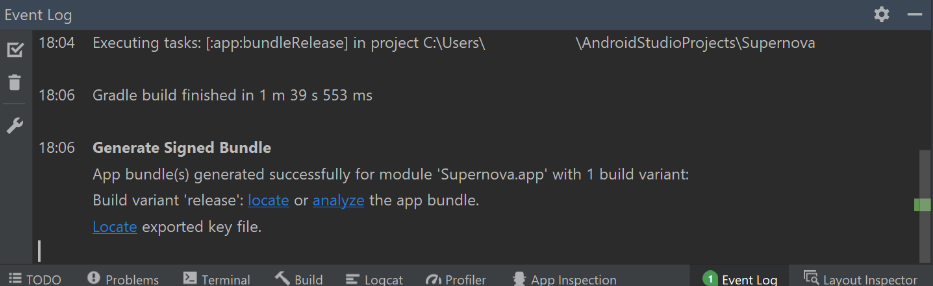
Once the Android App Bundle has been created, a notification should advise where you can locate the bundle on your computer. If you miss the notification, then open the Event Log tab and find the Generate Signed Bundle message.
The Android App Bundle file will contain the .aab extension, as shown below:

Creating a Google Play store listing
To publish an application on the Google Play store, you will require a Google Developer account. Note you may be required to pay a one-time registration fee of $25. Once you have set up your Google Developer account, navigate to the Google Play Console dashboard and click the Create app button.

In the Create App window, complete the App details form and provide the necessary information including the application’s name, default language, app or game status, and free or paid status. Note that a free application cannot be changed to a paid application once published.

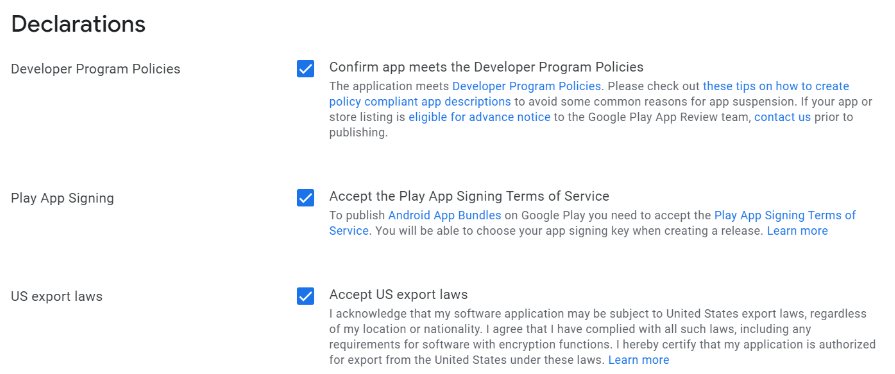
Below the App details form, you will see several declarations that you will need to review before continuing. We are uploading the application in Android App Bundle format, which means the Play App Signing declaration must be checked along with the Developer Program Policies and US export laws declarations to continue. If you review all the declarations and are happy to proceed, then check all the relevant boxes and click the Create app button at the bottom of the window.
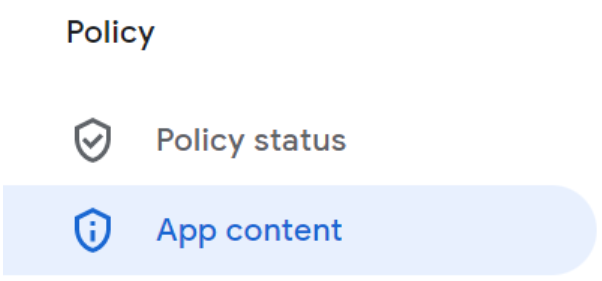
Google should then create a draft listing for your application. On the left-hand side of the console, you will find a menu of sections for customising the listing and publishing your application. We’ll discuss the sections that are required to publish your application. First, locate the App content section in the Policy category.
You should see a list of forms you need to fill in. We will discuss each form one by one. You must fill in each form accurately, so take your time.
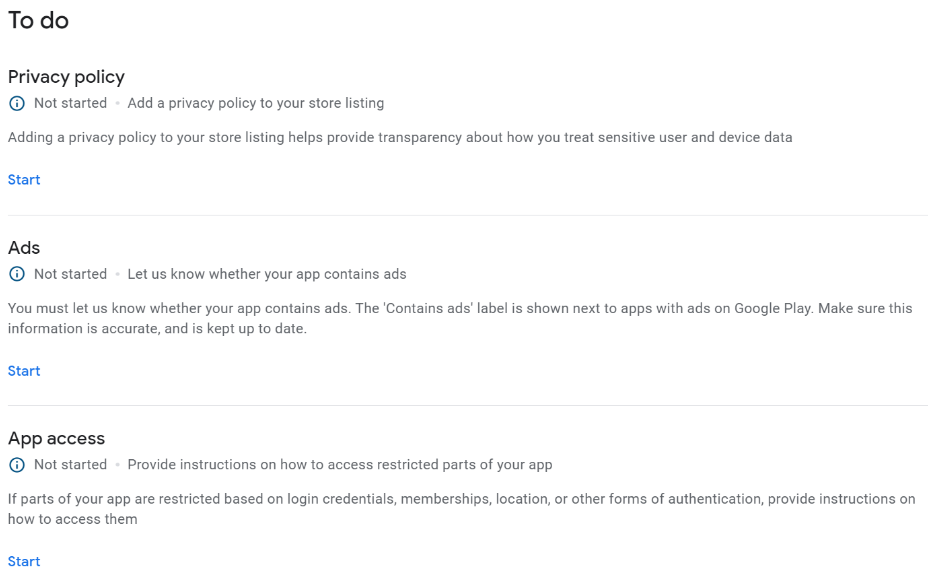
Privacy policy
Enter a web page URL for the privacy policy associated with your application. Your privacy policy should be transparent and describe how your application will handle and store user data. Including a privacy policy is mandatory if your app will be used by persons aged under 13 years old.
Ads
If your application will contain advertisements, then you must specify this because Google will display a “Contains ads” label in your store listing. You can find out more information about whether you need to declare advertisements by reading Google’s Ads policy.
App access
If access to any area of your app is restricted or requires user authentication, then you must provide Google with valid credentials and instructions for accessing the restricted content. For example, if access to your application is based on the user’s membership tier, then you must provide Google with the login credentials for an account that has access to all tiers. Google will not share this information but may use it to review your application and confirm compliance with its policies and terms and conditions.
Content ratings
The store listing for your application will feature an international age rating coalition (IARC) rating to indicate what age group your application is suitable for. To generate a content age rating for your application, click the Start questionnaire button and provide the required details. For example, you may be asked to provide contact details for yourself/your organisation, information about the category and purpose of your application, and details of any explicit or sensitive content.
Target audience and content
Google will ask several questions to determine who the target demographic of your application is. For example, you will be asked to specify what the target age range of your application is. Note you cannot target your application to persons under the age of 13 unless you have received the requisite content rating from the IARC. If your application will be used by children then make sure you read Google’s family policy to ensure your application’s content and advertisements (if applicable) are suitable.
News apps
You must declare whether or not your application will broadcast news or news articles. If your application will display news, then Google may ask for more information regarding how you source and report the news.
COVID-19 contact tracing and status apps
If your application will be used for COVID-19-related purposes such as contact tracing, infection status, or vaccination status, then you must report that here. Often, such applications require endorsement from a government authority or recognised healthcare organisation, so Google may ask for evidence of this if necessary.
Data safety
You must disclose how your application will gather, process and store user data. Google will ask you to complete a questionnaire detailing your approach to data handling and protection. When completing the questionnaire, make sure you read all the accompanying resources provided by Google and provide comprehensive and accurate answers. For example, you will be asked to describe whether your application handles location data, the user’s personal information, financial data and more.
Once you have completed all the forms listed in the App content section, navigate to the Main store listing section under the Store presence category.
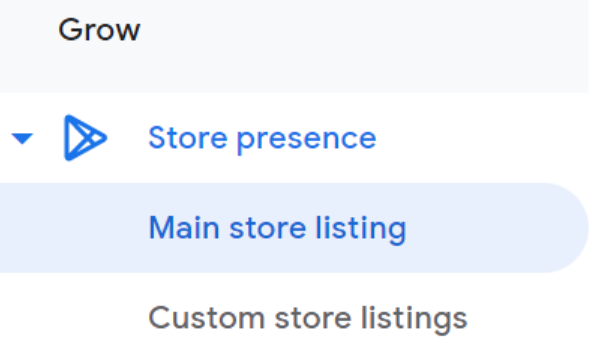
In the Main store listing section, you will get the opportunity to provide information that will be used in the Google Play store listing for your application. This is your chance to describe all the wonderful things about your app and show the user why they should download it. For example, you will be invited to provide a short and full description of the application. The short description will provide a brief overview of the application, which the user can expand to reveal the full description if they wish to learn more. You will also get the opportunity to upload the app icon, a feature graphic that will be displayed at the top of the listing, and a link to a YouTube video promoting your app that will be embedded in the listing.
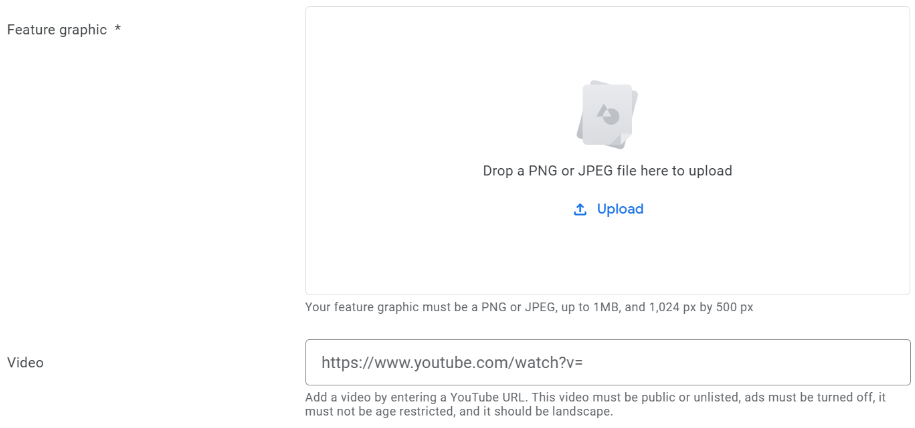
At the bottom of the page, you will also get the opportunity to upload multiple images of your application being used on mobile devices and tablets. You can use images captured on real devices or Android Studio’s virtual emulator. If you are using the virtual emulator, then you can capture screenshots using the camera icon in the action bar.

You can view and change the location where screenshots are saved by clicking the three dots at the bottom of the action bar and opening the virtual emulator’s settings.

Once you have customised the listing page, there is one more mandatory form you need to complete before you can publish your app. Navigate to the Store settings section, which can be found under the Store presence category.
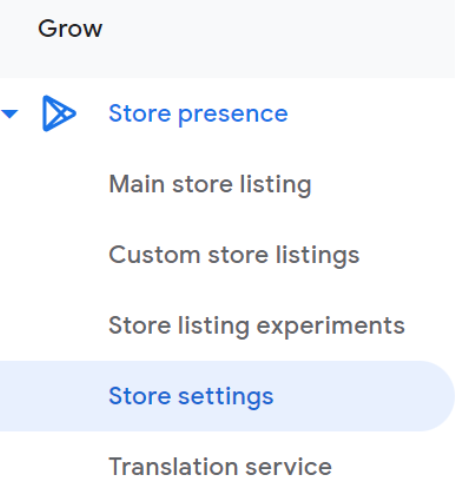
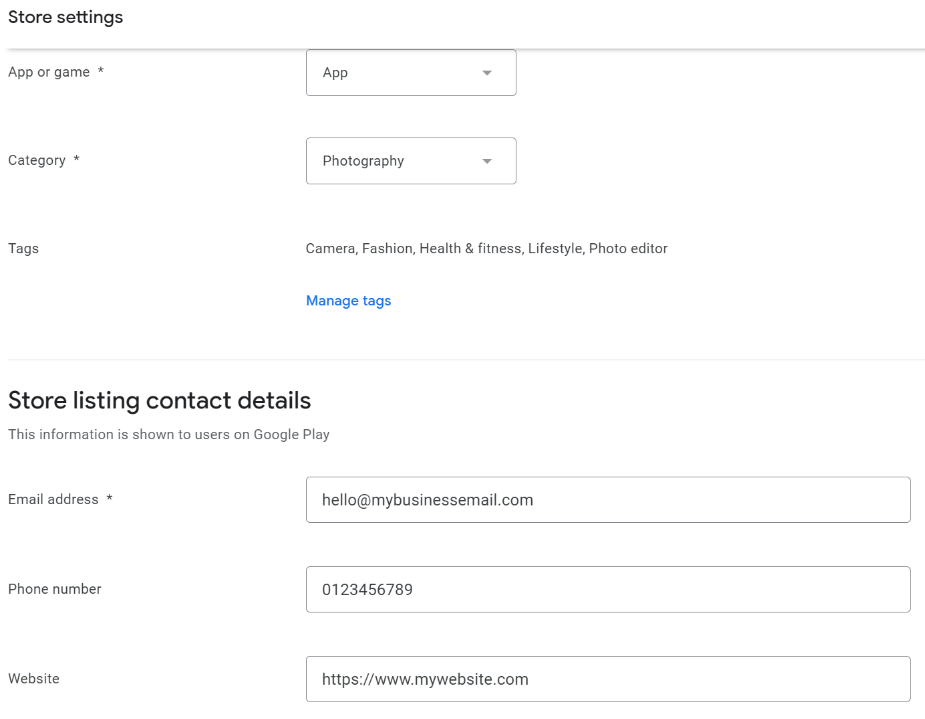
In the Store settings window, you will be invited to define a few details to help drive traffic to your application. First, in the App category subsection, specify whether your application is an app or game, select the most appropriate category, and choose up to five tags. These details will help your application appear in Play Store search results. Next, in the Store listing contact details subsection, you can provide contact details such as your organisation’s email address and website. These details will be displayed in the Play store listing, so bear in mind that you might receive spam from businesses that discover your listing (I’m speaking from experience!). Finally, at the bottom of the window, you should see a checkbox that allows you to opt-in to external marketing. If you check this option, then Google may advertise your app outside of the Play store.
Congratulations, you have now provided all the mandatory information required to list your application in the Play store. The Google Play console provides various other tools for customising your store listing and promoting and monetizing your app. Feel free to explore the Google Play console further and see whether any of the additional tools apply to your listing. Once you are ready to publish your application and upload your project code, proceed to the next section.
Publish your Android App Bundle
Once you have completed all the tasks in the previous section and configured the Play Store listing for your application, you can upload your Android App Bundle and publish your application. While it can be tempting to release your application to the public right away, it is often beneficial to stagger the release and allow time for testers to try your app and provide feedback. In this way, when you do eventually release your app fully, you can be confident that it is as error-free and robust as possible.
In the Release category of the Google Play console, you should see a production channel and several testing channels.
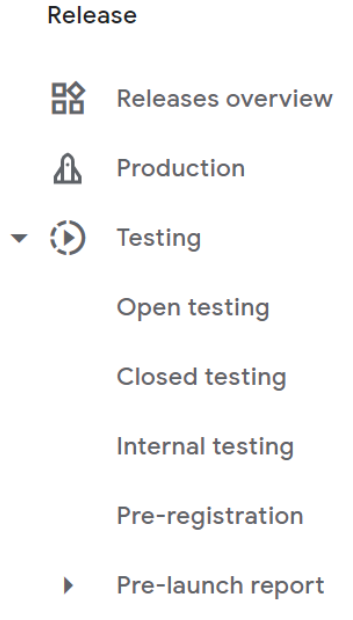
The purpose of each channel is summarised below:
- Internal testing - Internal testing is often the first level of testing and typically you would invite persons within your organisation or friends and family to test your application at this stage. You can specify up to 100 testers by email who will receive invitations to install your app. If you are releasing a paid app, then users who are invited to install the app during the internal testing stage can do so for free. This is not true for the closed and open testing stages.
- Closed testing - Similar to the internal testing stage, you must invite users to test your app in the closed testing stage; however, your selection criteria can be broader. For example, you can invite pre-registered users and Google Groups to test your app. The closed testing channel also provides a dedicated channel for testers to provide feedback and other analytics such as a pre-launch report to monitor issues. You can also communicate with testers privately through the Google Play console to gather feedback.
- Open testing - Your app will be available on the Google Play store but users will be aware that it is still in the testing stage. You can monitor usage analytics and identify issues via the pre-launch report. User feedback will not impact your Play store rating because the application is still in the testing phase. Also, you can restrict the availability of your application to certain countries.
- Production - Your app will be live on the Google Play store for the general public to install. You can restrict your application to certain countries and regions. User reviews will impact your Play Store rating.
To create a testing or production track, navigate to the relevant section and press Create track. Alternatively, you can select an existing track and use that instead.

Depending on your chosen track, you may need to complete additional configuration steps. First, for the internal testing tracks, you will see a Testers tab as shown below:
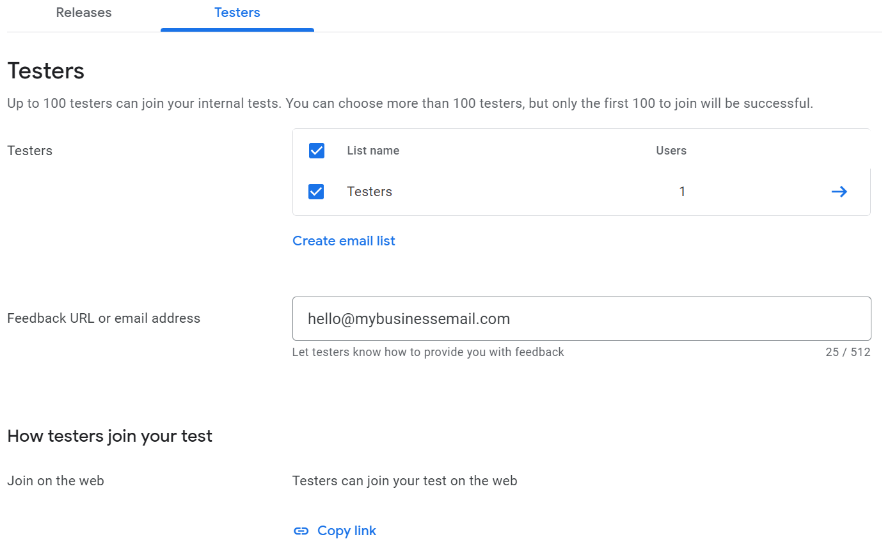
In the Testers subsection, you can create lists containing the email addresses of people you would like to invite to test your application. You can enter each tester’s email address manually or upload a comma-separated CSV file containing the email addresses. If you need to add or remove an email address from a list, then click the blue arrow next to the list. Below the list of testers, you will see a field where you can provide a URL or email address for testers to send feedback. Finally, at the bottom of the window, you will see a button to generate a link that you can send to invited testers so they can download your application.
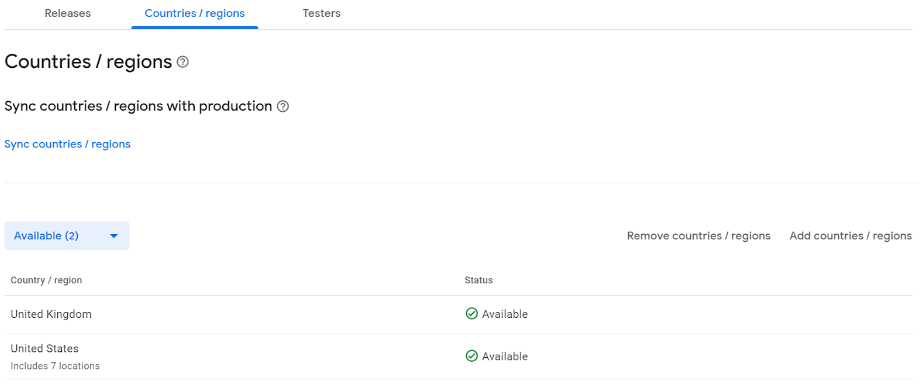
For closed and open testing tracks, in addition to inviting and managing tester cohorts via the Testing tab, you will also see a Countries/regions tab. In the Countries/regions tab, you can specify the locations that you would like your application to be available in. These location specifications are based on the country that the user’s Google account is registered in, not the user’s current location. You must specify at least one location to release your application on the closed and open testing tracks.
To release your application to a testing or production track, navigate to the relevant section and click the Create new release button.

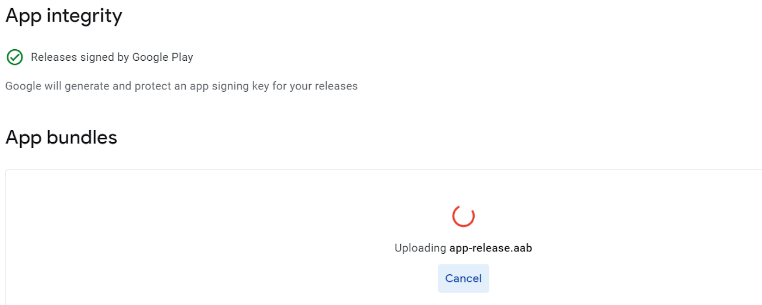
First, in the App bundles section, upload the Android App Bundle that you generated in the Creating an Android Application Bundle section. This file is likely called app-release.aab.
Note if you are attempting to release an updated version of your application and forget to increase the versionCode value in build.gradle file, then the Google Play console will reject the bundle. Remember that each new Android App Bundle you upload must have a higher versionCode value than its predecessor. If the bundle is accepted, then its details will be displayed as shown below.

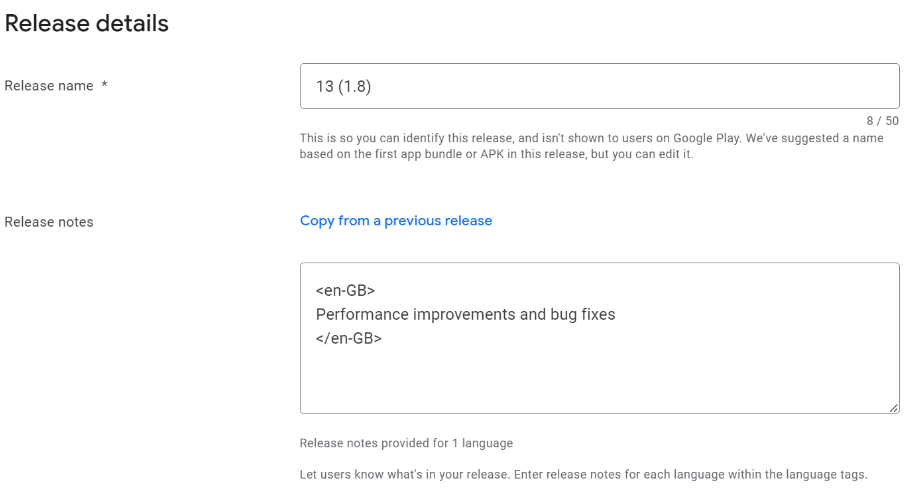
Next, scroll to the bottom of the window. In the Release details section, you will be able to specify a release name and release notes. The Google Play console will likely auto-populate the release name based on the releaseCode and releaseName value from the application’s build.gradle file. For the release notes, you should describe the new features and improvements that you have implemented since the last release. Of course, a brief list of updates will be fine; however, feel free to get creative! If you need inspiration then you might like to check out this Medium article where Freddie Harrison discusses the benefits of writing engaging release notes.
Android will then review your release, which typically takes less than an hour but could be longer if someone needs to manually review your application. Once the review is complete, the Google Play console should show that the release is live.
The Google Play console allows you to promote and demote releases between testing tracks and production. For example, if you are satisfied that the application has passed all the internal testing checks, then you can promote the release to a closed testing track. To do this, locate the release, click Promote release and select the testing track (or production track) that you would like the release to move to. The release will then be available to the regions and testers specified in that test track, or the general public in the case of the production track.

And that’s it! Simply progress through the testing tracks and gather as much tester feedback as possible. Once you’re confident that your app is in top condition, then release it to a production track. If you ever need to update a release, then increase the versionCode and versionName values in the app’s build.gradle file, create a new Android App Bundle and upload it as a new release to the relevant testing or production track.