How to create a Notes application using Kotlin
For this project, we will create a Notes app that will allow the user to record their thoughts and ideas. The user will be able to save and delete notes and personalise the app by switching between light and dark colour themes and adding dividing lines between the note previews on the home screen. In creating this app, you will learn many of the fundamentals of Android programming using Kotlin and XML. These fundamentals will help prepare you for more challenging projects.
The example code for the Notes application can be found here. The project was built using Android Studio Giraffe and targets Android 13 (API 33/SDK 33).
Getting started
To develop a new Android app, open Android Studio and click the New Project button. Android Studio will automatically save your project as you work so you never need to worry about losing your progress. Also, in future, each time you open Android Studio it will automatically load the last project(s) you were working on so you can pick up right where you left off.

Android Studio offers several ready-made project templates to help get you started. For the Notes app, select the Basic Views Activity template. The Basic Views Activity template provides your app with an action bar and a floating action button. In this app, the action bar will allow the user to navigate to the settings page and the floating action button will enable the user to create a new note.
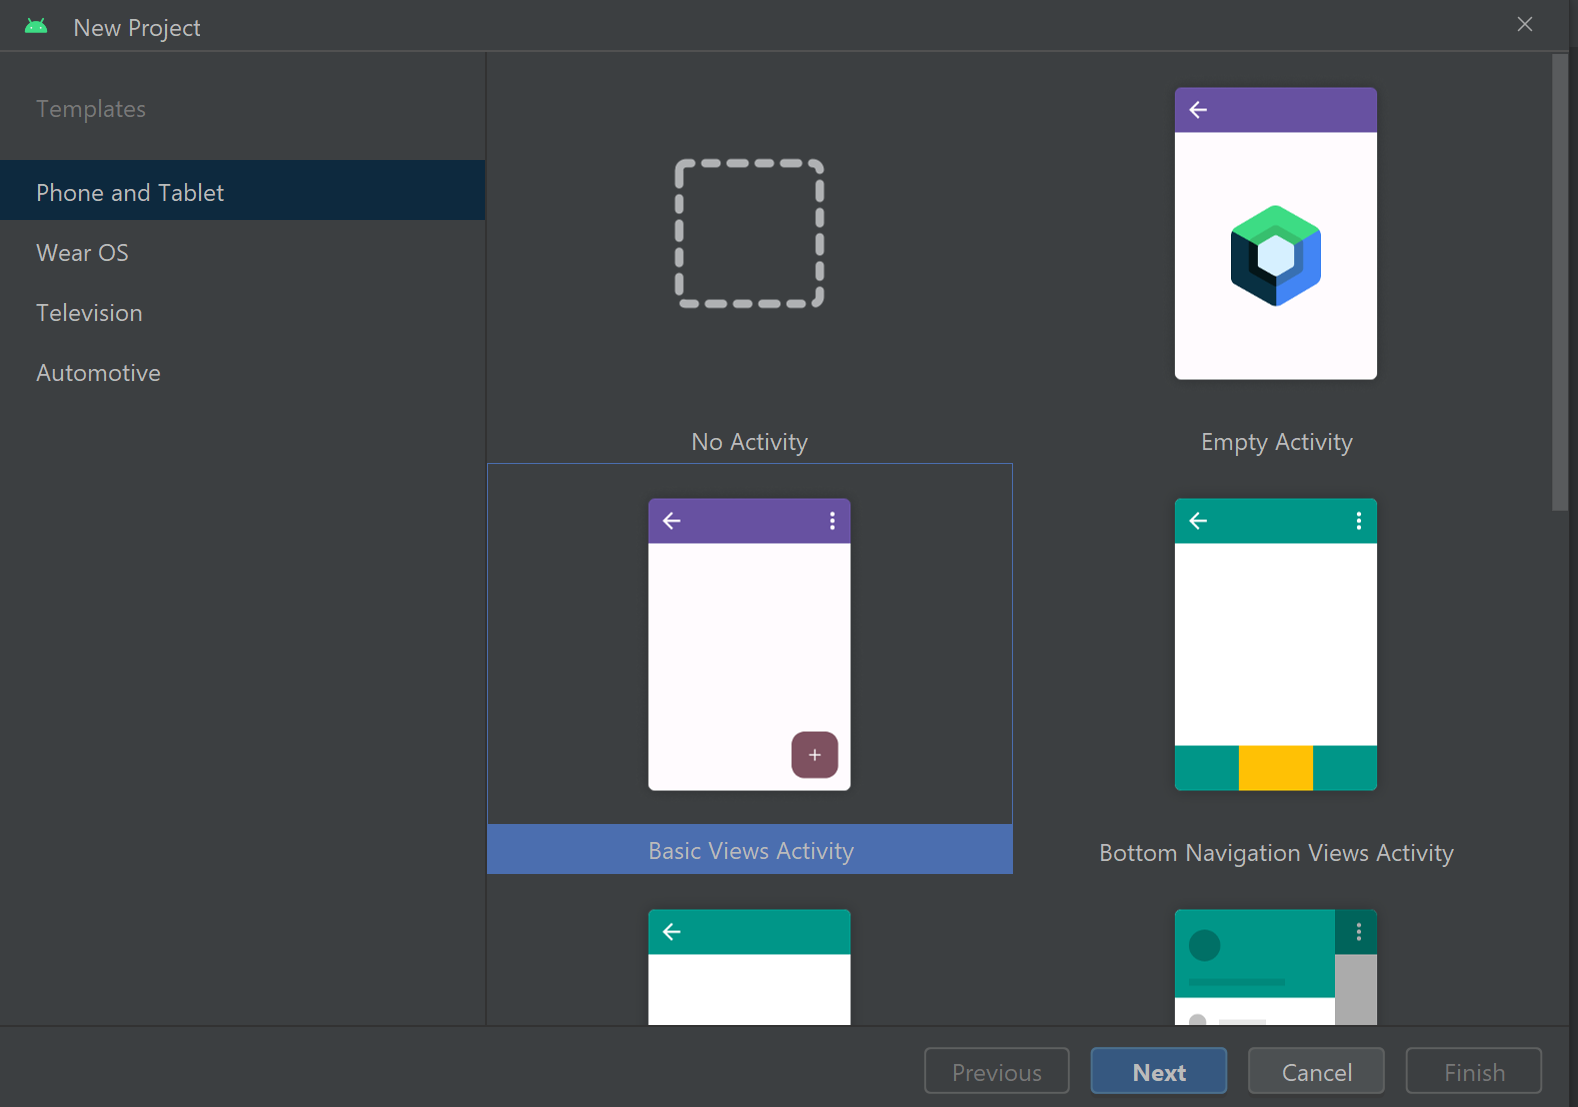
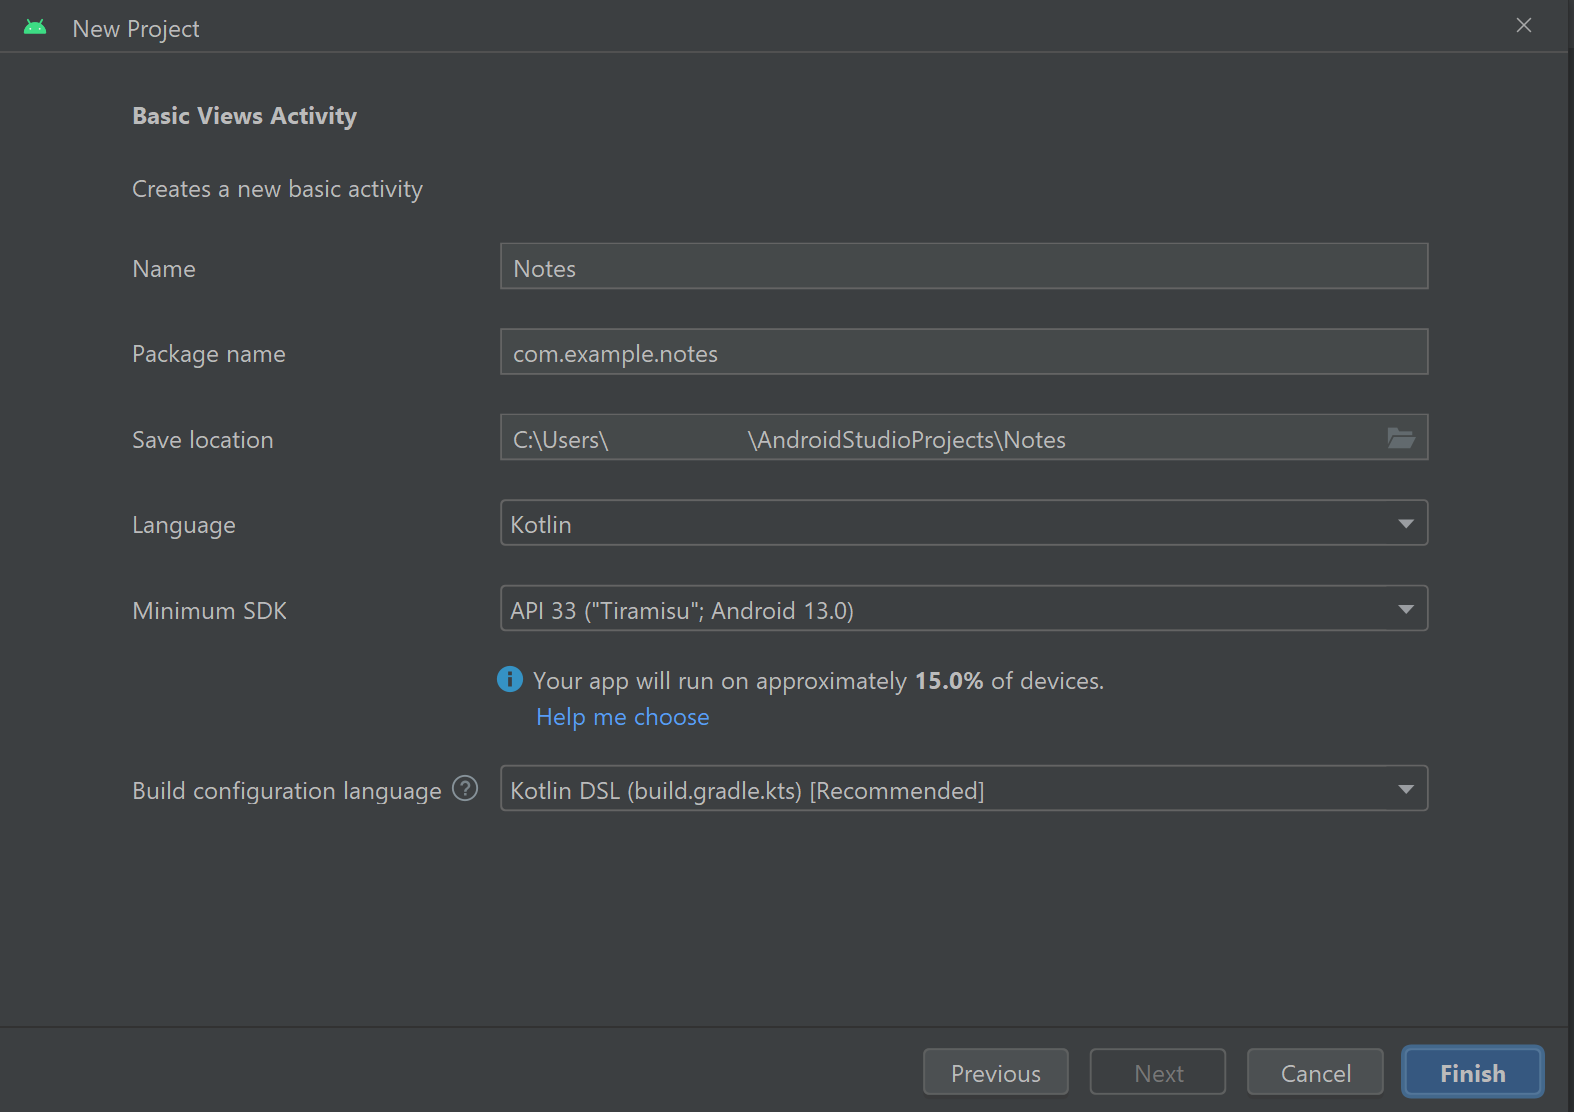
Select the Basic Views Activity template and press Next. You will be taken to a New Project window, which invites you to define a few details about the project. First, add a name for the project (e.g. Notes). Next, ensure the language is set to Kotlin and the API level is set to 33. Currently, all Android apps must target at least API 33 to be published in the Google Play store. You can find the latest API requirements by referring to the official Android documentation. Once all the above information has been entered, press Finish. Android Studio will then create a project based on the selected template.
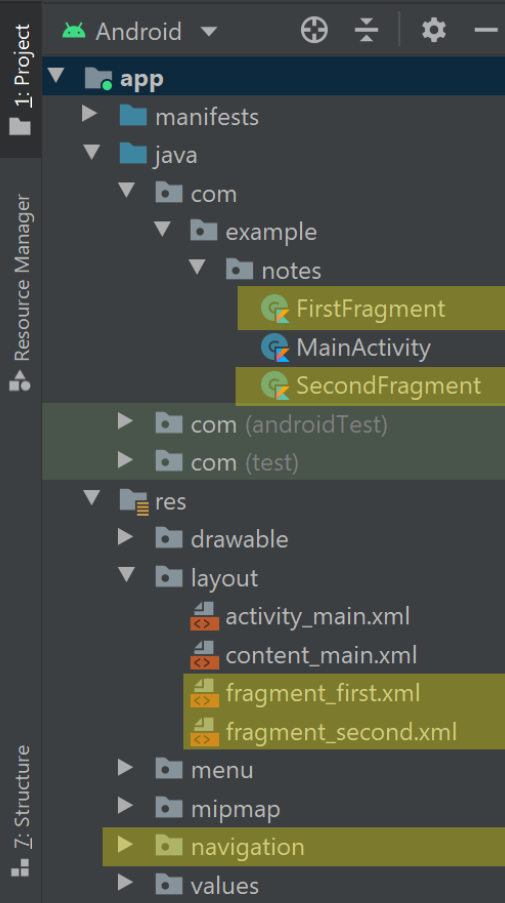
Projects created using the Basic Views Activity template will automatically contain two fragments and a navigation graph. We will not use fragments or navigation graphs in the Notes app so you can delete the following files and folders if you wish:
- FirstFragment.kt (Project > app > java > folder with the name of the project)
- SecondFragment.kt (Project > app > java > folder with the name of the project)
- fragment_first.xml (Project > app > res > layout)
- fragment_second.xml (Project > app > res > layout)
- navigation directory (Project > app > res)
The Kotlin code files that power the Notes app will often require external resources. Typically, external resources are integrated manually by adding ‘import …’ statements to the top of the Kotlin file; however, Android Studio offers a handy alternative called Auto Import, which will attempt to generate the requisite import statements automatically while you code. To enable the Auto Import feature, navigate through File > Settings. In the Settings window, navigate through Editor > General > Auto Import then select ‘Add unambiguous imports on the fly’ and ‘Optimise imports on the fly’ for both Java and Kotlin then press Apply and OK.

Android Studio should now add most of the necessary import statements automatically. Sometimes there are multiple potential import statements to choose from and the Auto Import feature may not work. In these instances, the requisite import statement(s) will be specified explicitly. You can also refer to the example code to find the finished files including all import statements.
Defining the String resources used in the app
Each item of text that the app will display should be stored as a string resource. A single string resource can be used across multiple locations in the app. String resources make it easier to update text because you only need to edit one resource and all areas that use the text will automatically reflect the change. Also, string resources help the app support multiple languages because you can define translations for each string.
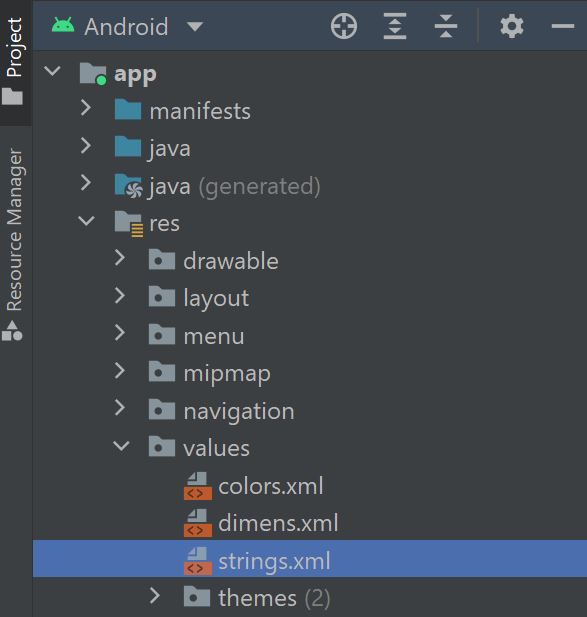
When you create a new project, Android Studio will automatically generate a strings.xml resource file to store your strings. To locate the strings.xml file, navigate through Project > app > res > values.
To define all the necessary strings for the Notes app, edit the strings.xml file so it reads as follows:
<resources>
   <string name="app_name">Notes</string>
   <string name="action_settings">Settings</string>

   <string name="title">Title</string>
   <string name="contents">Contents</string>
   <string name="cancel">Cancel</string>
   <string name="ok">OK</string>
   <string name="delete">Delete</string>

   <string name="select_theme">Switch to night theme?</string>
   <string name="add_dividers">Add dividing lines between notes?</string>

   <string name="add_new_note">Add a new note…</string>
   <string name="note_empty">Check the title and contents fields are not empty.</string>
   <string name="note_saved">Note saved!</string>
   <string name="note_deleted">Note deleted!</string>
</resources>
Each string resource contains a name attribute. The name attribute is what you will use to reference the string elsewhere in the app. The text that will be displayed to the user is input between the opening <string name=””> and closing </string> tags.
Creating the Note data class
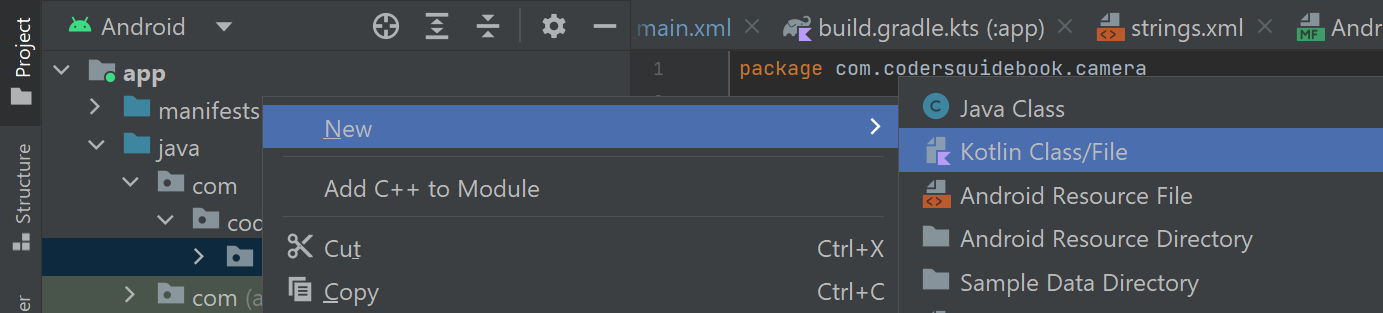
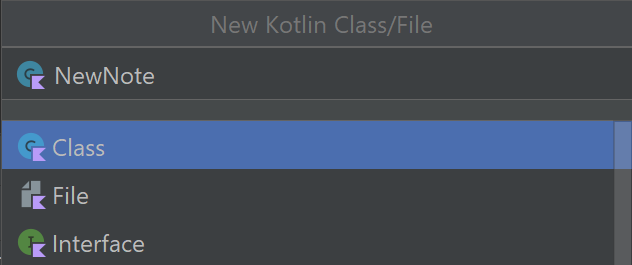
The details of each note the user writes will be packaged in a Kotlin class. The class will act as a template and contain fields for the different bits of information such as the note’s title and contents. An instance of a class is called an object, and a new object will be created for each note the user saves. To create a new Kotlin class, navigate through Project > app > java then right-click the folder with the name of the project. Next, select New > Kotlin Class/File.
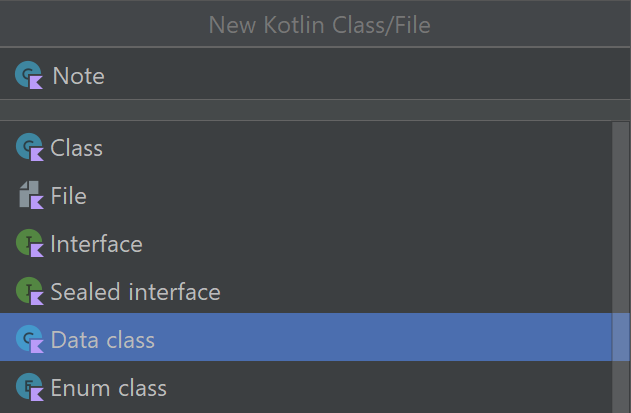
Name the file Note and select Data Class from the list of options.
A file called Note.kt should then open in the editor. To define the Note data class, modify the file’s code so it reads as follows:
data class Note(
   val title: String,
   val contents: String)
There are a couple of things to note about the above code. First, we label the class as a data class. Data classes are designed to store information and feature in-built functions to help manage data (see our dictionary entry for data classes for more details). The primary constructor of the data class must contain at least one variable. Each variable stores a piece of information. In this case, the title variable will store the name of the note and the contents variable will store the body of the note. Both variables will store data in String format. If the data type declaration has a question mark at the end (e.g. String?) then this means the value of the variable can be null. A variable with a null value is empty or valueless; however, the variable can be assigned a value later if it is initialised using the var keyword. The var keyword means the value of a variable can be changed, while the val keyword means the value of a variable is fixed and can only be set once.
The variables in the Note data class are initialised using the val keyword and the String data type declaration does not feature a question mark. This means the values of each variable may only be set once and cannot be null.
The layout for writing new notes
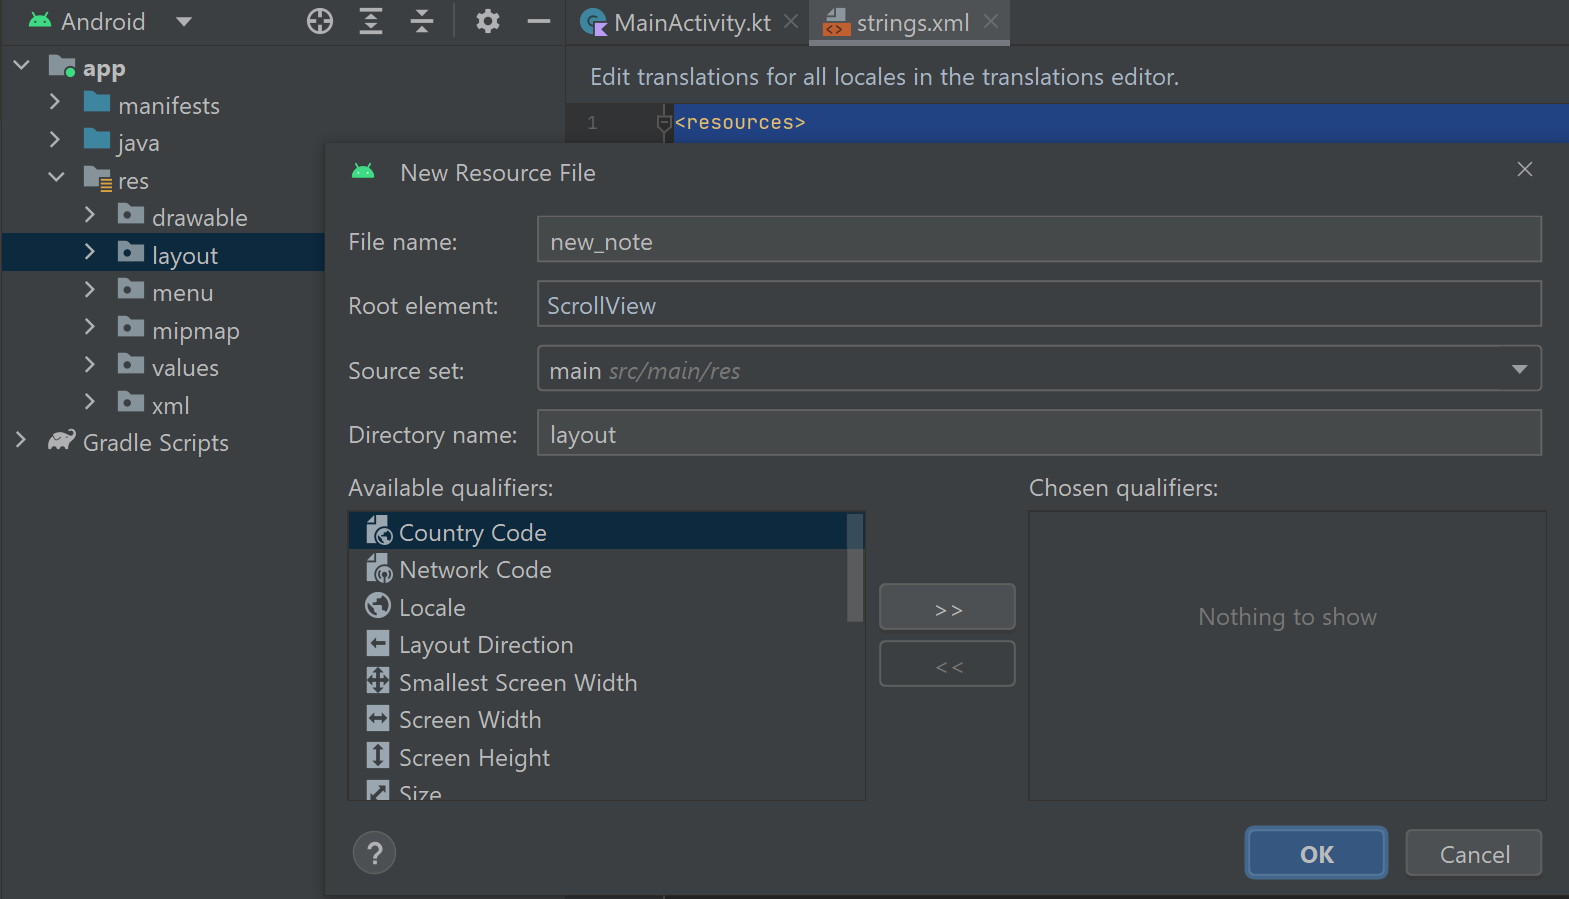
The app’s user-facing interfaces are defined in layout resource files. Layout resource files coordinate the widgets that display content and handle interactions. For the Notes app, the first layout we create will allow the user to write new notes. To create a layout file, locate and right-click the layout directory by navigating through Project > app > res. Next, select New > Layout Resource File. Name the file new_note and set the root element to ScrollView. ScrollView-based layouts allow the user to scroll if the layout’s content is too large to fit on the screen. The scroll feature may come in handy if the user writes an especially long note.
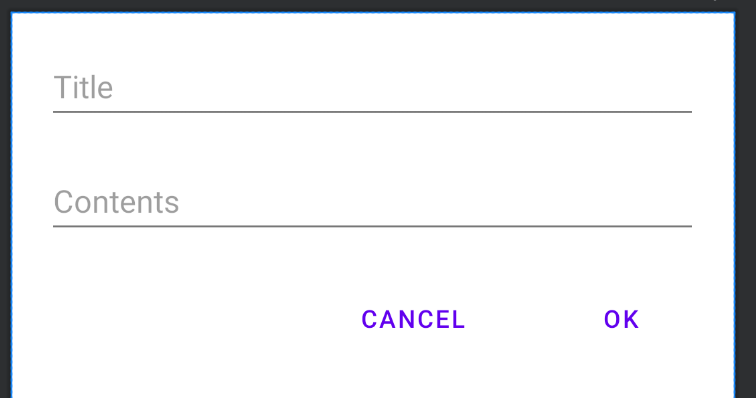
A file called new_note.xml should then open in the editor. The first elements we will add to the layout are two EditText widgets. EditText widgets allow the user to input text. In this case, the widgets will store the title of the note and its contents, respectively. At the bottom of the layout, we will add two button widgets: one to save the note and the other to dismiss the window without saving the note.
It is possible to add widgets to a layout by dragging and dropping them from the Palette; however, it is often quicker to input the XML code for the widgets into the layout directly. To view and edit the code of the new_note.xml layout file, click the Code view button as shown below.
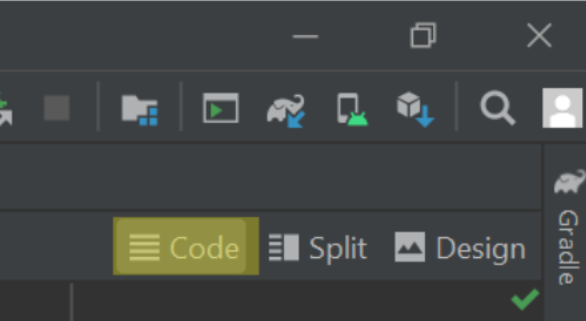
Alternative layout views include Design view, which shows how the layout will appear to the user, and Split view, which integrates both Code view and Design view simultaneously. Split view is handy for seeing how code changes affect the layout in real time.
To configure the new_note.xml layout file, open the layout in Code View and add the following code between the opening and closing ScrollView tags:
<LinearLayout
   android:layout_width="match_parent"
   android:layout_height="wrap_content"
   android:layout_margin="20dp"
   android:orientation="vertical">

   <EditText
       android:id="@+id/editTitle"
       android:layout_width="match_parent"
       android:layout_height="wrap_content"
       android:inputType="textPersonName"
       android:hint="@string/title"
       android:importantForAutofill="no" />

   <EditText
       android:id="@+id/editContents"
       android:layout_width="match_parent"
       android:layout_height="wrap_content"
       android:layout_marginVertical="20dp"
       android:hint="@string/contents"
       android:inputType="text"
       android:importantForAutofill="no" />

   <TableRow
       android:layout_width="match_parent"
       android:layout_height="wrap_content"
       android:gravity="end" >

       <Button
           android:id="@+id/btnCancel"
           android:layout_width="wrap_content"
           android:layout_height="wrap_content"
           android:text="@string/cancel"
           style="?android:attr/buttonBarButtonStyle" />

       <Button
           android:id="@+id/btnOK"
           android:layout_width="wrap_content"
           android:layout_height="wrap_content"
           android:layout_marginStart="30dp"
           android:text="@string/ok"
           style="?android:attr/buttonBarButtonStyle" />
   </TableRow>
</LinearLayout>
In the above code, we use a LinearLayout widget to align the EditText and Button widgets vertically. The first EditText widget will allow the user to enter the title of the note. The inputType attribute for the widget is set to "textPersonName", which restricts the input text to a single line. Meanwhile, the second EditText widget will allow the user to enter the contents of the note. The inputType attribute for the second EditText widget is set to text, which unlike the textPersonName type has no restrictions on the length of the contents. Both EditText widgets feature a hint attribute. The hint attribute defines a placeholder message that will be visible until the user begins typing. The hint attribute indicates what kind of information the user should enter. In this case, the hints are “Title” and “Contents”, respectively. The text for the hints is sourced from the string resources we defined earlier in the strings.xml file.
At the end of the layout, there are two button widgets: a cancel button that will close the layout and discard the note, and an OK button that will save the note. The code which enables this functionality will be defined later. Both buttons feature a style attribute set to ‘?android:attr/buttonBarButtonStyle’, which refers to a ready-made button style provided by Android. The button style will help the buttons look and behave in a way that is consistent with other apps you may have used. For example, the buttons will have a transparent background and display a ripple effect when pressed. Both buttons are enclosed within a TableRow widget to ensure they appear side-by-side in the layout.
The layout for displaying notes
The app will allow the user to read their saved notes. To view a note, the user simply needs to click a note preview on the app homepage and a dialog window will display the full note. The dialog window will require a new layout resource file. Locate and right-click the layout folder (found by navigating through Project > app > res) then select New > Layout Resource File. Name the file show_note and set the root element to ScrollView. The layout will contain two TextView widgets for displaying the title and contents of the note, respectively. It will also feature two buttons that allow the user to delete or close the note. To create the widgets, open the show_note.xml file in Code View and add the following code between the opening and closing ScrollView tags:
<LinearLayout
   android:layout_width="match_parent"
   android:layout_height="wrap_content"
   android:layout_margin="20dp"
   android:orientation="vertical">

   <TextView
       android:id="@+id/txtTitle"
       android:layout_width="wrap_content"
       android:layout_height="wrap_content"
       android:textSize="26sp" />

   <TextView
       android:id="@+id/txtContents"
       android:layout_width="wrap_content"
       android:layout_height="wrap_content"
       android:layout_marginVertical="20dp"
       android:textSize="22sp" />

   <TableRow
       android:layout_width="match_parent"
       android:layout_height="match_parent"
       android:gravity="end" >

       <Button
           android:id="@+id/btnDelete"
           android:layout_width="wrap_content"
           android:layout_height="wrap_content"
           android:text="@string/delete"
           style="?android:attr/buttonBarButtonStyle" />

       <Button
           android:id="@+id/btnOK"
           android:layout_width="wrap_content"
           android:layout_height="wrap_content"
           android:layout_marginStart="30dp"
           android:text="@string/ok"
           style="?android:attr/buttonBarButtonStyle" />
   </TableRow>
</LinearLayout>
The above code is similar to the code we added to the new_note.xml layout but with a few small differences. First, the above layout uses TextView widgets to display the title and contents of the note rather than EditText widgets. Unlike EditText widgets, TextView widgets are read-only and their contents cannot be modified by the user. Text will be programmatically loaded into the TextView widgets based on the opened note. At the bottom of the layout, there is a Delete button that will delete the note and an OK button that will dismiss the dialog window. Like before, the buttons are contained within a TableRow so they appear side-by-side.
We have now created the layouts which allow the user to create and view notes; however, the layouts are not yet operational. To make the layouts functional we need to create two Kotlin class files. The classes will handle user interactions and respond to requests to save and view notes.
The NewNote dialog window
To make the new_note.xml layout operational, we must create a Kotlin class that saves the user’s input as a note. To create a new Kotlin class, navigate through Project > app > java then right-click the folder with your project name. Select New > Kotlin File/Class, name the file NewNote and select Class from the list of options.
Once the NewNote.kt file opens in the editor, modify its code so it reads as follows:
import androidx.appcompat.app.AlertDialog
import androidx.fragment.app.DialogFragment

class NewNote : DialogFragment() {

   private var _binding: NewNoteBinding? = null
   private val binding get() = _binding!!

   override fun onCreateDialog(savedInstanceState: Bundle?): Dialog {
       val mainActivity = activity as MainActivity
       val inflater = mainActivity.layoutInflater
       _binding = NewNoteBinding.inflate(inflater)

       val builder = AlertDialog.Builder(mainActivity)
               .setView(binding.root)
               .setMessage(resources.getString(R.string.add_new_note))

       // TODO: Configure the buttons here

       return builder.create()
   }

   override fun onDestroyView() {
       super.onDestroyView()
       _binding = null
   }
}
In the above code, the NewNote class extends the DialogFragment class. When one class extends another, it imports all the data from that class. Importing the data from another class is a principle of object-oriented programming called inheritance, and a feature of programming languages like Kotlin. In this instance, we use inheritance to grant the NewNote class access to the variables and methods from the DialogFragment class. The NewNote class will use the inherited data to float on top of the rest of the app as a pop-up window.
You may notice the above code includes a TODO comment. In your code files, you can introduce comments to prevent lines of code from being executed. For example, you might like to prevent a problematic block of code from being run or leave a message for other developers who read your code. Some people also use comments to explain what a method or a block of code does.
In Kotlin, you can comment out a single line by preceding the line of code with two forward slashes //, or comment out multiple lines by enclosing the lines in /* and */.
// A single-line comment in Kotlin

/* A multiple line
   comment in Kotlin.
   fun commentedOutFunction(): String {
       return "I'm commented out"
   }
*/
In XML (the language we use to write our resource files), you can comment out a single line or multiple lines by enclosing the line(s) in <!-- and -->
<!-- I'm a comment in an XML file -->During the development process, you can also use comments to remind yourself to complete a task or fix an issue. For example, you can begin the comment message with the phrase TODO, if the comment refers to a task that you will complete later, or FIXME, if the comment refers to an issue that you need to fix. As you progress through the projects on this website, you will often see TODO comments in the code excerpts as we build the projects in stages.
// TODO: Sort the list alphabetically

// FIXME: The method cannot handle null values
At any point during the development process, you can view all the TODO and FIXME comments throughout your project by opening the TODO tab at the bottom of the Android Studio window.
The contents of the pop-up window will be sourced from the new_note.xml layout via the layout’s binding class. To access the binding class for a given layout, type each word from the layout name without spaces and punctuation then add Binding to the end. For example, in the above code, the binding class for the new_note.xml layout is called NewNoteBinding. The binding class is accessed via two binding variables: _binding, which will initialise the binding class, and binding, which will provide access to the layout’s contents. Two variables are used to avoid having to implement null checks when interacting with the binding class. For example, the _binding variable could be null and unusable, while the binding variable is explicitly declared as non-null. As long as you only refer to the binding variable once the _binding variable has been initialised, then you can be confident that the layout is accessible.
To generate the dialog window, the root element of the new_note.xml layout (the ScrollView widget) is loaded into an instance of the AlertDialog class, which is a native Android class. When building the AlertDialog instance, we also add the message “Add a new note…”, which will appear as a title above the rest of the content in the dialog window. The dialog window will feature a Cancel button and an OK button, as specified in the new_note layout. To make the buttons operational, replace the TODO comment in the onCreateDialog method with the following code:
binding.btnCancel.setOnClickListener {
   dismiss()
}

binding.btnOK.setOnClickListener {
   val title = binding.editTitle.text.toString()
   val contents = binding.editContents.text.toString()

   if (title.isNotEmpty() && contents.isNotEmpty()) {
       val note = Note(title, contents)
       mainActivity.createNewNote(note)

       Toast.makeText(mainActivity, resources.getString(R.string.note_saved), Toast.LENGTH_SHORT).show()

       dismiss()
   } else Toast.makeText(mainActivity, resources.getString(R.string.note_empty), Toast.LENGTH_LONG).show()
}
The above code accesses the buttons via the new_note layout’s binding class. To respond to clicks by the user, we must assign each button an onClick listener. For the Cancel button, we simply instruct its onClick listener to dismiss the dialog window without saving any of the text input by the user. Meanwhile, the OK button will save the note before dismissing the dialog window. To save the note, the onClick listener retrieves the text that the user input into the editTitle and editContents EditText widgets, packages the text in a Note object and stores the object in a variable called newNote. The newNote variable is sent to a method named createNewNote, which will be located in a Kotlin file called MainActivity.kt. The createNewNote method does not yet exist so it will be highlighted in red. Once defined, however, the createNewNote method will save the Note object inside the app.
In the Kotlin code throughout the projects on this website, you may notice ‘if’ expressions such as the following:
if (title.isNotEmpty() && contents.isNotEmpty()) {The if expression runs a block of code if the equation written inside the brackets is true. For example, in the above code, the if block will run if the values of the title and contents variables are not empty. Furthermore, you can also add an else block, which will run if the equation written inside the brackets is false.
if (title.isNotEmpty() && contents.isNotEmpty()) {
   // I will run if the equation is true
} else {
   // I will run if the equation is false
}
If you need to evaluate multiple scenarios then you could write a when block instead of an if expression. A when block will iterate through each scenario until it finds a true scenario. For example, the when block below evaluates the value of x and runs various methods based on whether x is equal to 1, 2 or 3. If x is not equal to any of those options then the else block will run.
when (x) {
   1 -> methodOne()
   2 -> methodTwo()
   3 -> methodThree()
   else -> methodElse()
}
In the comparative equations used in if and when blocks, you may notice the use of operators such as the || symbol when comparing two parameters. The || symbol is called a logical OR operator. It returns a value of ‘true’ if at least one side of the equation is correct. In other words, consider the below expression:
x == 1 || x == 3The above expression will return ‘true’ if x is equal to 3 (because the right side of the equation is correct) and ‘false’ if x is equal to 2 (because neither side of the equation is correct).
Alternative operators include:
- AND operator (&&) - Will return ‘true’ only if both sides of the equation are correct.
// will return TRUE 5 < 6 && 7 < 8 // will return FALSE 5 < 6 && 8 < 7 - EQUALITY operator (==) - Will return ‘true’ only if both sides of the equation are equal.
// will return TRUE 3 + 6 == 9 // will return FALSE 3 + 6 == 10 - INEQUALITY operator (!=) - Will return ‘true’ only if both sides of the equation are not equal.
// will return TRUE
3 + 6 != 10

// will return FALSE
3 + 6 != 9
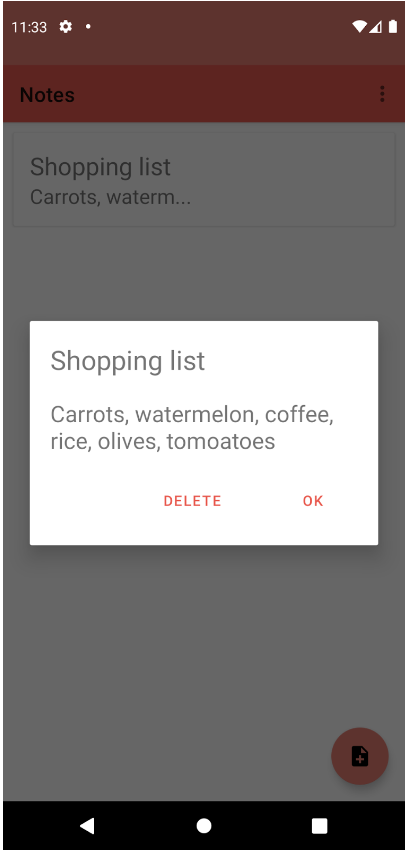
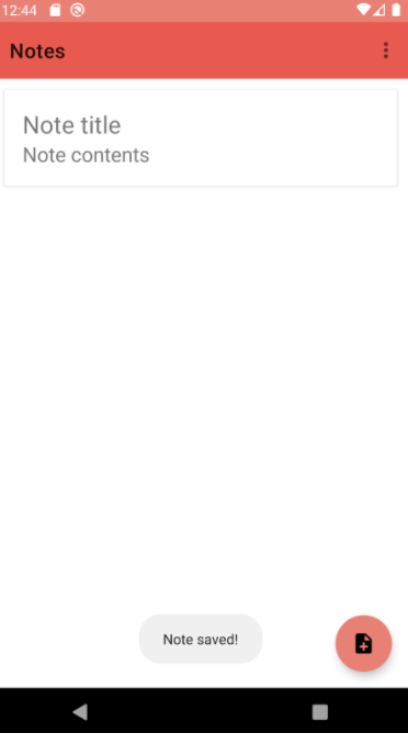
Returning to the code we added to the NewNote class, the onClick listener we assigned to the OK button checks whether the contents of the EditText widgets are empty. If either widget is empty then the note will not be saved. Instead, a toast notification will inform the user that not all the required fields have been filled in. On the other hand, if the note is successfully saved, then the dialog window will be dismissed and a toast notification will confirm the note has been saved, as shown below.
The final part of the NewNote class is a method called onDestroyView. The onDestroyView method refers to a stage in the DialogFragment lifecycle that runs when the dialog window is shutting down. When the onDestroyView stage occurs, the _binding variable is set to null to prevent interactions with a user interface that no longer exists. Fragments can take longer to close than layouts, so access to the layout’s binding class should be revoked as a safety precaution.
The ShowNote dialog window
Similar to how we used the NewNote class to make the new_note.xml layout operational, we also need to make a class for the show_note.xml layout. The new class will load notes and allow the user to delete them if they wish. Like before, navigate through Project > app > java then right-click the folder with your project name. Select New > Kotlin File/Class. Name the file ShowNote and select Class from the list of options. Next, modify the contents of the ShowNote.kt file so it reads as follows:
import androidx.appcompat.app.AlertDialog
import androidx.fragment.app.DialogFragment

class ShowNote(private val note: Note, private val index: Int) : DialogFragment() {

   private var _binding: ShowNoteBinding? = null
   private val binding get() = _binding!!

   override fun onCreateDialog(savedInstanceState: Bundle?): Dialog {

       val mainActivity = activity as MainActivity
       val inflater = mainActivity.layoutInflater
       _binding = ShowNoteBinding.inflate(inflater)

       val builder = AlertDialog.Builder(mainActivity)
           .setView(binding.root)

       binding.txtTitle.text = note.title
       binding.txtContents.text = note.contents

       binding.btnOK.setOnClickListener{
           dismiss()
       }

       binding.btnDelete.setOnClickListener{
           mainActivity.deleteNote(index)

           Toast.makeText(mainActivity, resources.getString(R.string.note_deleted), Toast.LENGTH_SHORT).show()

           dismiss()
       }

       return builder.create()
   }

   override fun onDestroyView() {
       super.onDestroyView()
       _binding = null
   }
}
Similar to the NewNote class, the ShowNote class extends the DialogFragment class and inherits its data. Unlike the NewNote class, however, the ShowNote class contains two parameters (note and index) in its primary constructor. The parameters are marked as private, which means their values are only accessible to the ShowNote class. The note variable will store the Note object being displayed, while the index variable will contain an integer (an integer is a whole number) that identifies the Note object’s position in the overall list of notes. The values of both parameters will be supplied by the MainActivity class when the dialog is created. The ShowNote class will then use this information to display the note to the user.
Next, an instance of the AlertDialog class is built and used to load the show_note.xml layout file as a dialog window. The show_note layout contains two TextView widgets, which will display the title and contents of the note, respectively. The note data is extracted from the Note object that is supplied in the ShowNote class’s primary constructor and loaded into the TextView widgets so the user can read the note.
At the bottom of the show_note layout, there is an OK button and a Delete button. The OK button will dismiss the dialog window and close the note, while the Delete button will run a method from the MainActivity class called deleteNote. The deleteNote method will delete the associated Note object from the app. Once this operation is complete, a toast notification will inform the user that the note has been deleted.
The add new note floating action button
In this section, we’ll turn our attention to the app homepage. The homepage will contain previews of all the user’s notes and a floating action button that will allow the user to create a new note. By default, the first layout file to open when an app is launched is a readymade file called activity_main.xml. Locate and open this file by navigating through Project > app > res > layout. When you create a project using the Basic Activity template, the activity_main layout will often look like this:
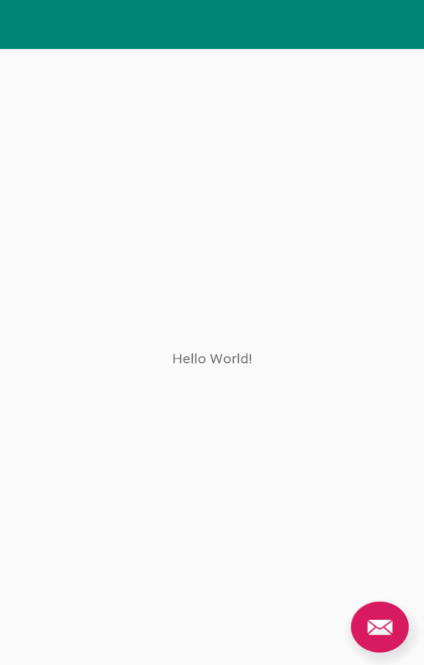
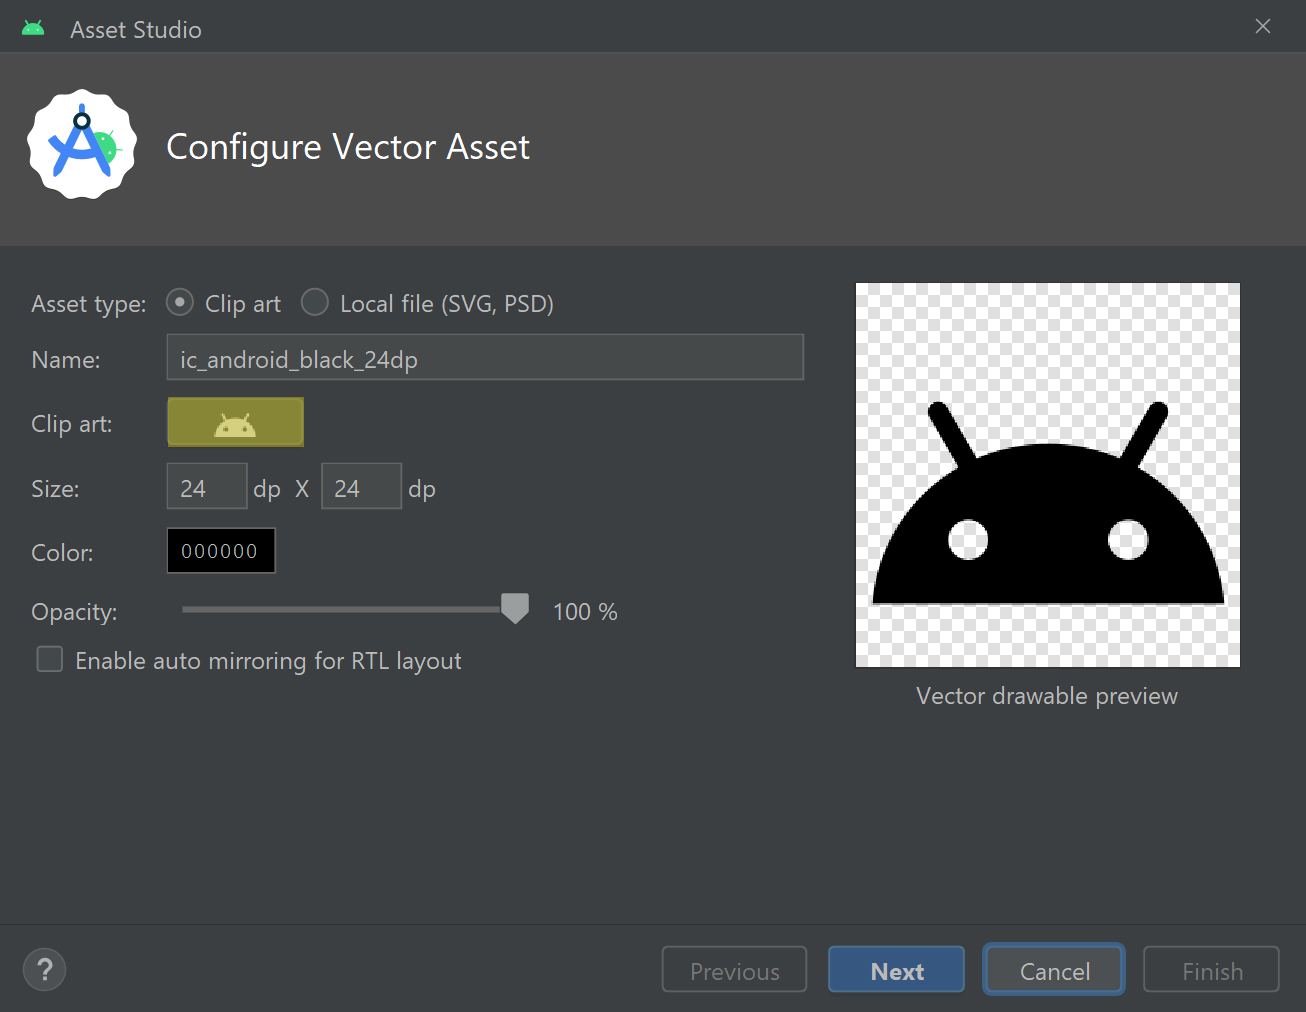
Needless to say, we’re going to want to make a couple of changes. First, let’s modify the floating action button, which is the pink circle with the mail icon in the bottom-right corner. The mail icon may be suitable for an email app but not the Notes app. To fix this, we will make a new icon using the Vector Asset Studio. To open the Vector Asset Studio, navigate through Project > app then right-click the res folder and select New > Vector Asset. In the Asset Studio window, click the image of the Android next to the phrase ‘Clip Art:’.
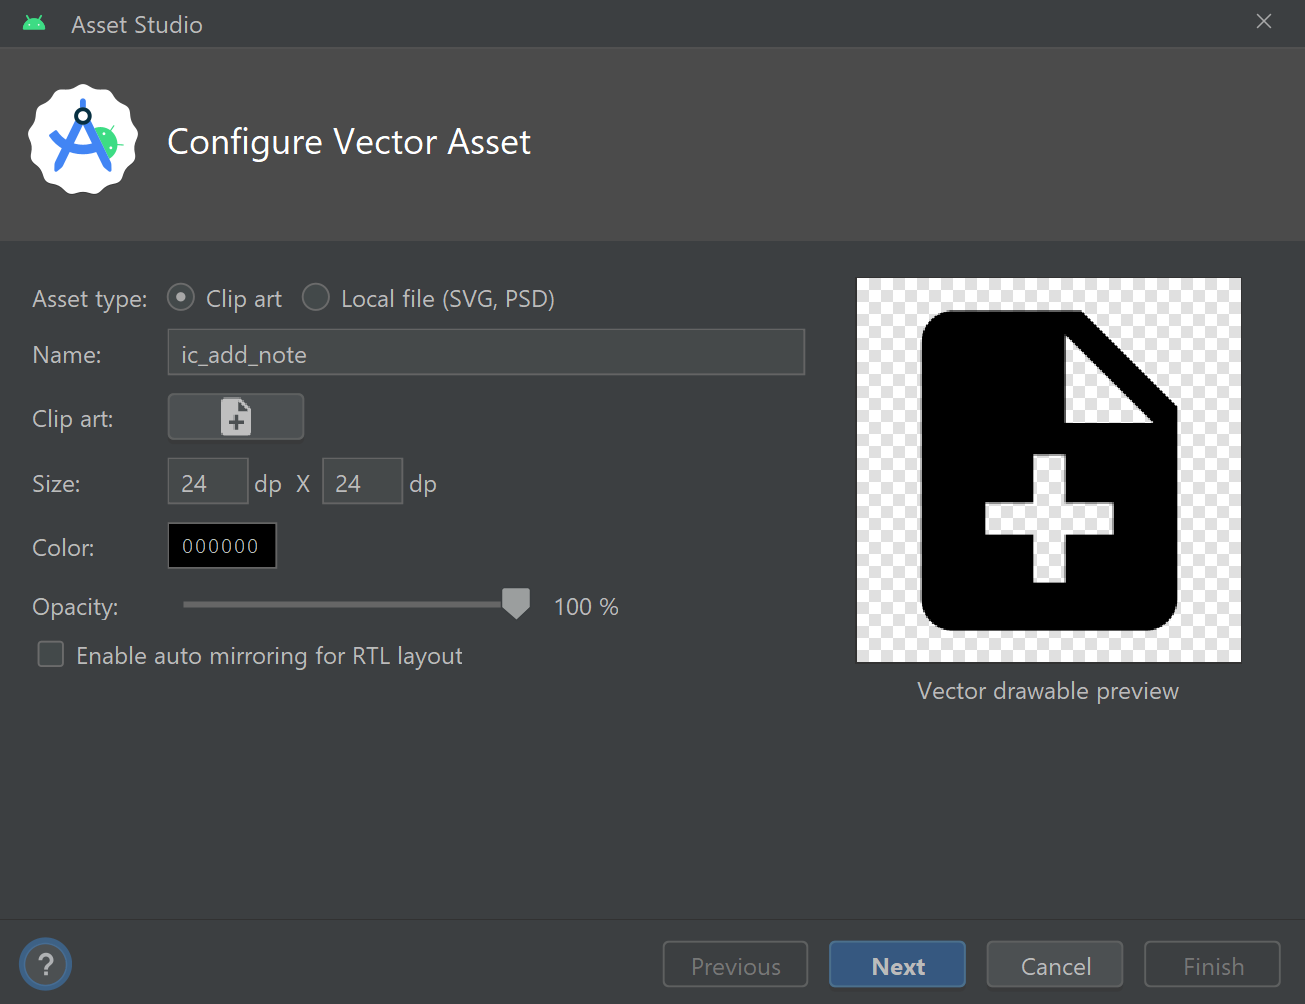
In the Select Icon window, search for and select the ‘note add’ icon then press OK.
When you return to the Asset Studio window, set the name to ic_add_note. Once that is done, press Next followed by Finish to save the icon.
Returning to the activity_main.xml file, switch the layout to Code view and find the FloatingActionButton element. Change the value of the srcCompat attribute to @drawable/ic_add_note to replace the mail icon with our new ‘add note’ icon. Also, add a content description attribute to let users who use screen readers know what the button does:
android:contentDescription="@string/add_new_note"Altogether, the code for the floating action button should now read like this:
<com.google.android.material.floatingactionbutton.FloatingActionButton
   android:id="@+id/fab"
   android:layout_width="wrap_content"
   android:layout_height="wrap_content"
   android:layout_gravity="bottom|end"
   android:layout_margin="@dimen/fab_margin"
   android:contentDescription="@string/add_new_note"
   app:srcCompat="@drawable/ic_add_note" />
When clicked, the floating action button should open the NewNote dialog window. To achieve this, open the MainActivity.kt file (Project > app > java > name of your project) and edit the onCreate method so it reads as follows:
override fun onCreate(savedInstanceState: Bundle?) {
   super.onCreate(savedInstanceState)

   binding = ActivityMainBinding.inflate(layoutInflater)
   setContentView(binding.root)
   setSupportActionBar(binding.toolbar)

   binding.fab.setOnClickListener {
       NewNote().show(supportFragmentManager, null)
   }
}
The onCreate method refers to the first stage of the activity’s lifecycle. It will run when the activity has been launched and the components of the activity’s user interface become operational. The user interface for the MainActivity class is defined in the activity_main.xml layout. The above code initialises the activity_main layout’s binding class and directs MainActivity to source its content and toolbar from the layout. Next, an onClick listener is assigned to the floating action button. If the floating action button is clicked, then the NewNote dialog fragment will be displayed using the DialogFragment class’s inbuilt show method.
Displaying note previews in a RecyclerView widget
A preview of each note will be displayed on the app homepage. If the user clicks a preview, then the full note will be loaded using the ShowNote dialog window. The collection of note previews must update dynamically as the user creates and deletes notes. To facilitate this, we will use a widget called a RecyclerView. RecyclerView widgets display lists of content. Typically, each list item will use the same layout, and the RecyclerView widget efficiently recycles this layout for all list items. To add the RecyclerView widget to the app homepage, open the activity_main.xml layout (Project > app > res > layout) and replace the below line:
<include layout="@layout/content_main" />The new code should read as follows:
<androidx.recyclerview.widget.RecyclerView
android:id="@+id/recyclerView"
android:layout_width="match_parent"
android:layout_height="match_parent"
app:layout_behavior="@string/appbar_scrolling_view_behavior"
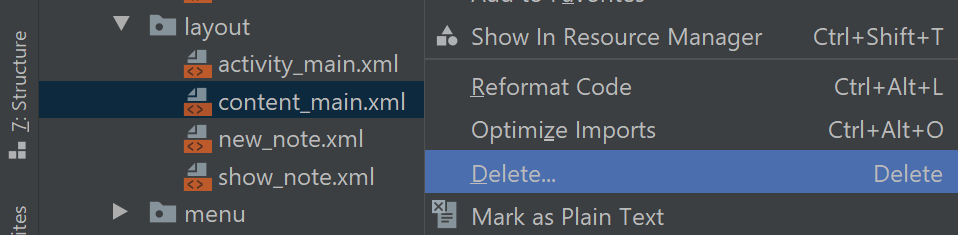
app:layoutManager="androidx.recyclerview.widget.LinearLayoutManager" />The above step replaces the reference to a layout file called content_main.xml with a RecyclerView widget. In projects created using the Basic Activity template, Android Studio will typically split the homepage into two layouts: activity_main, which contains static objects that rarely change as the user navigates around the activity, and content_main, which is more dynamic and displays the content the user is viewing. Often, this content is provided by a fragment, which represents a navigational destination within the parent activity. In this app, the MainActivity activity will not be split into multiple navigational destinations. For this reason, it is simpler to remove the reference to the content_main layout and insert the RecyclerView directly. Also, we should delete the content_main.xml layout file itself. To do this, find the file in the layout directory, right-click it and press Delete.
The width and height of the RecyclerView are set to match_parent, which means the RecyclerView will occupy the maximum amount of available space; however, we still want to leave a small gap at the top to ensure the RecyclerView is not obscured by the toolbar. To handle this, the layout behaviour of the RecyclerView is set to AppBarLayout.ScrollingViewBehavior, This behaviour helps coordinate layout components and the toolbar to ensure they do not obstruct one another. Finally, the layout manager for the RecyclerView is set to a linear layout manager, which will ensure the RecyclerView’s constituent items will stack vertically one by one. Other layout managers such as GridLayoutManager are also available (we will use the GridLayoutManager in the Camera app project).
The RecyclerView will display a preview of every note the user has saved. Note previews will require a layout, so right-click the layout directory and select New > Layout Resource File. Name the file note_preview then press OK. A layout file called note_preview.xml should open automatically. Switch the layout to Code view then replace all its code with the following:
<?xml version="1.0" encoding="utf-8"?>
<androidx.cardview.widget.CardView xmlns:android="http://schemas.android.com/apk/res/android"
   xmlns:card_view="http://schemas.android.com/apk/res-auto"
   android:layout_width="match_parent"
   android:layout_height="wrap_content"
   android:layout_margin="10dp"
   card_view:cardElevation="2dp" >

   <LinearLayout
       android:layout_width="match_parent"
       android:layout_height="wrap_content"
       android:orientation="vertical"
       android:padding="16dp">

       <TextView
           android:id="@+id/viewTitle"
           android:layout_width="match_parent"
           android:layout_height="wrap_content"
           android:textSize="24sp" />

       <TextView
           android:id="@+id/viewContents"
           android:layout_width="match_parent"
           android:layout_height="wrap_content"
           android:textSize="20sp" />
   </LinearLayout>
</androidx.cardview.widget.CardView>
The root element of the note_preview layout is a CardView widget. CardView-based layouts appear slightly elevated above their containing view group (the RecyclerView in this instance). They provide a useful way of displaying list items while keeping the style of each item consistent. In the above code, two TextView widgets are added to the CardView. The TextView widgets will display the title of the note and a preview of its contents, respectively. The TextView widgets are packaged inside a LinearLayout widget so they align themselves vertically within the layout.
The list of note previews will be loaded into the RecyclerView using an adapter, which requires a new class. Create a Kotlin class called NoteAdapter in the usual way (right-click on Project > app > java > name of your project then select New > Kotlin Class/File) and modify the class’s code so it reads as follows:
class NoteAdapter(private val mainActivity: MainActivity):
   RecyclerView.Adapter<NoteAdapter.ViewHolderNote>() {

   var noteList = mutableListOf<Note>()

   inner class ViewHolderNote(view: View) :
       RecyclerView.ViewHolder(view) {

       internal var title = view.findViewById<View>(R.id.viewTitle) as TextView
       internal var contents = view.findViewById<View>(R.id.viewContents) as TextView

       init {
           view.isClickable = true
           view.setOnClickListener {
               mainActivity.showNote(layoutPosition)
           }
       }
   }

   override fun onCreateViewHolder(parent: ViewGroup, viewType: Int): ViewHolderNote {
       return ViewHolderNote(LayoutInflater.from(parent.context).inflate(R.layout.note_preview, parent, false))
   }

   override fun onBindViewHolder(holder: ViewHolderNote, position: Int) {
       val note = noteList[position]

       holder.title.text = note.title
       holder.contents.text = if (note.contents.length < 15) note.contents
       else note.contents.substring(0, 15) + "..."
   }

   override fun getItemCount(): Int = noteList.size
}
The NoteAdapter class’s primary constructor features a parameter called mainActivity, which will hold a reference to the MainActivity class. Inside the NoteAdapter class, there is a variable called noteList, which will contain the details of every note the user has saved. The list is a mutable list, which means items can be added, removed and changed. Next, an inner class called ViewHolderNote is established. Inner classes can access data such as variables and methods from the outer class and vice versa, even if that content is marked as private. In this instance, the ViewHolderNote inner class will initialise the components of the note_preview.xml layout so they can be used by the adapter. The ViewHolderNote inner class also defines what action should occur when a note preview is clicked. If the user clicks a note preview, then a MainActivity method called showNote will load the full note using the ShowNote dialog fragment.
Next, we define several methods that shape how the RecyclerView widget operates. The onCreateViewHolder method tells the NoteAdapter to use the note_preview.xml layout for every item that is loaded into the RecyclerView. Meanwhile, the onBindViewHolder method retrieves the title and contents of each Note object in the noteList list and uses this information to populate the TextView widgets in the note_preview layout. For this purpose, an if expression is used to assess the length of the contents string. If the contents string is less than 15 characters long then the full contents will be displayed in the preview. Otherwise, the contents string will be shortened to 15 characters using Kotlin’s substring method because we only want to display a small preview of the note’s contents. An ellipsis is appended to the end of the shortened contents string to show the user that we are displaying only a preview of the note. Finally, a method called getItemCount is defined, which will calculate how many items are loaded into the RecyclerView. In this case, the number of items will equal the size of the list of notes.
Initialising the RecyclerView widget, adapter and dialog windows
In this section, we will add the code to the MainActivity.kt file that is required to bind the NoteAdapter adapter to the RecyclerView widget and allow the NewNote and ShowNote dialog windows to function. First, however, we need to tidy up the MainActivity class and remove some code that was autogenerated by Android Studio. For example, we will not use the appBarConfiguration variable so you can delete this variable from the top of the class:
private lateinit var appBarConfiguration: AppBarConfigurationAlso, if you see a function called onSupportNavigateUp then remove that function too. Both the appBarConfiguration variable and onSupportNavigateUp function help coordinate navigation around the app; however, the only destination in the Notes app is the app homepage so navigation is not required. Once the surplus code has been removed, add the following variable below the binding variable at the top of MainActivity to store a reference to the NoteAdapter class:
private lateinit var adapter: NoteAdapterThe adapter variable features the lateinit modifier, which indicates that it is a non-null variable and its value will be assigned later. An alternative to the lateinit modifier could be to define the variable conventionally but assign it a null value as shown in this example:
private var adapter: NoteAdapter? = nullThe drawback of this approach is it requires you to always accommodate for the value of the variable potentially being null. The lateinit modifier removes this consideration because the app will assume the variable has been initialised and assigned a value. If you attempt to reference a lateinit variable in your code before the variable has been initialised then an error called an exception will occur and the app may crash. Hence, it is important to assign lateinit variables a value before they are referenced elsewhere in your code.
Moving on, we’ll now set up the NoteAdapter adapter and RecyclerView widget. To do this, add the following code to the bottom of the onCreate method:
adapter = NoteAdapter(this)
binding.recyclerView.adapter = adapter
binding.recyclerView.itemAnimator = DefaultItemAnimator()
The adapter variable is initialised by building an instance of the NoteAdapter class and passing a value of ‘this’ (in this instance ‘this’ refers to the MainActivity class) for the mainActivity parameter in the NoteAdapter class’s primary constructor. Next, the NoteAdapter adapter is assigned to the RecyclerView widget to help manage the RecyclerView’s content. Finally, an instance of the DefaultItemAnimator class is applied to the RecyclerView. The default item animator will provide some basic animations when items are added, removed or changed.
Moving on, we’ll now discuss two methods that will save and delete the user’s notes, respectively. The methods will also notify the NoteAdapter adapter of any changes. Add the following code below the onOptionsItemSelected function in the MainActivity class:
fun createNewNote(note: Note) {
   adapter.noteList.add(note)
   adapter.notifyItemInserted(adapter.noteList.size -1)
   saveNotes()
}

fun deleteNote(index: Int) {
   adapter.noteList.removeAt(index)
   adapter.notifyItemRemoved(index)
   saveNotes()
}
The createNewNote method is called by the NewNote dialog window when the user attempts to save a note. The title and contents of the note (as entered by the user) are packaged in a Note object and sent to the createNewNote method. The createNewNote method adds the Note object to the end of the list of notes stored in the NoteAdapter instance and runs a method automatically programmed into all adapters called notifyItemInserted. The notifyItemInserted method tells the RecyclerView widget that a new item has been inserted at a given index. In this case, the item has been added to the end of the list, so the index will be the size of the list minus one. The reason for this is that the index of the first item in a list is 0, so we must subtract one from the size of the list to get the index of the last item. The deleteNote method does the opposite of the createNewNote method: it removes the Note object at a given index from the adapter and then calls notifyItemRemoved to update the RecyclerView. Whenever a note is saved or deleted, a method called saveNotes will update the list of notes saved in the application.
Finally, let’s define a method called showNote which will load the full version of a note and display it to the user. Add the following code below the deleteNote method:
fun showNote(index: Int) {
   val dialog = ShowNote(adapter.noteList[index], index)
   dialog.show(supportFragmentManager, null)
}
The showNote method sends the user’s selected Note object and its index within the overall list of notes to the ShowNote dialog window. The ShowNote class will use this information to display the full note and handle requests to delete it.
Using JSON to save the user’s notes
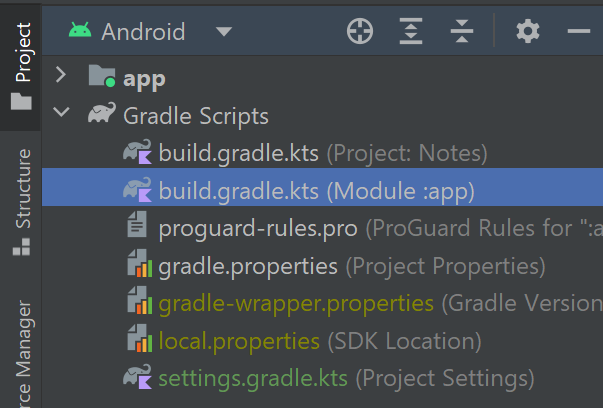
The user’s notes will be stored in JavaScript Object Notation (JSON) format, which is a text-based system for handling data. The list of Note objects saved by the user will be converted to a JSON string and saved internally in the app. When the app is launched, the JSON string will be converted back to a list of Note objects that can be used by the app. The conversion of objects to and from JSON is known as serialisation and deserialisation, respectively. To facilitate these processes, we will use a Java library called GSON. To add GSON to the app, open the module-level build.gradle.kts file by navigating through Project > Gradle Scripts.
Locate the dependencies section and add the following implementation statement to import the GSON library into the project:
implementation("com.google.code.gson:gson:2.9.0")Don’t forget to re-sync your project when prompted!

Let’s now write the code that will convert the user’s notes into JSON and save the JSON string internally within the app. Return to the MainActivity.kt file and add the following companion object below the list of variables at the top of the class:
companion object {
   private const val FILEPATH = "notes.json"
}
Companion objects are initialised when the outer class (MainActivity in this instance) loads. In this companion object, a variable called FILEPATH is defined which contains the name of the file that will store the JSON string. Other methods in the MainActivity class can refer to the FILEPATH variable to ensure they are all interacting with the same file. The method which saves the user’s notes is called saveNotes. To define the saveNotes method, add the following code below the showNote method:
private fun saveNotes() {
   val notes = adapter.noteList
   val gson = GsonBuilder().create()
   val jsonNotes = gson.toJson(notes)

   val outputStream = openFileOutput(FILEPATH, Context.MODE_PRIVATE)
   OutputStreamWriter(outputStream).use { writer ->
       writer.write(jsonNotes)
   }
}
The saveNotes method retrieves the full list of Note objects from the NoteAdapter class and uses the GsonBuilder class to convert the list to a JSON string. An instance of the OutputStreamWriter class then encodes the JSON string as a stream of data and writes it to a file within the app. The details of the file are defined in a variable called outputStream, which stores an instance of the FileOutputStream class. The FileOutputStream class is initialised using the openFileOutput method and by supplying the name of the file and an operating mode. In this instance, the operating mode is set to private, which means the notes.json file will only be accessible to this application.
The workflow which writes data to the notes.json file is enclosed in a block of code that is applied to the OutputStreamWriter instance via Kotlin’s use function. Kotlin’s use function allows you to interact with resources safely. For example, the use function will close the OutputStreamWriter instance once the workflow defined in the use block has been executed, even if an error occurs. Closing resources once they are no longer required helps maintain the security and performance of the application.
The list of Note objects stored in the notes.json file will be retrieved each time the app is launched. This operation is managed by a method called retrieveNotes, which can be defined by adding the following code below the saveNotes method:
private fun retrieveNotes(): MutableList<Note> {
   val noteList = mutableListOf<Note>()
   if (getFileStreamPath(FILEPATH).isFile) {
       val fileInput = openFileInput(FILEPATH)
       BufferedReader(InputStreamReader(fileInput)).use { reader ->
           val stringBuilder = StringBuilder()
           for (line in reader.readLine()) stringBuilder.append(line)

           if (stringBuilder.isNotEmpty()){
               val listType = object : TypeToken<List<Note>>() {}.type
               noteList.addAll(Gson().fromJson(stringBuilder.toString(), listType))
           }
       }
   }
   return noteList
}
The retrieveNotes method will return a mutable list of Note objects. It does this by defining a variable called noteList, which will store the list of Note objects. Next, it checks whether a file exists at the location specified in the FILEPATH variable. If no file exists, then an empty list is returned by the method; however, if a file does exist, then the file’s contents are decoded using the BufferedReader and InputStreamReader classes. The decoded contents are collated using an instance of the StringBuilder class and converted to a list of Note objects using GSON. As discussed previously, we apply Kotlin’s use function to ensure the BufferedReader instance is closed once the above processing is complete.
The retrieveNotes method will need to run when the app is launched so the notes can be displayed on the app homepage. To arrange this, add the following code to the bottom of the onCreate method:
adapter.noteList = retrieveNotes()
adapter.notifyItemRangeInserted(0, adapter.noteList.size)
The list of notes returned by the retrieveNotes method is loaded into the NoteAdapter instance and displayed to the user using the adapter’s notifyItemRangeInserted method. The notifyItemRangeInserted method notifies the adapter that one or more items have been added to the RecyclerView. In this instance, we are loading notes into an empty RecyclerView, so the new items will be inserted at index 0 (the first position in the RecyclerView) and the number of items will equal the size of the list of notes. In this way, we use the notifyItemRangeInserted method to load the entire list of notes into the RecyclerView widget and make them visible to the user.
And that’s it! The app will now save the user’s notes when it is closed and retrieve them again when it is opened. The remainder of this guide will focus on building a Settings page and allowing the user to personalise the app.
Creating the Settings activity and preferences file
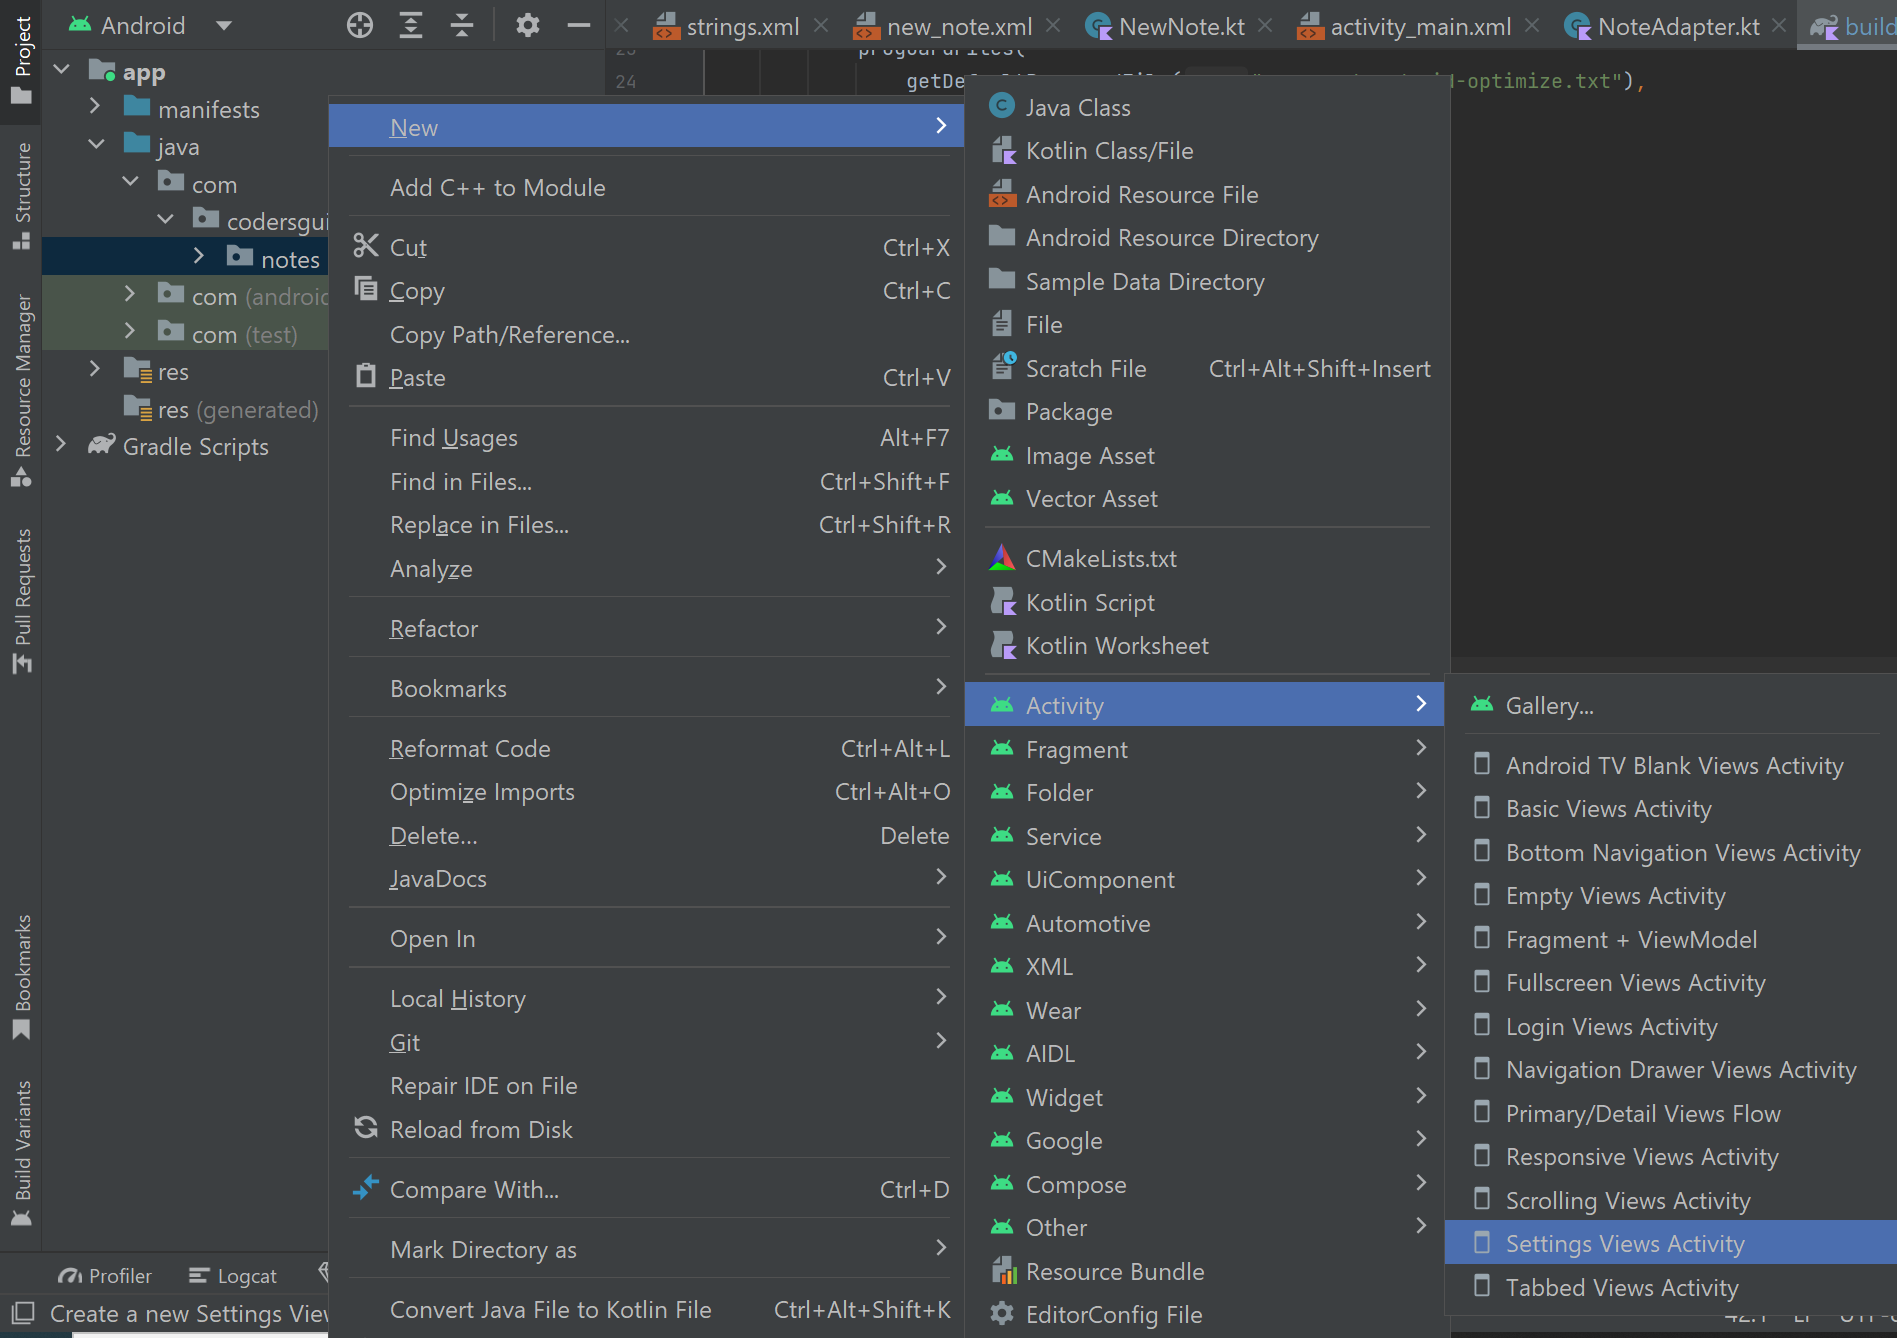
The Notes app will contain a settings page that allows users to add and remove dividing lines between notes on the home screen and toggle the theme between day and night modes. The settings page will be managed by a distinct activity. To create a new activity, navigate through Project > app > java then right-click the folder with the name of your project. Select New > Activity > Settings Views Activity.
Name the activity SettingsActivity then press Finish.

A file called SettingsActivity.kt should then open in the editor. The first task will be to ensure the user can find their way back to the app homepage. Android will automatically generate a back button in the top left corner of the app bar; however, we need to instruct the button to return the user to the MainActivity activity when clicked. To do this, add the following code below the onCreate method:
override fun onOptionsItemSelected(item: MenuItem): Boolean {
   if (item.itemId == android.R.id.home) finish()
   return super.onOptionsItemSelected(item)
}
The above code uses the finish command to close the SettingsActivity activity when the home button is pressed and returns the user to the app homepage.
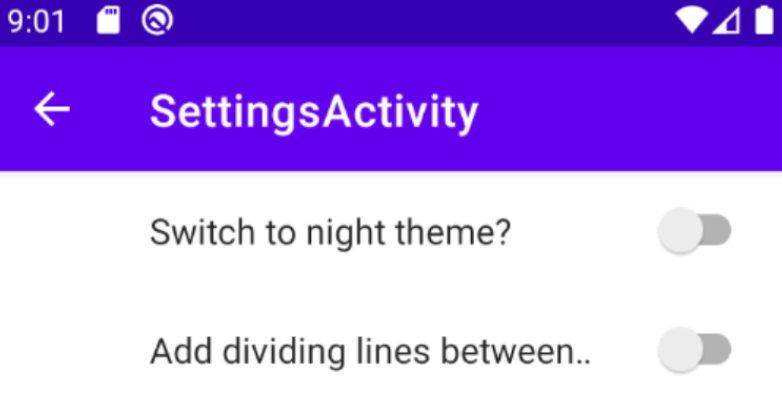
Moving on, let’s define the code that handles changes to the user’s preferences. When the SettingsActivity class was created, Android Studio should automatically have generated a preferences XML file. To locate the file, navigate through Project > res > xml and open the file called root_preferences.xml. Switch the preferences file to Code view and replace the code in the file with the following:
<PreferenceScreen xmlns:app="http://schemas.android.com/apk/res-auto">

   <SwitchPreferenceCompat
       app:key="theme"
       app:defaultValue="false"
       app:title="@string/select_theme" />

   <SwitchPreferenceCompat
       app:key="dividingLines"
       app:defaultValue="false"
       app:title="@string/add_dividers" />
</PreferenceScreen>
The above code defines two SwitchPreferenceCompat elements, which the user can toggle between on and off states. The first switch allows the user to enable and disable the night theme, while the second switch allows the user to add and remove dividing lines from between notes on the app homepage. Each switch returns a boolean (a true or false value) depending on whether the switch is activated or not. The user’s selections are stored internally in a shared preferences file which can be accessed from anywhere within the app. To change these preferences, we must add some code to the SettingsActivity and MainActivity classes. First, return to the SettingsActivity.kt file and edit the SettingsFragment class’s code so it reads as follows:
class SettingsFragment : PreferenceFragmentCompat(), SharedPreferences.OnSharedPreferenceChangeListener {

   override fun onCreatePreferences(savedInstanceState: Bundle?, rootKey: String?) {
       setPreferencesFromResource(R.xml.root_preferences, rootKey)

       preferenceManager.sharedPreferences?.registerOnSharedPreferenceChangeListener(this)
   }

   override fun onResume() {
       super.onResume()
       preferenceManager.sharedPreferences?.registerOnSharedPreferenceChangeListener(this)
   }

   override fun onPause() {
       super.onPause()
       preferenceManager.sharedPreferences?.unregisterOnSharedPreferenceChangeListener(this)
   }

   override fun onSharedPreferenceChanged(
       sharedPreferences: SharedPreferences?,
       key: String?
   ) {
       sharedPreferences?.run {
           when (key) {
               "theme" -> {
                   val nightThemeSelected = sharedPreferences.getBoolean(key, false)
                   if (nightThemeSelected) AppCompatDelegate.setDefaultNightMode(AppCompatDelegate.MODE_NIGHT_YES)
                   else AppCompatDelegate.setDefaultNightMode(AppCompatDelegate.MODE_NIGHT_NO)
               }
           }
       }
   }
}
The SettingsFragment fragment handles changes to the user’s preferences in real time. It does this by registering an onSharedPreferenceChange listener to the shared preferences file when the fragment is created. The listener will monitor the user’s preferences and respond to changes. If the user navigates away from the fragment or closes the app while the fragment is active then the onPause stage of the fragment lifecycle will run and the onSharedPreferenceChange listener will be unregistered; however, if the user then returns to the fragment the onResume stage of the fragment lifecycle will run and the listener will be registered again.
The onSharedPreferenceChanged method at the bottom of the fragment responds to changes in the user’s preferences. If the changed preference has the key theme then the method uses Android’s AppCompatDelegate class to activate or deactivate the night theme as necessary. We could implement code to handle changes to the dividingLines preference here; however, this would not be particularly effective because note previews are not displayed in the SettingsActivity activity. Changes to the dividingLines preferences are better handled by the MainActivity class. Return to the MainActivity.kt file and add the following code to the list of variables at the top of the class:
private lateinit var sharedPreferences: SharedPreferencesThe above variable will provide access to the shared preferences file that was modified by the settings activity. To initialise the variable, add the following code to the bottom of the onCreate method:
sharedPreferences = PreferenceManager.getDefaultSharedPreferences(this)Note you may need to import the PreferenceManager class manually by adding the following import statements to the top of the file:
import androidx.preference.PreferenceManagerThe user’s preferences should be applied each time the app is launched. To handle this, add the following code to the MainActivity class below the onCreate method:
override fun onStart() {
   super.onStart()

   val nightThemeSelected = sharedPreferences.getBoolean("theme", false)
   if (nightThemeSelected) AppCompatDelegate.setDefaultNightMode(AppCompatDelegate.MODE_NIGHT_YES)
   else AppCompatDelegate.setDefaultNightMode(AppCompatDelegate.MODE_NIGHT_NO)

   val showDividingLines = sharedPreferences.getBoolean("dividingLines", false)
   if (showDividingLines) binding.recyclerView.addItemDecoration(DividerItemDecoration(this, LinearLayoutManager.VERTICAL))
   else if (binding.recyclerView.itemDecorationCount > 0) binding.recyclerView.removeItemDecorationAt(0)
}
This onStart method refers to a stage of the activity lifecycle that runs when the activity is displayed to the user, such as when the user returns from the SettingsActivity activity. In this instance, we instruct the onStart method to retrieve the user’s theme preference from the shared preferences file and use the AppCompatDelegate class’s setDefaultNightMode method to activate or deactivate the night theme accordingly. Next, the user’s dividingLines preference is retrieved. If the dividingLines preference is set to true, then a DividerItemDecoration instance is applied to the RecyclerView widget from the activity_main.xml layout. The DividerItemDecoration instance will add a dividing line between each note preview. Conversely, if the dividingLines preference is false, then the dividing lines are removed from the RecyclerView.
The last thing we’ll do is configure the toolbar menu so that the user can navigate from the homepage to the settings page. Android Studio helpfully generates a settings page menu item as part of the Basic Activity project template. To make the menu item operational, locate the onOptionsItemSelected method and edit the return block so it reads as follows:
return when (item.itemId) {
   R.id.action_settings -> {
       val intent = Intent(this, SettingsActivity::class.java)
       startActivity(intent)
       true
   }
   else -> super.onOptionsItemSelected(item)
}
The block of code defined above listens for clicks on menu items and runs the appropriate actions based on the menu item’s ID. If the user clicks on the settings menu item, then an intent will launch the SettingsActivity activity. In Android programming, an intent describes an action that should be performed. Often the intent will involve another activity, service or application. Once the SettingsActivity activity has been launched, the when block returns a value of true to signal that no further processing is required.
Designing the themes
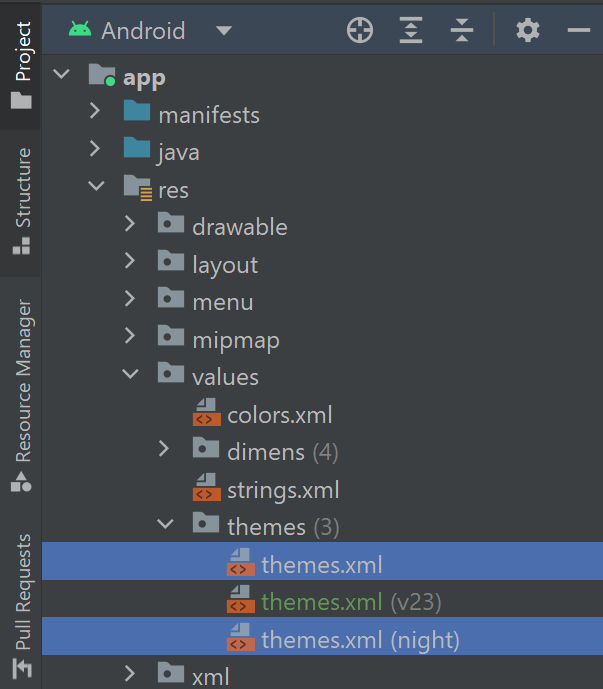
In this section, we will customise the night and day themes. When the project was created, Android Studio will have generated two resource files to store the details of the day and night themes. To locate the theme resource files, navigate through Project > res > values > themes. You can distinguish between the two files because the night theme file will have the word night in brackets at the end:
First, open the day themes.xml file and locate the style element that has a name attribute set to Base.Theme.Notes. The Base.Theme.Notes style element defines the base theme for the application. We want to import a readymade theme and override some colours, so edit the style element so it reads as follows:
<style name="Base.Theme.Notes" parent="Theme.Material3.DayNight.NoActionBar">
    <item name="colorPrimary">@color/colorPrimary</item>
    <item name="colorPrimaryDark">@color/colorSecondary</item>
    <item name="colorSecondary">@color/colorSecondary</item>
</style>
In the above code, the parent attribute of the opening style tag imports the information from a readymade Material theme called DayNight. The DayNight theme, like all Material themes, features 12 categories of colour, as summarised in the colour chart below. The left side of the chart shows light mode theme variants of the colours, while the right side shows dark mode variants.
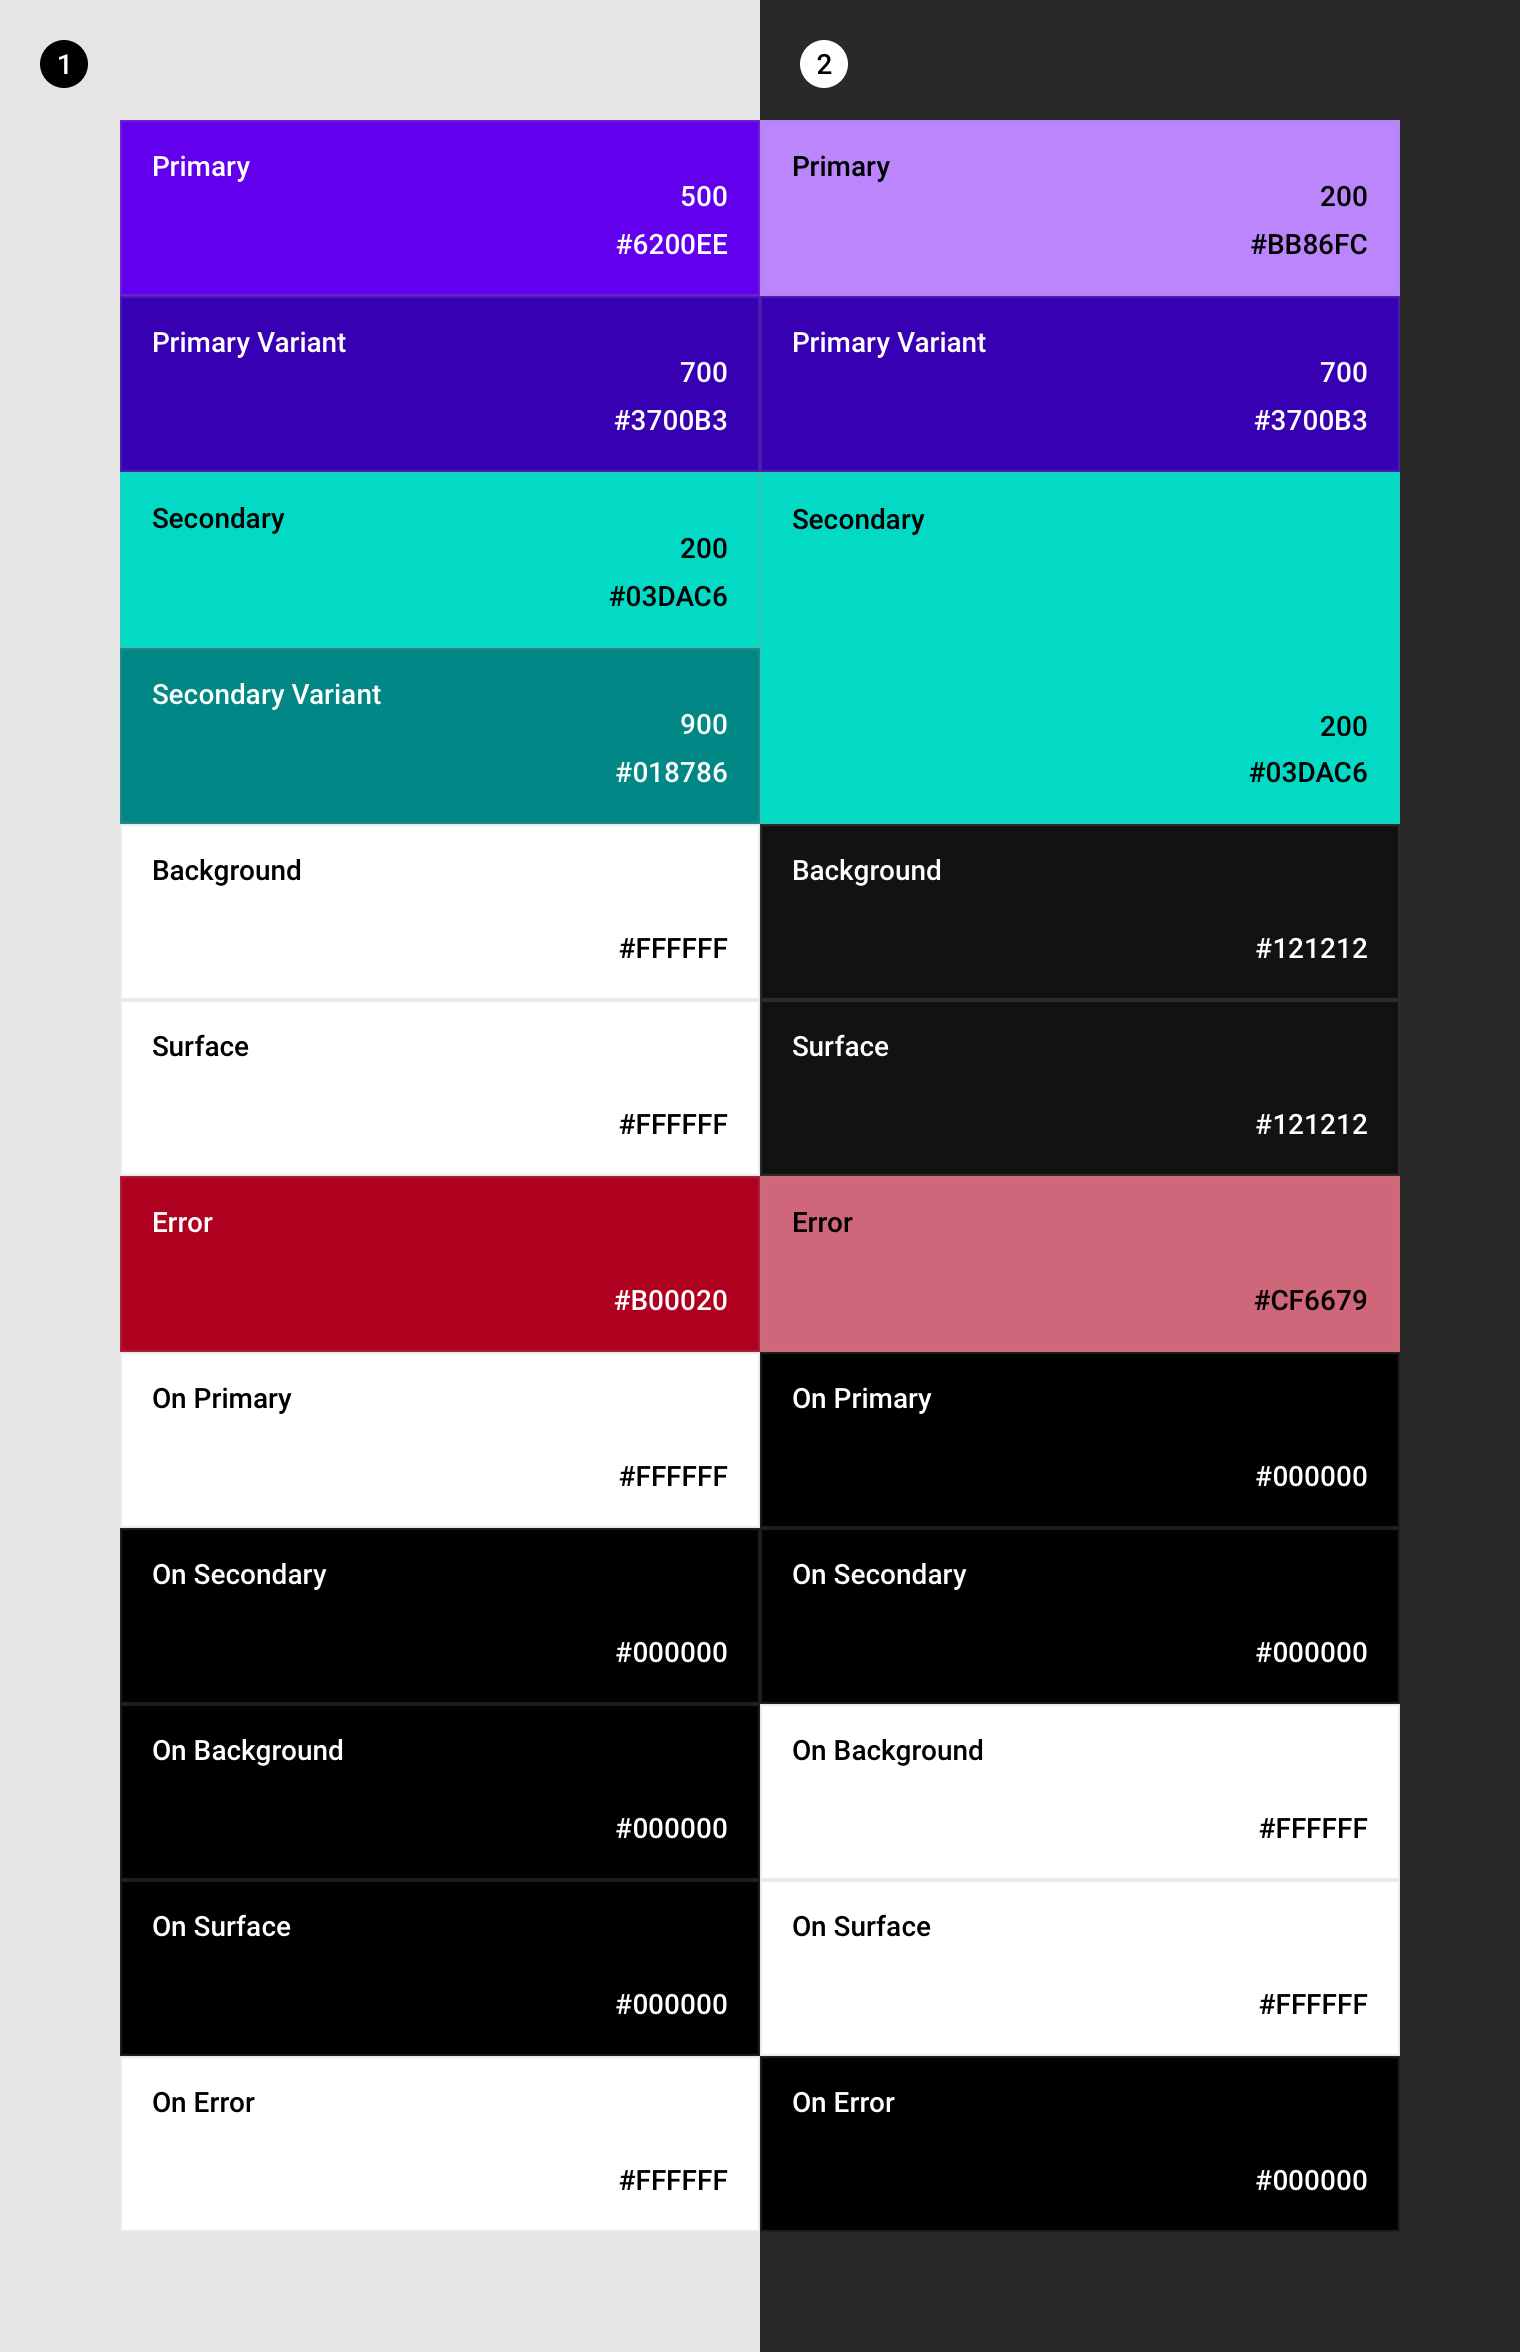
Image source: https://m2.material.io/design/color/dark-theme.html
It is possible to override the colours used in a theme. To do this, simply insert an item element into the base style element of the relevant themes.xml file as shown in the above example code. The name of the item should be the theme attribute that you wish to override. If you are looking to override a colour then begin the item name with ‘color’ followed by the name of the colour. For example, to override the secondary variant colour the item name should be ‘colorSecondaryVariant’. The colour that you wish to use instead will sit between the item tags and use the following format:
@color/colorPrimaryIn the above example, ‘colorPrimary’ is the name of the colour in the colors.xml resource file. We will discuss the colors.xml file shortly. For now, you can either just copy and paste the code from above or wait until you test the app yourself and make a note of which colours you would like to change.
Moving on, let’s customise the night theme. Open the night version of the themes.xml file and edit the Base.Theme.Notes style element so it reads as follows:
<style name="Base.Theme.Notes" parent="Theme.Material3.DayNight.NoActionBar">
   <item name="colorPrimary">@color/nightColorPrimary</item>
   <item name="colorSecondary">@color/nightColorSecondary</item>
</style>
The above overrides the night theme’s primary and secondary colours with our selections.
Once the night theme file is set up, we can turn our attention to the colors.xml file. The colors.xml file will contain the details of any custom colours used in the app. To locate colors.xml file, navigate through Project > app > res > values. Next, replace the color elements in the file with the following code:
<color name="colorPrimary">#E85A4F</color>
<color name="colorSecondary">#E98074</color>

<color name="nightColorPrimary">#272727</color>
<color name="nightColorSecondary">#84C9FB</color>
Each color element has a name attribute, which is used by other files to access the hexadecimal (HEX) code found between the color tags. You can find the HEX code for many common colours by using our colour picker and table.
Summary
Congratulations on completing the Notes app! In creating this app, you have covered the following skills and topics:
- Create a new application using the Basic Views Activity project template.
- Use string, colour and theme resources to display text and customise the appearance of the app.
- Build a user interface layout using widgets such as Button, EditText, TextView and RecyclerView.
- Register onClick listeners and respond to user interactions with widgets and menu items.
- Explore a principle of object-oriented programming called inheritance to import the data from one class into another class.
- Use the DialogFragment and AlertDialog classes to display a pop-up window.
- Create, store and decode JSON strings.
- Apply Kotlin’s use function to interact with resources and ensure they are safely closed when no longer needed.
- Write and retrieve data from a file internally within the app.
- Utilise a Settings Activity to allow the user to customise the app based on their preferences.
- Import readymade themes from Material Design and customise the colours used in those themes.