How to create a mobile Store application using Kotlin
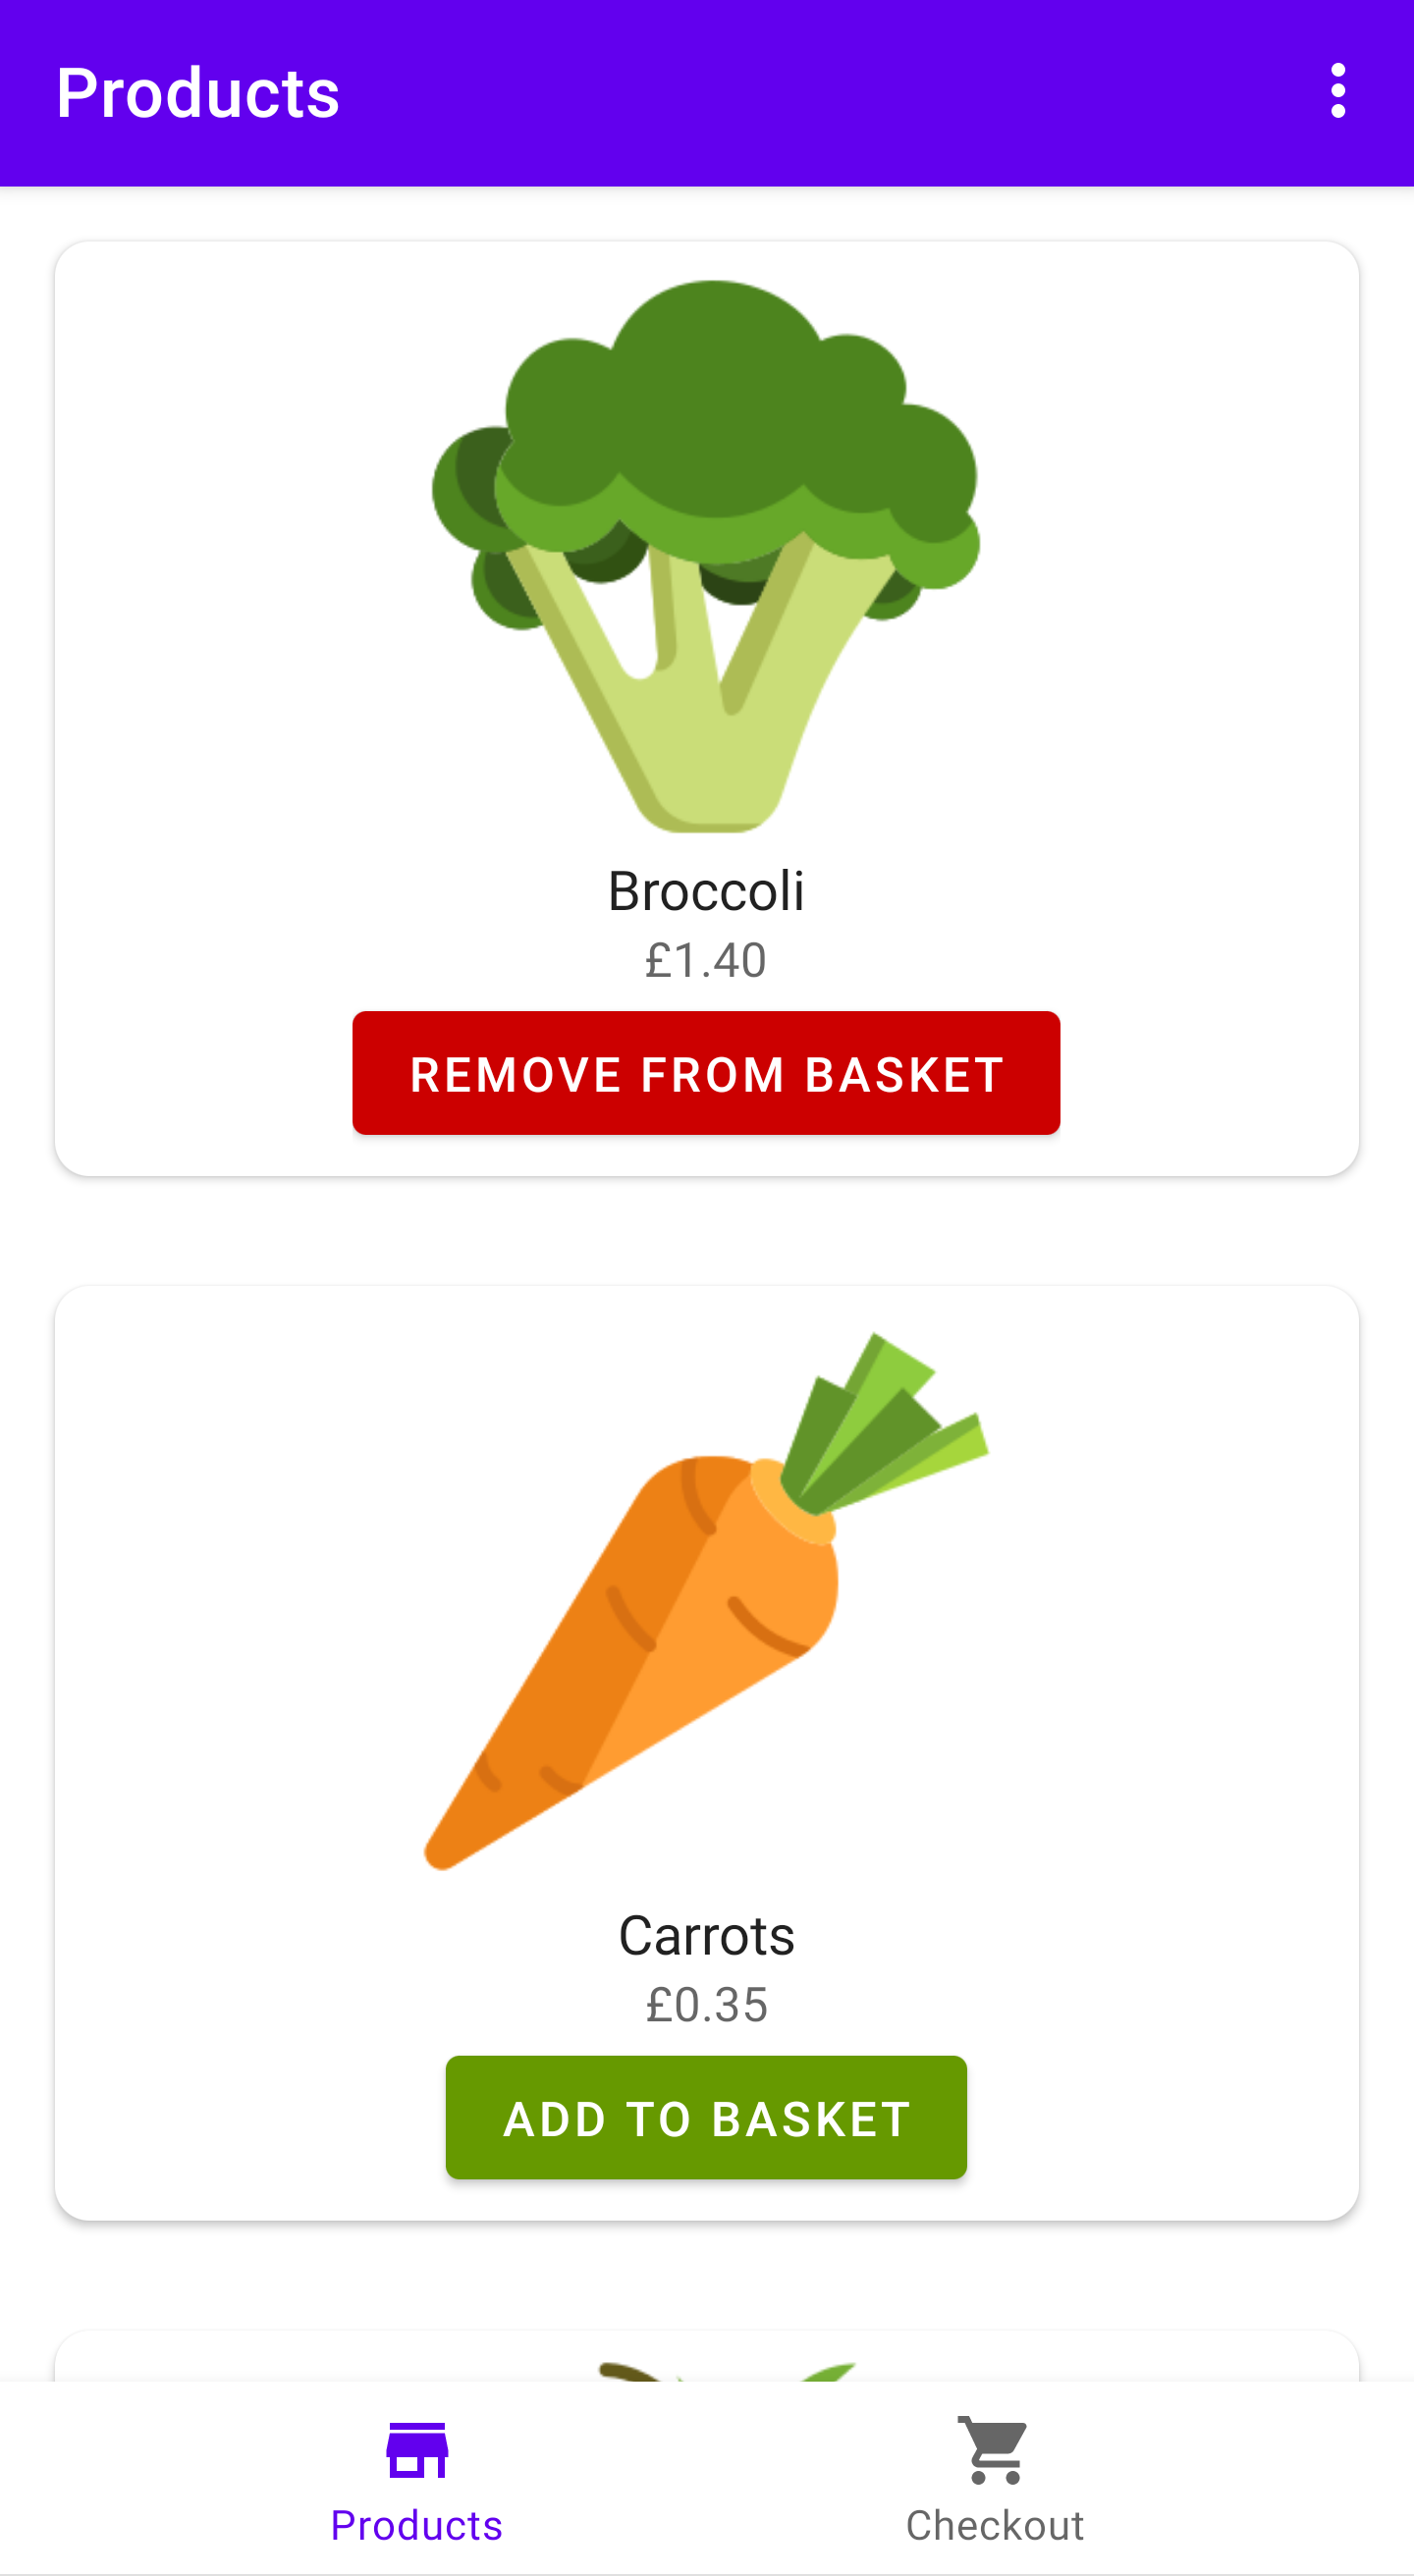
For this project, we will create a mobile store application that allows the user to shop for products and pay using debit/credit card, PayPal and more! Payments will be handled using the Braintree API, which is the recommended mobile payment processing system for PayPal and is compatible with other digital wallets such as Apple Pay and Google Pay. After completing this project, you will know how to integrate the Braintree payment system into your app, process transactions and use a currency exchange API to allow the customer to shop in different currencies.
The example code for the Store application can be found here. The project was built using Android Studio Giraffe and targets Android 13 (API 33/SDK 33).
To complete this project and process transactions using the Braintree API, you will need to have a website domain and server hosting provider that you can upload files to. If you would like help with this, then we have a guide on how to register a website domain and choose a hosting provider.
Getting started
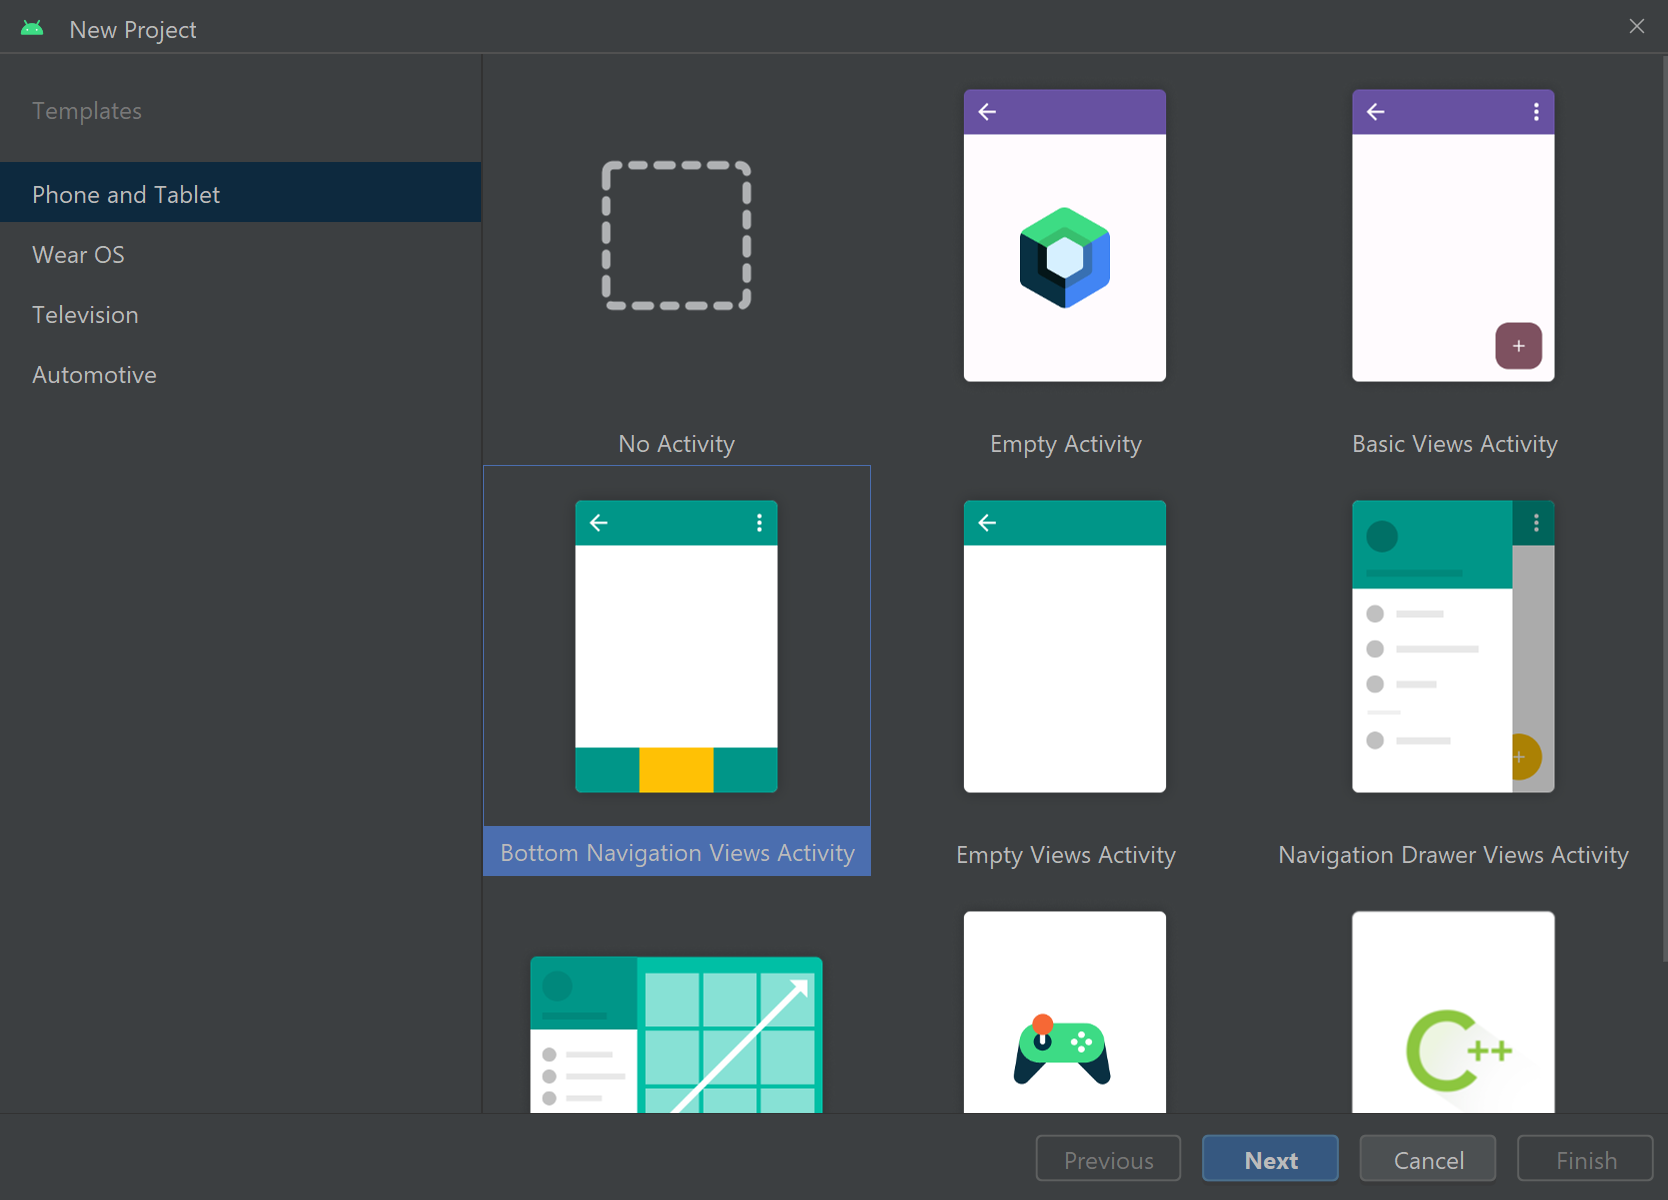
To begin, open Android Studio and create a new project using the Bottom Navigation Views Activity project template. You might remember this project template from the Camera application or the Communications application. The template provides your app with a navigation bar at the bottom of the screen, as well as several readymade fragments. Each fragment represents a different destination in the app, which the user will be able to navigate to using the navigation bar. In this app, there will be separate fragments for the product catalogue and checkout pages.
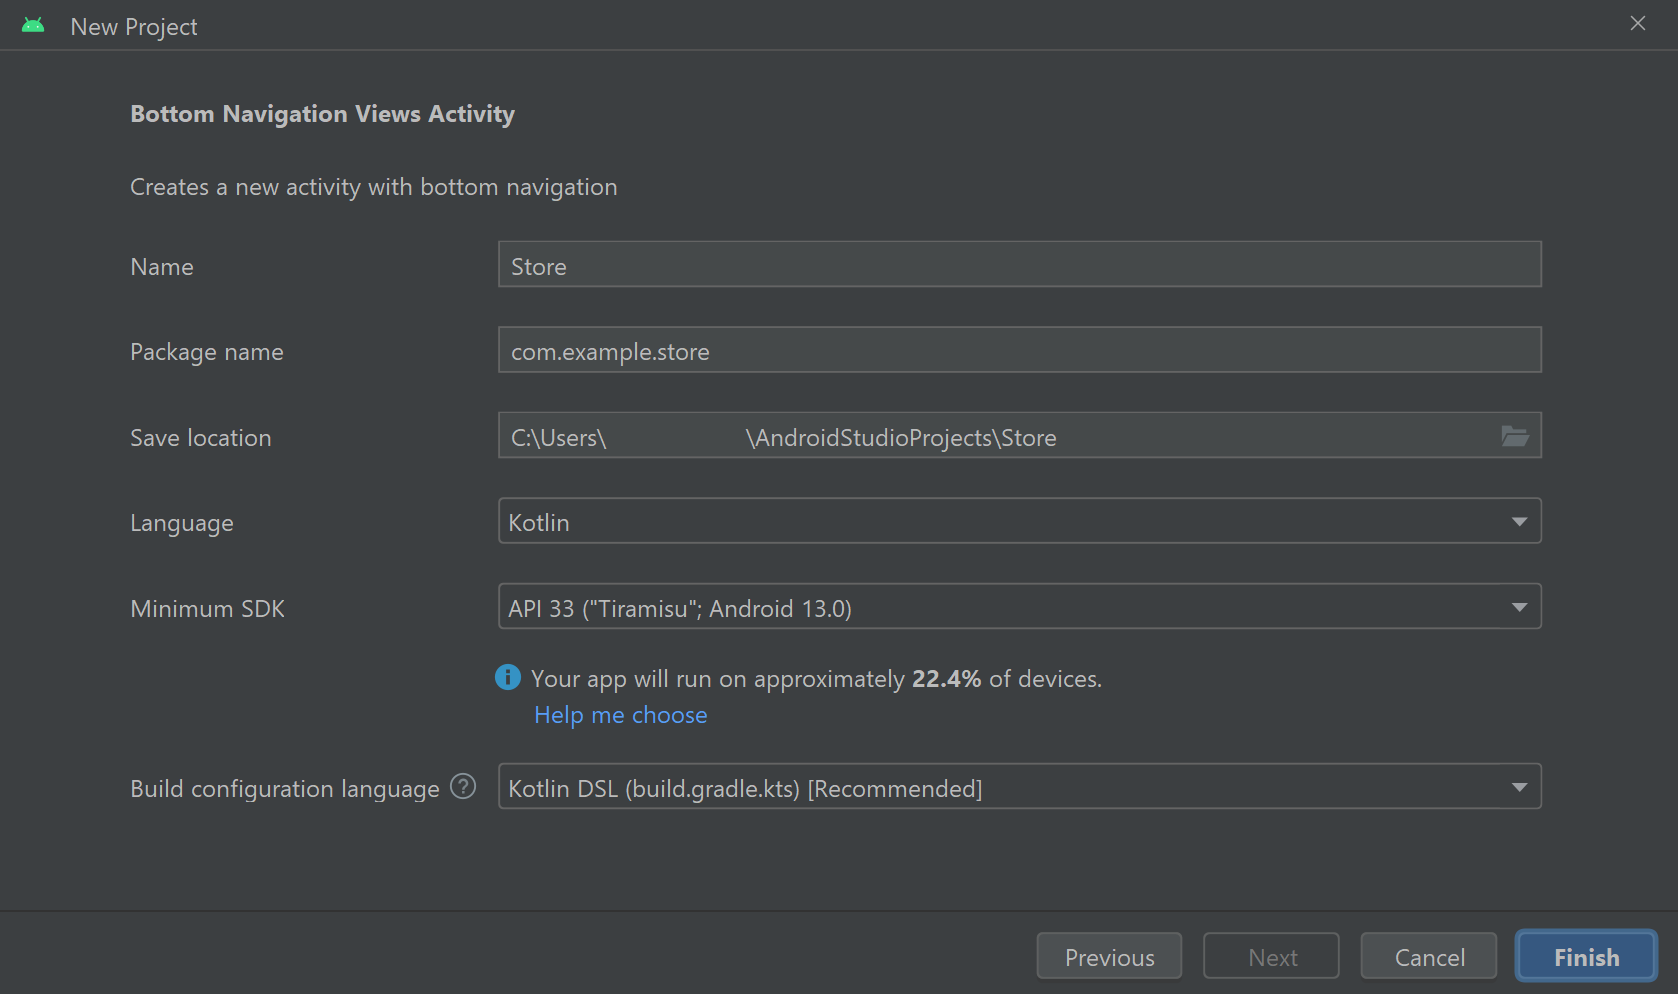
In the Create New Project window, name the project Store, set the language to Kotlin and select API level 33.
It is recommended you enable Auto Imports to direct Android Studio to add any necessary import statements to your Kotlin files as you code. These import statements are essential for incorporating the external classes and tools required for the app to run. To enable Auto Imports, open Android Studio’s Settings window by clicking File > Settings. In the Settings window, navigate through Editor > General > Auto Import then select ‘Add unambiguous imports on the fly’ and ‘Optimise imports on the fly’ for both Java and Kotlin then press Apply and OK.
Android Studio should now add most of the necessary import statements to your Kotlin class files automatically. Sometimes there are multiple classes with the same name and the Auto Import feature will not work. In these instances, the requisite import statement(s) will be specified explicitly in the example code. You can also refer to the finished project code to find the complete files including all import statements.
Configuring the Grade scripts
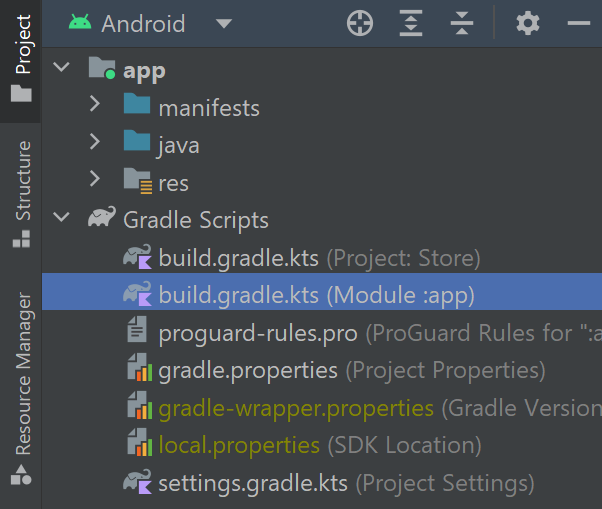
For the Store app to perform all the operations we want it to, we must manually import some external packages using a toolkit called Gradle. To do this, navigate through Project > Gradle Scripts and open the Module-level build.gradle.kts file:
Next, refer to the dependencies element and add the following code to the list of implementation statements:
implementation("com.github.bumptech.glide:glide:4.11.0")
implementation("androidx.preference:preference-ktx:1.2.0")
implementation("com.loopj.android:android-async-http:1.4.9")
implementation("com.braintreepayments.api:paypal:4.39.0")
implementation("com.braintreepayments.api:data-collector:4.40.1")
The above implementation statements enable the app to access an image rendering tool called Glide, a shared preferences feature that will allow the app to write data to a file that is readily accessible across every area of the app and persists when the app is closed, an asynchronous HTTP client that can interact with web pages, and several Braintree payments packages that process PayPal payments and handle user data.
We’re now finished with the Gradle Scripts files. Don’t forget to re-sync your project when prompted!

Configuring the manifest file
We’ll now turn our attention to the application's manifest file, which contains an overview of the app’s activities, as well as the user permissions the app requires to run. Open the AndroidManifest.xml file by navigating through Project > app > manifests then add the following line of code above the application element:
<uses-permission android:name="android.permission.INTERNET" />The above uses-permission element signals to the device (and the Google Play store) that this app will require access to the internet.
Next, locate the activity element. You should notice an intent filter. Intent filters define actions that the parent component can respond to. In this case, the parent component is the MainActivity class. We need to define an additional intent filter for the MainActivity class so the user can return to the app after completing a payment using Braintree. For instance, PayPal, Venmo and 3D secure verification will require a browser window to open for payment authentication. To redirect users back to the app, add the following code below the existing intent filter:
<intent-filter>
   <action android:name="android.intent.action.VIEW" />
   <category android:name="android.intent.category.DEFAULT" />
   <category android:name="android.intent.category.BROWSABLE" />
   <data android:scheme="${applicationId}.braintree" />
</intent-filter>
The above code defines a URL scheme that the MainActivity class can use to return the user to the app once payment has been authenticated.
Defining the String resources used in the app
Like the other projects on this website, the Store app will store all the strings of text used throughout the application in a resource file. To define the string resources, navigate through Project > app > res and open the file called strings.xml. Once the file opens in the editor, modify its contents so it reads as follows:
<resources>
   <string name="app_name">Store</string>
   <string name="product_price">%1$s%2$s</string>
   <string name="pay_using_paypal">Pay with PayPal</string>
   <string name="paypal_error">A PayPal authentication error has occurred: %1$s</string>
   <string name="payment_error">Unfortunately there was an error processing the payment.</string>
   <string name="payment_successful">Congratulations! Your order has been placed successfully.</string>
   <string name="title_products">Products</string>
   <string name="title_checkout">Checkout</string>
   <string name="an_image_of_the_product">product_image</string>
   <string name="add_to_basket">Add to basket</string>
   <string name="remove_from_basket">Remove from basket</string>
   <string name="exchange_data_unavailable">Exchange rate data currently unavailable. Please try again shortly.</string>
   <string name="select_currency">Select currency</string>
   <string name="order_total">Order total: %1$s</string>
   <string name="empty_cart">Your cart is empty.</string>

   <!-- TODO: Create a string title for each currency your store supports -->
   <string name="currency_gbp">Pound Sterling (£)</string>
   <string name="currency_usd">United States Dollar ($)</string>
   <string name="currency_eur">Euro (€)</string>
</resources>
Each string resource contains a name attribute, which we will use to reference the string elsewhere in the app. The text that will be displayed is input between the opening and closing string tags. You may notice that the product_price and order_total strings contain code in the format ‘%1$s’. These sections of code represent arguments that must be supplied when the string is created. The ‘%1’ part represents the argument number, so will increase incrementally for each new argument that is added to the string e.g. ‘%1’, %2’, ‘%3’ etc. The second part of the argument indicates what data type is expected: ‘$s’ represents a string, while ‘$d’ represents a decimal integer and ‘$.nf’ represents a floating number rounded to a certain number of decimal places (replace ‘n’ with the number of decimal places e.g. ‘$.2f’). For example, in the above code, we can see the product_price string expects two string arguments. The first argument will display the currency symbol while the second argument will specify the price. To build the product_price string, you could write the following Kotlin code:
getString(R.string.product_price,"£", "17.99")The above line imports the product_price string and supplies “£” as argument 1 and “17.99” as argument 2. The output string of the above code would be “£17.99”.
At the bottom of the strings.xml file, you should see a TODO comment that indicates where you should include a list of string resources detailing each currency that the app supports. These strings will populate the text in currency conversion buttons that the customer can use to change the currency that your products are priced. In this project, the app will support Pound Sterling, United States Dollar and Euro but you can add or remove currencies to suit your business requirements.
Setting up the Products fragment and layout
In this section, we will create a fragment that lists the catalogue of available products and allows the user to add items to their shopping basket. When we created the project using the Bottom Navigation Activity template, Android Studio automatically generated three fragment packages. You can locate them by navigating through Project > app > java > name of the project > ui.
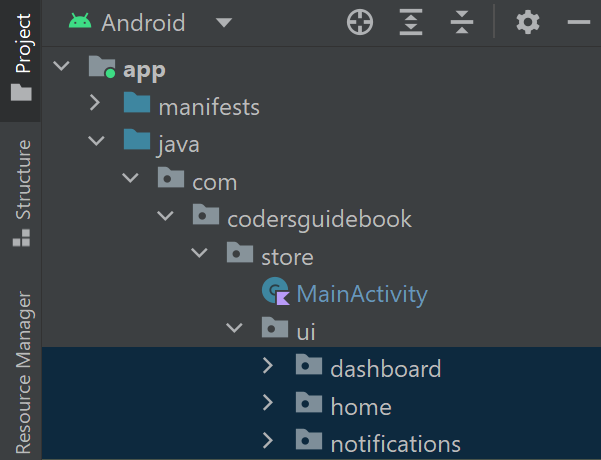
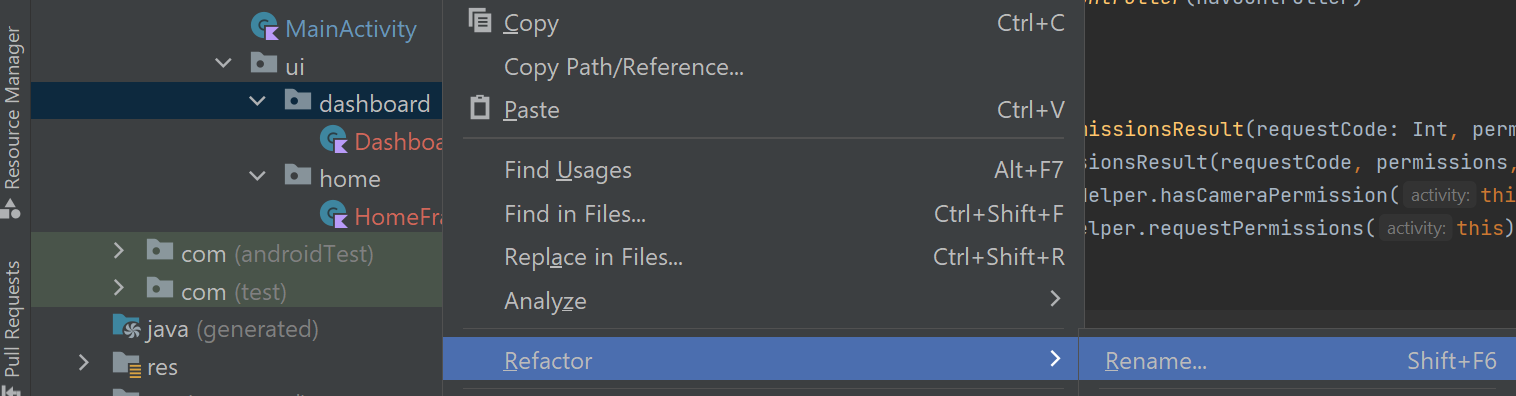
For this app, we will only require two fragments, so right-click one of the packages (e.g. notifications) and press Delete. Of the remaining two packages, we will not require either of the view models, so expand the dashboard and home directories, right-click the DashboardViewModel.kt and HomeViewModel.kt files and press Delete. Next, we need to rename the remaining fragment files to suit our application. Android Studio provides a Refactor tool that allows you to rename an item (e.g. a file, variable or class) and automatically update all in-code references to the item with the new information. To refactor the dashboard package and repurpose it for the products fragment, right-click the dashboard directory then press Refactor > Rename.
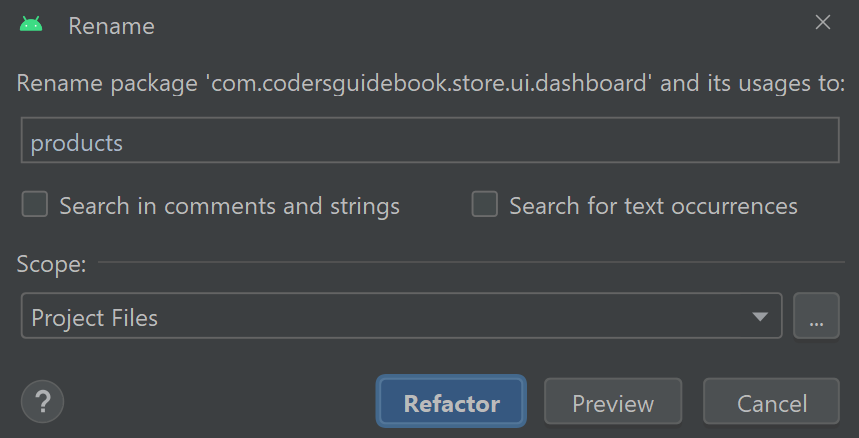
Change the name to products then press Refactor.
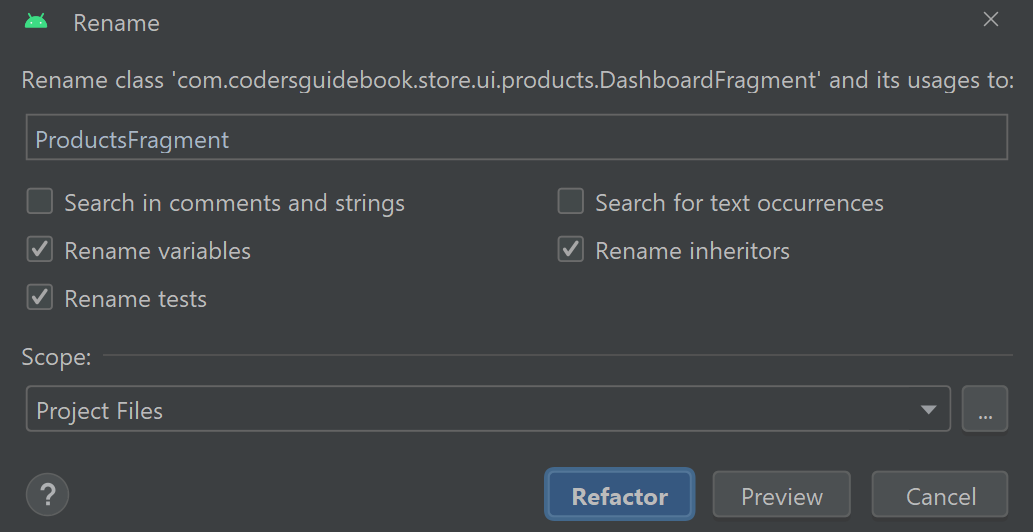
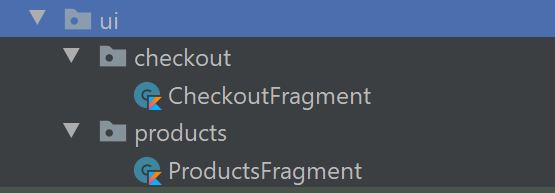
Next, right-click the DashboardFragment.kt file and again select Refactor > Rename. Set the new name to ProductsFragment then press Refactor.
The products fragment and directory have now been successfully refactored. While we’re here, it may be a good opportunity to also prepare the Checkout fragment. To do this, refactor the home directory to checkout and refactor the HomeFragment file to CheckoutFragment.
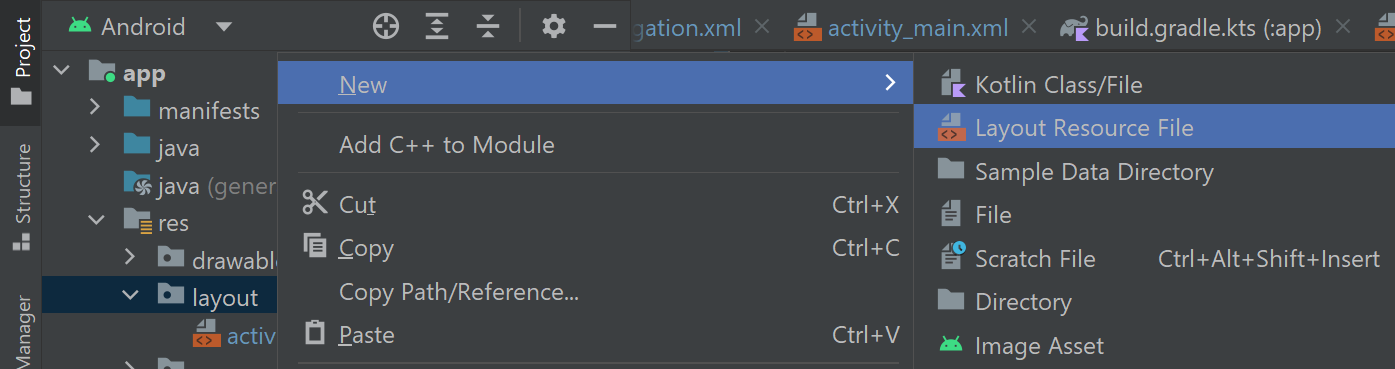
The products fragment will require a layout, so locate the layout folder by navigating through Project > app > res. The readymade fragment_dashboard.xml, fragment_home.xml and fragment_dashboard.xml files can be deleted because we will not use them. Instead, create a new layout file by right-clicking the layout folder and selecting New > Layout Resource File.
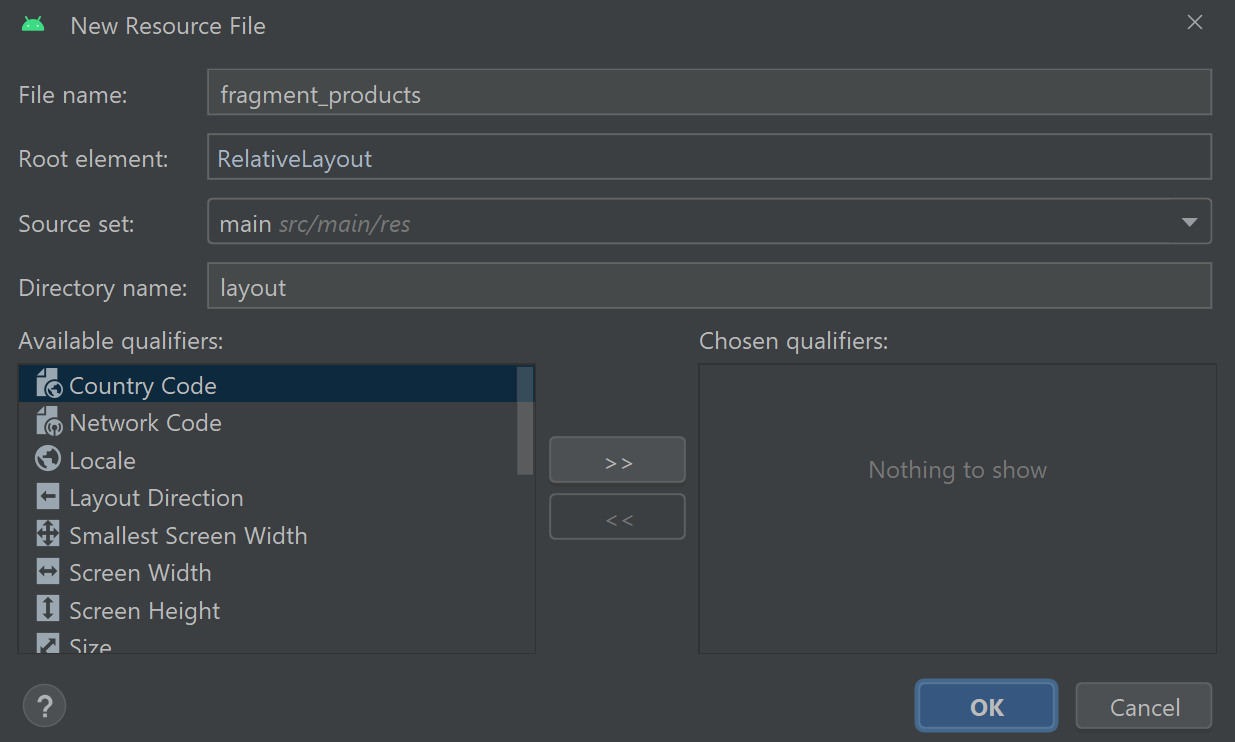
Name the file fragment_products, set the root element to RelativeLayout then press OK.
Once the fragment_products.xml file opens in the editor, add the following code inside the RelativeLayout element:
<androidx.recyclerview.widget.RecyclerView
   android:id="@+id/productsRecyclerView"
   android:visibility="gone"
   android:layout_width="match_parent"
   android:layout_height="match_parent"
   app:layoutManager="androidx.recyclerview.widget.LinearLayoutManager" />

<ProgressBar
   android:id="@+id/loadingProgress"
   android:layout_width="wrap_content"
   android:layout_height="wrap_content"
   android:indeterminate="true"
   android:layout_centerInParent="true" />
Note you may need to also add the following namespace declaration to the opening RelativeLayout tag:
xmlns:app="http://schemas.android.com/apk/res-auto"The above code defines a RecyclerView widget that will display the details of each available product. Initially, the RecyclerView will be hidden because its visibility is set to gone. The RecyclerView is hidden because the products fragment will not display the list of products until it has connected to the currency exchange API and calculated the price of each product. For this reason, the layout also contains a ProgressBar widget with an indeterminate attribute set to true. This means the progress bar will continuously loop like a loading symbol until the list of products is ready. Once the price of each product has been calculated, the ProgressBar will disappear and the RecyclerView will become visible. To position the ProgressBar widget in the center of the RelativeLayout container, we set the ProgressBar’s centerInParent attribute to true.
The layout for the camera fragment is now complete. To integrate the layout with the fragment, open the ProductsFragment.kt file and replace the _binding variable at the top of the class with the following code:
private var _binding: FragmentProductsBinding? = null
private lateinit var mainActivity: MainActivity
The above variables allow the fragment to access the data and methods in the fragment_products.xml layout’s binding class and the MainActivity class, respectively. To initialise the variables, edit the onCreateView method so it reads as follows:
override fun onCreateView(
       inflater: LayoutInflater,
       container: ViewGroup?,
       savedInstanceState: Bundle?
): View {
   _binding = FragmentProductsBinding.inflate(inflater, container, false)

   mainActivity = activity as MainActivity

   return binding.root
}
The above code creates a binding instance between the ProductsFragment and the fragment_products.xml layout via the layout’s FragmentProductsBinding binding class. The fragment can use the binding class to interact with the layout and its widgets.
Storing product information
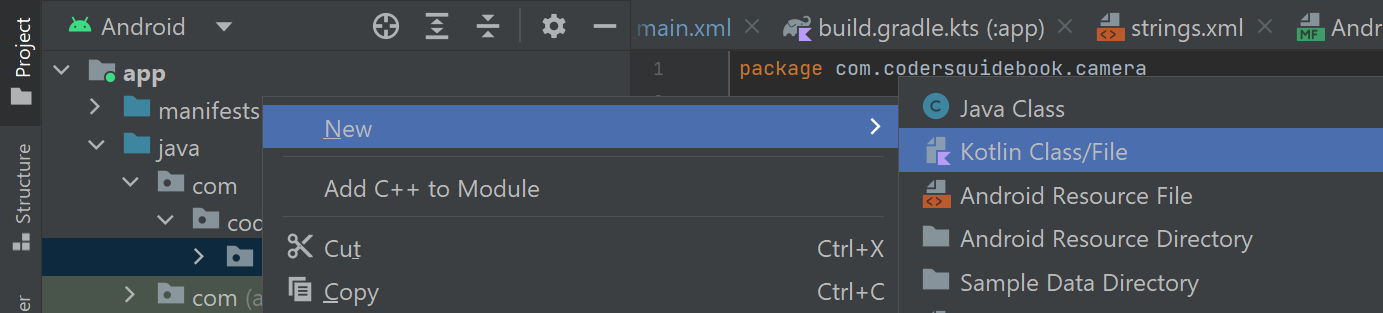
The details of each product will be stored as objects of a data class. The data class will be called Product and will have separate fields for each item of information such as the product’s name, price and image. To create the Product data class, navigate through Project > app > java then right-click the folder with the name of the project and select New > Kotlin File/Class.
Name the file Product and select Data Class from the list of options.
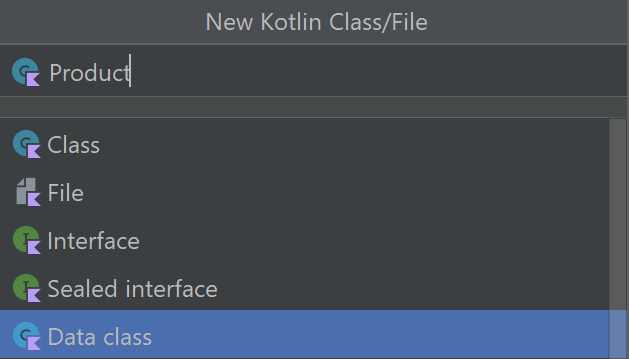
A file called Product.kt should then open in the editor. Modify the class so its code reads as follows:
data class Product(
   // In this app the images used are saved within the app as drawable resources.
   // In a live app you may instead prefer to store a link (as a String) to an image stored online (e.g. on your website server)
   var image: Int,
   var name: String,
   // Note the price of each product should be input in the base currency of the store
   var price: Double,
   var inCart: Boolean = false
)
The above code defines a data class that will hold information about each available product. The data class’s primary constructor contains four parameters, each storing a different bit of data about the product. First, the image variable will store an integer value that will identify the drawable resource file that will be used as the product’s image. Referencing a drawable resource assumes that the image file is included within the app. If your store will be retrieving product images from the internet then it may be preferable to change the data type of the image variable to ‘String’ so you can store a link to the online image.
var image: StringNext, the name variable will store the name of the product, the price variable will contain the price of the product in the base currency of the store, and the inCart variable will store a boolean value indicating whether or not the product is currently in the user’s shopping cart. By default, the inCart variable is set to false because products will not automatically be added to the customer’s shopping cart.
As mentioned above, for this example project the images for each product will be stored as drawable resources within the app. Specifically, the example store will allow the user to shop for broccoli, carrots and strawberries. If you would like to add the drawable resources for these products to your project, then you will need to copy the source files from the example code into the drawable folder of your project. To locate the drawable files in the example code, navigate through the following folders: app > src > main > res > drawable. The files you should copy are highlighted below. You could also copy the unhighlighted files over; some are default drawable files created by Android Studio and others are drawable icon resources we will create later.
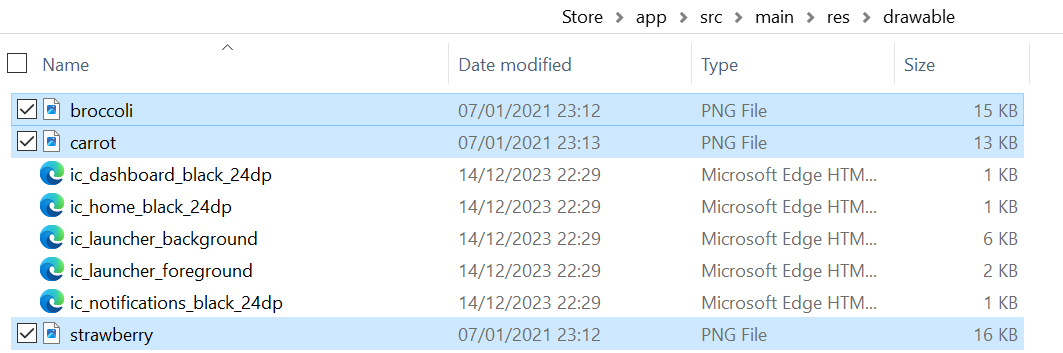
To copy image files into the Android Studio project, simply drag and drop them into the drawable directory as shown below:
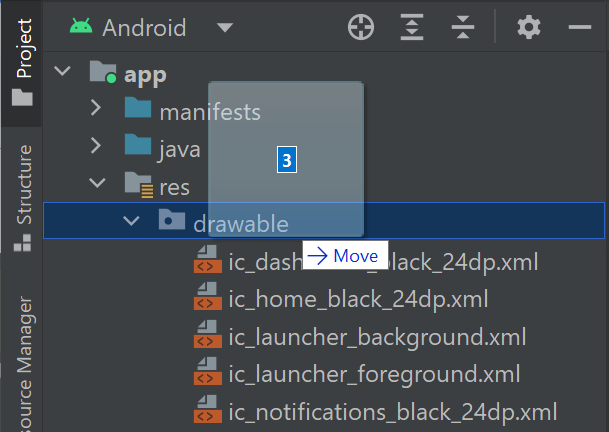
The broccoli, carrot and strawberry image source files were made by Icongeek26 from www.flaticon.com and are free for commercial use with attribution.
The list of available products will be managed by a view model. The view model will store the list of products and distribute the list’s contents to other areas of the app. To create the view model, right-click the folder that contains the MainActivity class (Project > app > java > name of the project) and select New > Kotlin File/Class. Name the file StoreViewModel and select Class from the list of options. Once the StoreViewModel.kt file opens in the editor, modify its code so it reads as follows:
class StoreViewModel : ViewModel() {
   var products = MutableLiveData<List<Product>>()
}
The above code defines a variable called products that will store a mutable list of Product objects. Other areas of the app can observe this list and monitor any changes. To initialise the view model in the MainActivity class, open the MainActivity.kt file (Project > app > java > name of the project) and add the following variable to the top of the class:
private val storeViewModel: StoreViewModel by viewModels()Next, add the following code to the bottom of the onCreate method to populate the view model’s products variable with Product objects:
/* FIXME: Here we manually define a list of products
   In reality, you may want to retrieve product information in real-time from your website. */
val broccoli = Product(R.drawable.broccoli, "Broccoli", 1.40)
val carrots = Product(R.drawable.carrot, "Carrots", 0.35)
val strawberries = Product(R.drawable.strawberry, "Strawberries", 2.00)
storeViewModel.products.value = listOf(broccoli, carrots, strawberries)
The above code defines separate instances of the Product class for the broccoli, carrots and strawberries products. To construct each Product object, we must provide the ID of the drawable resource that will be used for the image (R.drawable.broccoli), the name of the product (“Broccoli”) and the price of the product in the base currency of the store (1.40). We do not need to provide a value for the inCart parameter because it is false by default, as specified in the Product data class primary constructor. Once all the Product objects have been created, they are added to a list and assigned to the StoreViewModel class’s products variable so they can be accessed elsewhere in the app.
N.B. For this example project, the details of each product are predefined in the MainActivity class. In reality, you will likely want to retrieve the product information from your website server. There are a variety of ways you can do this, including using an HTTP client to query a web page and retrieve product data. We will discuss how to use an HTTP client in upcoming sections with regards to querying the Braintree and currency exchange APIs, so you can apply this logic to query your website and retrieve product information.
Displaying products in the Products fragment
In this section, we will load the list of products from the view model into the RecyclerView widget in the fragment_products.xml layout. To facilitate this, we need to create a layout that will display information about each product. Create a new layout resource file by right-clicking the layout directory (Project > app > res) and then selecting New > Layout Resource File. Name the layout product then press OK. Once the layout opens in the editor, switch it to Code view and edit the file so it reads as follows:
<?xml version="1.0" encoding="utf-8"?>
<androidx.cardview.widget.CardView xmlns:android="http://schemas.android.com/apk/res/android"
xmlns:app="http://schemas.android.com/apk/res-auto"
android:layout_width="match_parent"
android:layout_height="wrap_content"
android:layout_margin="16dp"
app:cardCornerRadius="10dp"
app:cardElevation="2dp">
<LinearLayout
android:layout_width="wrap_content"
android:layout_height="wrap_content"
android:layout_gravity="center"
android:layout_marginVertical="6dp"
android:orientation="vertical" >
<ImageView
android:id="@+id/productImage"
android:layout_width="wrap_content"
android:layout_height="wrap_content"
android:layout_gravity="center_horizontal"
android:contentDescription="@string/an_image_of_the_product" />
<TextView
android:id="@+id/productName"
android:layout_width="wrap_content"
android:layout_height="wrap_content"
android:layout_gravity="center_horizontal"
android:textColor="@color/material_on_surface_emphasis_high_type"
android:textSize="16sp" />
<TextView
android:id="@+id/productPrice"
android:layout_width="wrap_content"
android:layout_height="wrap_content"
android:layout_gravity="center_horizontal"
android:textColor="@color/material_on_surface_emphasis_medium"
android:textSize="14sp" />
<Button
android:id="@+id/addToBasketButton"
android:layout_width="wrap_content"
android:layout_height="wrap_content"
android:layout_gravity="center_horizontal"
android:text="@string/add_to_basket" />
</LinearLayout>
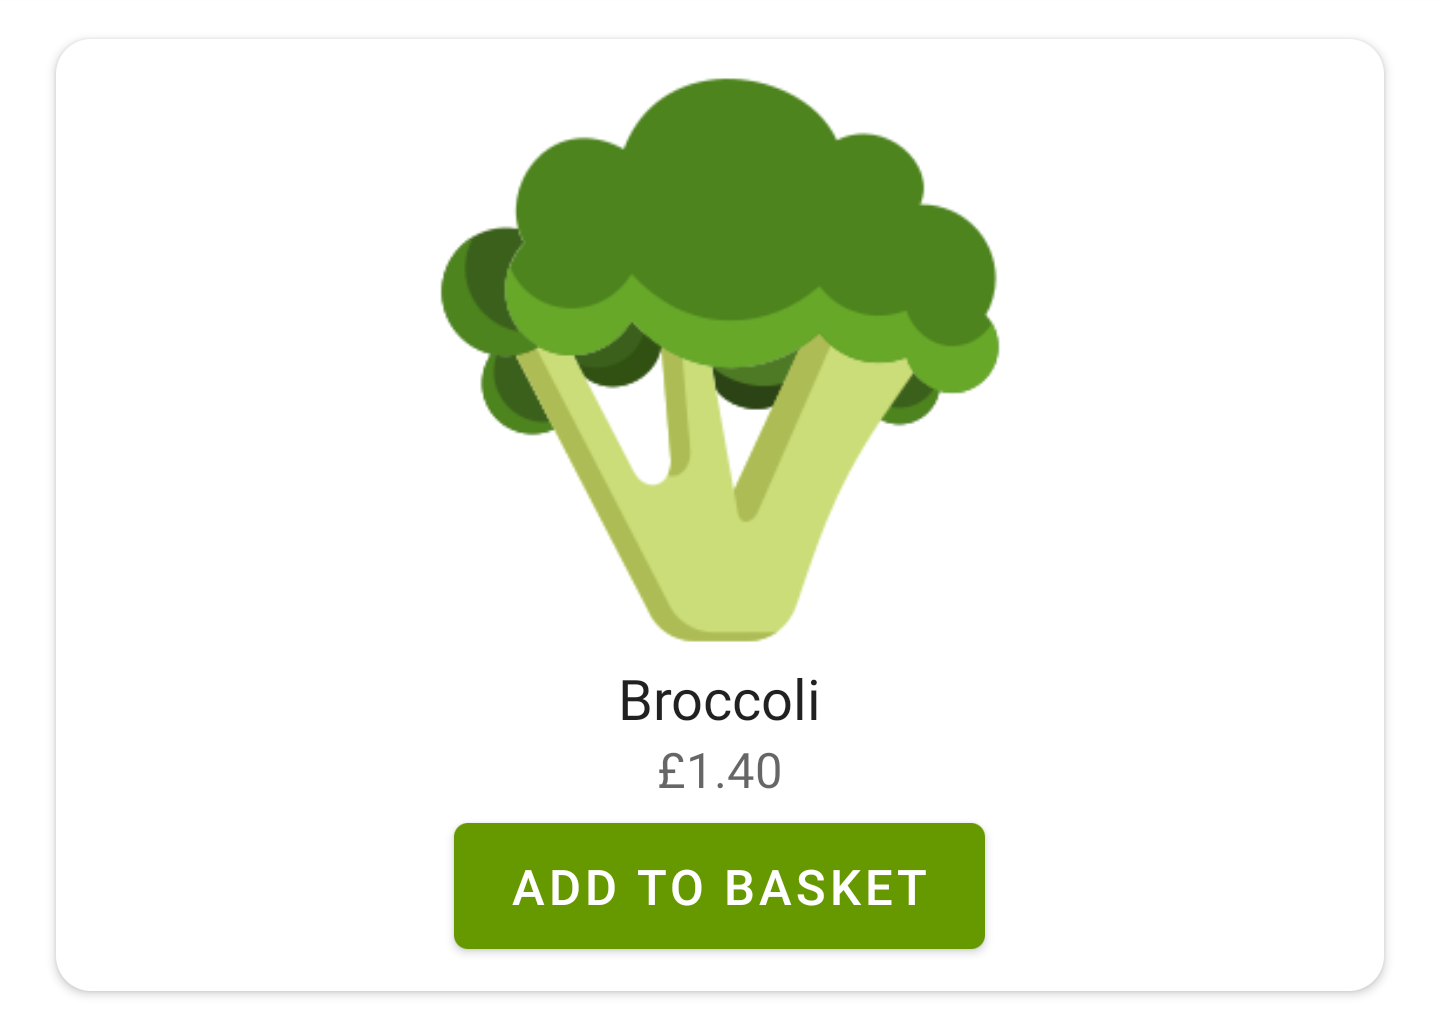
</androidx.cardview.widget.CardView>The root element of the product layout is a CardView widget. Card-based layouts appear slightly elevated above their containing view group (the RecyclerView in this instance) and allow you to display a list of items while keeping the style of each item consistent. In the above code, the CardView contains a LinearLayout widget that vertically aligns an ImageView widget, two TextView widgets and a Button widget. The ImageView widget will display an image of the product, while the two TextView widgets will display the product’s name and price, respectively. Finally, the Button widget will enable the user to add or remove the product from their shopping basket.
Moving on, let’s create an adapter that will coordinate the list of Product objects and load their information into the RecyclerView. To create the adapter class, right-click the products directory then select New > Kotlin Class/File. Name the file ProductsAdapter and select Class from the list of options. Once the ProductsAdapter.kt file opens in the editor, modify the class so it reads as follows:
class ProductsAdapter(private val activity: MainActivity, private val fragment: ProductsFragment) : RecyclerView.Adapter<ProductsAdapter.ProductsViewHolder>() {
   val products = mutableListOf<Product>()

   inner class ProductsViewHolder(itemView: View) :
       RecyclerView.ViewHolder(itemView) {

       internal var productImage = itemView.findViewById<ImageView>(R.id.productImage)
       internal var productName = itemView.findViewById<TextView>(R.id.productName)
       internal var productPrice = itemView.findViewById<TextView>(R.id.productPrice)
       internal var addToBasketButton = itemView.findViewById<Button>(R.id.addToBasketButton)
   }
}
The above code adds parameters called activity and fragment to the ProductAdapter class’s primary constructor. The parameters will store references to the MainActivity and ProductsFragment classes, respectively. In the body of the adapter, a variable called products will store the list of Product objects from the view model. Next, an inner class called ProductsViewHolder is established. This inner class will initialise the product.xml layout and store references to its widgets in variables so the adapter can interact with the widgets elsewhere.
To direct the adapter to use the product.xml layout, we must inflate the layout by overriding the Adapter class’s onCreateViewHolder method. To do this, add the following code below the ProductsViewHolder inner class:
override fun onCreateViewHolder(parent: ViewGroup, viewType: Int): ProductsViewHolder {
   return ProductsViewHolder(LayoutInflater.from(parent.context).inflate(R.layout.product, parent, false))
}
Next, to load the product data associated with each item in the RecyclerView, we need to override an Adapter class method called onBindViewHolder. To do this, add the following code below the onCreateViewHolder method:
override fun onBindViewHolder(holder: ProductsViewHolder, position: Int) {
   val current = products[position]

   Glide.with(activity)
       .load(current.image)
       .transition(DrawableTransitionOptions.withCrossFade())
       .centerCrop()
       .override(600, 600)
       .into(holder.productImage)

   holder.productName.text = current.name

   // TODO: Set the price of the product here

   if (current.inCart) {
       holder.addToBasketButton.text = activity.resources.getString(R.string.remove_from_basket)
       holder.addToBasketButton.setBackgroundColor(ContextCompat.getColor(activity, android.R.color.holo_red_dark))
   } else {
       holder.addToBasketButton.text = activity.resources.getString(R.string.add_to_basket)
       holder.addToBasketButton.setBackgroundColor(ContextCompat.getColor(activity, android.R.color.holo_green_dark))
   }

   holder.addToBasketButton.setOnClickListener {
       fragment.toggleInCart(position)
   }
}
In the above code, the onBindViewHolder method loads the corresponding Product object from the products list for the current position in the RecyclerView. Next, an image-loading framework called Glide retrieves the drawable resource referenced in the Product object’s image parameter and displays it in the productImage ImageView. The above code also directs Glide to apply a fade animation when loading the image, crop the image if necessary and set the image’s dimensions to 600 pixels * 600 pixels. Next, the name of the product is loaded into the productName TextView and the text and colour of the add to basket button are modified based on whether the inCart parameter of the Product object is true or false. If the product is currently in the user’s shopping basket, then the button will be red and display the text “Remove from basket”. Meanwhile, if the product is not in the user’s shopping basket, then the button will be green and display the text “Add to basket”. If the add to basket button is clicked, then a method in the ProductsFragment class called toggleInCart will add or remove the product from the customer’s shopping basket as appropriate.

To finalise the adapter, we need to define a method called getItemCount. The method will calculate how many items are loaded into RecyclerView. Invariably, the total number of items will equal the size of the products list, so define the getItemCount method by adding the following code below the onBindViewHolder method:
override fun getItemCount() = products.sizeMoving on, let’s integrate the adapter with the products fragment and apply it to the RecyclerView. To do this, open the ProductsFragment.kt file and add the following variables to the list of variables at the top of the class:
private val storeViewModel: StoreViewModel by activityViewModels()
private lateinit var adapter: ProductsAdapter
The above variables will allow the fragment to access and interact with the StoreViewModel and ProductsAdapter classes. Next, add the following code below the onCreateView method to direct the onViewCreated stage of the fragment lifecycle to initialise the ProductsAdapter class and apply it to the RecyclerView:
override fun onViewCreated(view: View, savedInstanceState: Bundle?) {
   super.onViewCreated(view, savedInstanceState)

   adapter = ProductsAdapter(mainActivity, this)
   binding.productsRecyclerView.itemAnimator = DefaultItemAnimator()
   binding.productsRecyclerView.adapter = adapter
}
In the above code, the ProductsAdapter class is initialised and applied to the RecyclerView widget from the fragment_products.xml layout. Next, an instance of the DefaultItemAnimator class is applied to the RecyclerView, which will provide some basic animations when items are added, removed or updated.
To load the products from the StoreViewModel view model into the adapter, add the following code to the bottom of the onViewCreated method:
storeViewModel.products.value?.let { adapter.products.addAll(it) }
adapter.notifyItemRangeInserted(0, adapter.products.size)
The above code adds all the products from the StoreViewModel view model’s products variable to the ProductsAdapter adapter’s products variable. It then calls the adapter’s notifyItemRangeInserted method to load the products into the RecyclerView widget from the fragment_products layout and display them to the user.
Finally, let’s define a method called toggleInCart that the ProductsAdapter class will run whenever the user clicks the add to basket button for a given product. To define the toggleInCart method, add the following code below the onViewCreated method:
fun toggleInCart(index: Int) {
   adapter.products[index].inCart = !adapter.products[index].inCart
   adapter.notifyItemChanged(index)

   storeViewModel.products.value = adapter.products
   storeViewModel.calculateOrderTotal()
}
The toggleInCart method requires an integer to be supplied as a parameter. The integer will specify the index of the selected product within the overall list of products. Once the product index has been supplied, the updateCart method toggles the inCart field for the selected product from true to false or vice versa. This process effectively adds or removes the product from the customer’s shopping cart. Next, the updated list of products is uploaded to the StoreViewModel view model. A StoreViewModel method that we will define later called calculateOrderTotal will then recalculate the total price of the customer’s order.
Using the currency exchange rate API
The app will allow the customer to shop in different currencies. If the customer changes the currency, the app will retrieve the live exchange rate from the store’s base currency to their selected currency and update all the product prices accordingly. The currency exchange rate API we will use in this project can be found on this website: https://api.exchangerate-api.com/. To use the API, you must first create a free account by completing the sign-up form. Free accounts can submit 1500 API calls a month, which is sufficient for this example project. Once you have signed up, log in to your account dashboard and make a note of your API key.

Let’s now write the code that handles changes in the currency used in the store. Return to Android Studio and create a new Kotlin class by right-clicking the directory that contains MainActivity and selecting New > Kotlin Class/File. Name the file Currency and select Data Class from the list of options. Once the Currency.kt file opens in the editor, modify its code so it reads as follows:
data class Currency(
   var code: String,
   var symbol: String,
   var exchangeRate: Double?
)
The Currency data class will store information about the active currency. Specifically, it will store the three-digit ISO code that identifies the currency (a list of ISO codes supported on the currency exchange API website), the symbol that represents the currency (e.g. £ for GBP) and the exchange rate (if applicable).
Once the Currency data class is in place, open the MainActivity.kt file and add the following variables to the top of the class:
// TODO: put the ISO code for your store's base currency as the value of the defCurrency variable
private val defCurrency = "GBP"
private var exchangeData: JSONObject? = null
private lateinit var sharedPreferences: SharedPreferences
The defCurrency variable in the above code will contain the three-digit ISO code for the base currency of the store. Currently, the base currency is Great British Pounds, but you may need to change the ISO code if your store will use a different base currency. A full list of accepted ISO codes can be found on the exchange rate API website. The other variables will store the JSON output the app receives following an exchange rate API request and a SharedPreferences class that we will use to record the user’s currency preference.
To initialise the sharedPreferences variable and request exchange rate data when the app is launched, add the following code to the bottom of the onCreate method:
sharedPreferences = PreferenceManager.getDefaultSharedPreferences(this)
getCurrencyData()
Note you may need to add the following import statement to the top of the file:
import androidx.preference.PreferenceManagerExchange rate data will be retrieved by a method called getCurrencyData. To define the getCurrencyData method, add the following code below the onCreate method:
private fun getCurrencyData(): JSONObject? {
   val client = AsyncHttpClient()

   // TODO: Replace YOUR-API-KEY-HERE with your exchange rate API key
   client.get("https://v6.exchangerate-api.com/v6/YOUR-API-KEY-HERE/latest/$defCurrency", object : TextHttpResponseHandler() {
       override fun onSuccess(statusCode: Int, headers: Array<out Header>?, responseString: String?) {
           if (responseString != null) {
               exchangeData = JSONObject(responseString)
               val currencyPreference = sharedPreferences.getString("currency", defCurrency) ?: defCurrency
               setCurrency(currencyPreference)
           }
       }

       override fun onFailure(statusCode: Int, headers: Array<out Header>?, responseString: String?, throwable: Throwable?) {
           Toast.makeText(this@MainActivity, resources.getString(R.string.exchange_data_unavailable), Toast.LENGTH_SHORT).show()
           setCurrency(defCurrency)
       }
   })

   return null
}
Note you may need to add the following import statement to the top of the file:
import cz.msebera.android.httpclient.HeaderThe getCurrencyData method builds an instance of the AsyncHttpClient class that will be used to communicate with the exchange rate API. The AsyncHttpClient object will request data via a URL that uses the ISO code associated with the store’s base currency as the endpoint. Using the store’s base currency ISO code as the endpoint instructs the exchange rate API to return all the exchange rates associated with your store’s default currency. Note you will need to replace the YOUR-API-KEY-HERE part of the URL with your API key from the exchange rate API website dashboard. The AsyncHttpClient object will request data from the URL asynchronously, which means the app will process the request without blocking other application processes while it awaits a response.
To define the setCurrency method, add the following code below the getCurrencyData method:
private fun setCurrency(isoCode: String) {
   val exchangeRate = exchangeData?.getJSONObject("conversion_rates")?.getDouble(isoCode)

   // TODO: Define the base currency here
   var currency = Currency(defCurrency, "£", null)
   if (exchangeRate != null) {
       when (isoCode) {
           // TODO: Define each additional currency your store supports here
           "USD" -> currency = Currency(isoCode, "$", exchangeRate)
           "EUR" -> currency = Currency(isoCode, "€", exchangeRate)
       }
   }

   sharedPreferences.edit().apply {
      putString("currency", isoCode)
      apply()
   }

   storeViewModel.currency.value = currency
   storeViewModel.calculateOrderTotal()
}
The setCurrency method begins by determining the exchange rate from the store’s base currency to the user’s selected currency. This is achieved by retrieving the conversion_rates JSON object from the exchange rate API output. An example of what the exchange rate API call output looks like when USD is the base currency is included below. By way of illustration, to retrieve the exchange rate from USD to AUD, the setCurrency method would search the conversion_rates JSON object to find the value assigned to the AUD key, which in the below example is 1.4817. If exchange rate data is not available, then the value of the exchangeRate variable will be null.
{
	"result": "success",
	"documentation": "https://www.exchangerate-api.com/docs",
	"terms_of_use": "https://www.exchangerate-api.com/terms",
	"time_last_update_unix": 1585267200,
	"time_last_update_utc": "Fri, 27 Mar 2020 00:00:00 +0000",
	"time_next_update_unix": 1585353700,
	"time_next_update_utc": "Sat, 28 Mar 2020 00:00:00 +0000",
	"base_code": "USD",
	"conversion_rates": {
		"USD": 1,
		"AUD": 1.4817,
		"BGN": 1.7741,
		"CAD": 1.3168,
		"CHF": 0.9774,
		"CNY": 6.9454,
		"EGP": 15.7361,
		"EUR": 0.9013,
		"GBP": 0.7679,
		"...": 7.8536,
		"...": 1.3127,
		"...": 7.4722, etc. etc.
	}
}
Once the exchange rate has been determined, the Currency object for the store’s default currency is generated and assigned to a variable called currency. The value of the currency variable is overwritten by a when block if the user selects another currency and exchange rate data is available. The when block generates a corresponding Currency object for the user’s selected currency based on its ISO code. You should add a separate option to the when block for each additional currency your store supports. For both the default and optional Currency objects, you should modify the currency symbol (e.g. ‘$’), as appropriate.
The setCurrency method ends by writing the user’s selected currency ISO code to the shared preferences file under a key called currency. In doing so, the user’s currency preference can be retrieved whenever needed. Finally, the Currency object associated with the active currency is dispatched to the StoreViewModel view model so it can be used elsewhere in the app. To configure the view model to accept the Currency object, open the StoreViewModel.kt file and add the following variable to the top of the class:
var currency = MutableLiveData<Currency?>(null)Changing the active currency
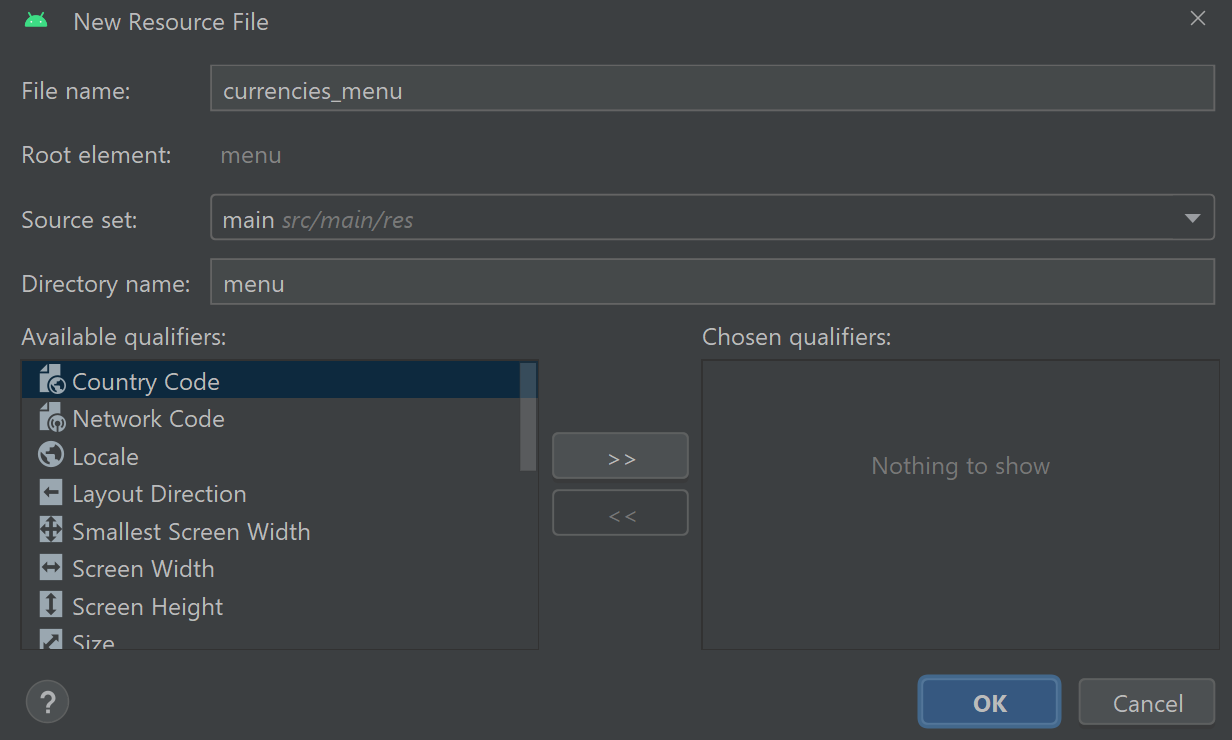
The user can change the currency using an overflow menu in the app toolbar. To design the overflow menu, create a menu resource file by right-clicking the menu folder (Project > app > res) and selecting New > Menu Resource File. Name the file currencies_menu then press OK.
Open the currencies_menu.xml file in Code view and add the following code inside the menu element:
<item android:title="@string/select_currency" >
   <menu>
       <!-- TODO: Create a menu item for each currency that your store supports -->
       <item
           android:id="@+id/currency_gbp"
           android:title="@string/currency_gbp" />
       <item
           android:id="@+id/currency_usd"
           android:title="@string/currency_usd" />
       <item
           android:id="@+id/currency_eur"
           android:title="@string/currency_eur" />
   </menu>
</item>
The above code defines a menu item that will display the text ‘Select currency’. If the user clicks the item, then a submenu will expand showing all the available currencies. For each currency your store supports, you will need to define a separate menu item in the submenu. The above example code shows you how to create menu items for three currencies: GBP, USD and EUR.

To handle user interactions, return to the MainActivity class and add the following code below the onCreate method:
override fun onCreateOptionsMenu(menu: Menu): Boolean {
   menuInflater.inflate(R.menu.currencies_menu, menu)
   return super.onCreateOptionsMenu(menu)
}
The onCreateOptionsMenu method defined above uses the MenuInflater class to load the contents of the currencies_menu.xml resource file and use it as an overflow menu for the app toolbar. The menu will be accessible across all fragments in the app (unless directed otherwise). To define what action should occur when a menu item is clicked, add the following code below the onCreateOptionsMenu method:
override fun onOptionsItemSelected(item: MenuItem): Boolean {
   if (exchangeData == null) {
       Toast.makeText(this, resources.getString(R.string.exchange_data_unavailable), Toast.LENGTH_SHORT).show()
       getCurrencyData()
   } else {
       when (item.itemId) {
           // TODO: Configure each currency exchange menu item here
           R.id.currency_gbp -> setCurrency("GBP")
           R.id.currency_usd -> setCurrency("USD")
           R.id.currency_eur -> setCurrency("EUR")
       }
   }
   return super.onOptionsItemSelected(item)
}
The above code defines a method called onOptionsItemSelected, which first checks whether the app has up-to-date exchange rate data. If the data is not available, then a toast notification will ask the user to try again later. The getCurrencyData method will then attempt to request data from the exchange rate API. On the other hand, if exchange rate data is available, then a when block will send the corresponding ISO code for the user’s selected currency to the setCurrency method. The setCurrency method will then generate the appropriate Currency object and upload it to the StoreViewModel view model. Remember to add a separate entry to the when block for each currency your store supports, as shown above.
Updating the prices of products
The application will need to update the product prices whenever the user changes the currency. To handle the price updates, we will instruct the ProductsFragment class to register an observer on the StoreViewModel view model’s currency variable so that the fragment will be notified whenever the active Currency object updates. The ProductsFragment class can use the value of the Currency object’s exchangeRate field to update the price of each product. Open the ProductsAdapter.kt file (Project > app > java > name of the project > ui > products) and add the following variable below the products variable at the top of the class:
var currency: Currency? = nullNote you may need to add the following import statement to the top of the file, replacing the com.example.store part if your app uses a different package name. The package name of your app can be found in line 1 of the file:
import com.example.store.CurrencyThe currency variable will store a Currency object that the adapter will extract exchange rate data from. To calculate any necessary price adjustments, locate the adapter’s onBindViewHolder method and replace the TODO comment with the following code:
val price = if (currency?.exchangeRate == null) current.price
else current.price * currency?.exchangeRate!!

holder.productPrice.text = activity.resources.getString(R.string.product_price, currency?.symbol, String.format("%.2f", price))
The above code multiplies the price of each product by the exchange rate of the Currency object and assigns it to a variable called price. If the exchange rate is null then no price adjustment will occur. The updated price and symbol from the Currency object are then loaded into the product price TextView widget and displayed to the user.
To transfer the Currency object from the view model to the ProductsAdapter class, open the ProductsFragment class and add the following code to the bottom of the onViewCreated method:
storeViewModel.currency.observe(viewLifecycleOwner) { currency ->
   currency?.let {
       binding.productsRecyclerView.visibility = View.VISIBLE
       binding.loadingProgress.visibility = View.GONE
       if (adapter.currency == null || currency.symbol != adapter.currency?.symbol) {
           adapter.currency = currency
           adapter.notifyItemRangeChanged(0, adapter.itemCount)
       }
   }
}
The above code registers an observer on the StoreViewModel view model’s currency variable. The observer will detect whenever the value of the currency variable changes. When the app is first launched, the Currency object will be null. Also, the RecyclerView will not be visible and a loading symbol will appear instead. However, once a Currency object has been constructed, either for the store’s base currency or the user’s selected currency, the observer will retrieve the Currency object, hide the loading symbol and reveal the RecyclerView. The RecyclerView will contain the catalogue of products available in the store and the adapter will adjust their price according to the customer’s selected currency. Whenever the observer transfers a new Currency object to the adapter, it calls the adapter’s notifyItemRangeChanged method to refresh the products in the RecyclerView and prompt the adapter to recalculate their prices.
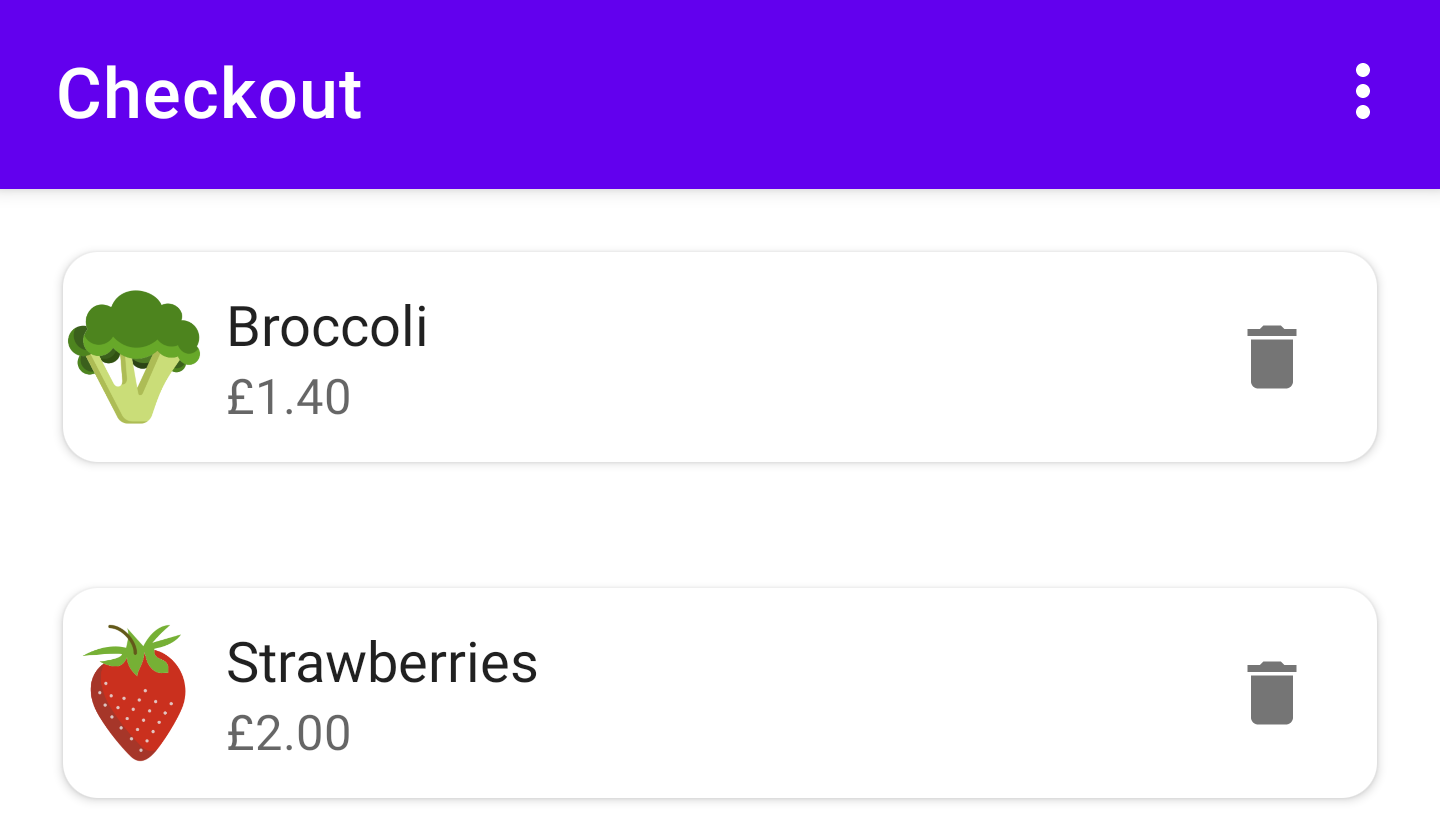
Setting up the Checkout fragment and layout
The user will be able to view all the products in their shopping basket and pay for their order in a dedicated checkout fragment. The checkout fragment will require a layout. To create the layout navigate through Project > app > res then right-click the layout folder and select New > Layout Resource File. Name the file fragment_checkout then click OK. Edit the code in the layout file so it reads as follows:
<?xml version="1.0" encoding="utf-8"?>
<androidx.constraintlayout.widget.ConstraintLayout xmlns:android="http://schemas.android.com/apk/res/android"
   xmlns:app="http://schemas.android.com/apk/res-auto"
   android:layout_width="match_parent"
   android:layout_height="match_parent" >

   <androidx.recyclerview.widget.RecyclerView
       android:id="@+id/cartRecyclerView"
       android:layout_height="0dp"
       android:layout_width="match_parent"
       app:layout_constraintTop_toTopOf="parent"
       app:layout_constraintBottom_toTopOf="@id/orderTotal"
       app:layoutManager="androidx.recyclerview.widget.LinearLayoutManager" />

   <TextView
       android:id="@+id/emptyCart"
       android:layout_width="wrap_content"
       android:layout_height="wrap_content"
       android:text="@string/empty_cart"
       app:layout_constraintStart_toStartOf="parent"
       app:layout_constraintTop_toTopOf="parent"
       app:layout_constraintEnd_toEndOf="parent"
       app:layout_constraintBottom_toBottomOf="parent" />

   <TextView
       android:id="@+id/orderTotal"
       android:layout_width="wrap_content"
       android:layout_height="wrap_content"
       android:layout_marginEnd="12dp"
       android:layout_marginBottom="8dp"
       android:textSize="16sp"
       app:layout_constraintEnd_toEndOf="parent"
       app:layout_constraintBottom_toTopOf="@id/payButton" />

   <Button
       android:id="@+id/payButton"
       android:text="@string/pay_using_paypal"
       android:layout_width="wrap_content"
       android:layout_height="wrap_content"
       android:layout_marginBottom="6dp"
       app:layout_constraintStart_toStartOf="parent"
       app:layout_constraintEnd_toEndOf="parent"
       app:layout_constraintBottom_toBottomOf="parent" />
</androidx.constraintlayout.widget.ConstraintLayout>
The root element of the fragment_checkout layout is a ConstraintLayout widget. The ConstraintLayout coordinates the following widgets: a RecyclerView, which will display a breakdown of the user’s shopping basket; a TextView, which will inform the user if their shopping basket is empty; another TextView, that will display the total price of the order; and a Button, that will allow the user to pay using PayPal. The RecyclerView widget will display a summary of each product in the user’s shopping basket. To initialise the RecyclerView widget, locate and open the CheckoutFragment.kt file by navigating through Project > app > java > name of the project > ui > checkout. Replace the _binding variable at the top of the class with the following code:
private var _binding: FragmentCheckoutBinding? = null
private val storeViewModel: StoreViewModel by activityViewModels()
private lateinit var mainActivity: MainActivity
The above variables will allow the fragment to access the contents of the fragment_checkout.xml layout via the layout’s binding class, and interact with the StoreViewModel and MainActivity classes. To initialise the variables, edit the onCreateView method so it reads as follows:
override fun onCreateView(
       inflater: LayoutInflater,
       container: ViewGroup?,
       savedInstanceState: Bundle?
): View {
   _binding = FragmentCheckoutBinding.inflate(inflater, container, false)

   mainActivity = activity as MainActivity

   return binding.root
}
The above code creates a binding instance between the CheckoutFragment class and the fragment_checkout.xml layout via the layout’s FragmentCheckoutBinding binding class. The fragment can use the binding class to interact with the layout and its widgets.
Preparing the Checkout adapter
In this section, we will load the contents of the user’s shopping basket into the RecyclerView widget from the fragment_checkout.xml layout. To facilitate this, we first need to create a layout that will hold information about each product. Create a new layout resource file by right-clicking the layout directory (found by navigating Project > app > res) and selecting New > Layout Resource File. Name the layout basket_product then press OK. Once the layout opens in the editor, switch it to Code view and edit the file so it reads as follows:
<?xml version="1.0" encoding="utf-8"?>
<androidx.cardview.widget.CardView xmlns:android="http://schemas.android.com/apk/res/android"
   xmlns:app="http://schemas.android.com/apk/res-auto"
   android:layout_width="match_parent"
   android:layout_height="wrap_content"
   android:layout_margin="18dp"
   app:cardCornerRadius="10dp"
   app:cardElevation="2dp">

   <androidx.constraintlayout.widget.ConstraintLayout
       android:layout_width="match_parent"
       android:layout_height="wrap_content"
       android:layout_gravity="center">

       <ImageView
           android:id="@+id/productImage"
           android:layout_width="0dp"
           android:layout_height="0dp"
           android:contentDescription="@string/an_image_of_the_product"
           app:layout_constraintDimensionRatio="1:1"
           app:layout_constraintStart_toStartOf="parent"
           app:layout_constraintTop_toTopOf="@id/productDetails"
           app:layout_constraintBottom_toBottomOf="@id/productDetails" />

       <LinearLayout
           android:id="@+id/productDetails"
           android:layout_width="0dp"
           android:layout_height="wrap_content"
           android:layout_marginHorizontal="6dp"
           android:orientation="vertical"
           app:layout_constraintEnd_toStartOf="@id/removeFromBasketButton"
           app:layout_constraintStart_toEndOf="@id/productImage"
           app:layout_constraintTop_toTopOf="parent"
           app:layout_constraintBottom_toBottomOf="parent">

           <TextView
               android:id="@+id/productName"
               android:layout_width="wrap_content"
               android:layout_height="wrap_content"
               android:textColor="@color/material_on_surface_emphasis_high_type"
               android:textSize="16sp" />

           <TextView
               android:id="@+id/productPrice"
               android:layout_width="wrap_content"
               android:layout_height="wrap_content"
               android:textColor="@color/material_on_surface_emphasis_medium"
               android:textSize="14sp" />
       </LinearLayout>

       <ImageButton
           android:id="@+id/removeFromBasketButton"
           android:layout_width="60dp"
           android:layout_height="60dp"
           android:src="@drawable/ic_delete"
           android:contentDescription="@string/remove_from_basket"
           android:backgroundTint="@android:color/transparent"
           android:foreground="?attr/selectableItemBackground"
           app:layout_constraintBottom_toBottomOf="parent"
           app:layout_constraintEnd_toEndOf="parent"
           app:layout_constraintTop_toTopOf="parent" />
   </androidx.constraintlayout.widget.ConstraintLayout>
</androidx.cardview.widget.CardView>
The root element of the basket_product layout is a CardView widget that will elevate the layout above the backdrop of the RecyclerView. The CardView widget also features a 10dp corner radius that will round the corners of the layout. Inside the CardView widget, a ConstraintLayout widget will coordinate the other widgets in the layout. The first widget is an ImageView that will display an image of the product. The ImageView widget has a constraintDimensionRatio of 1:1, which means the width of the image will equal its height and the image will appear as a square.
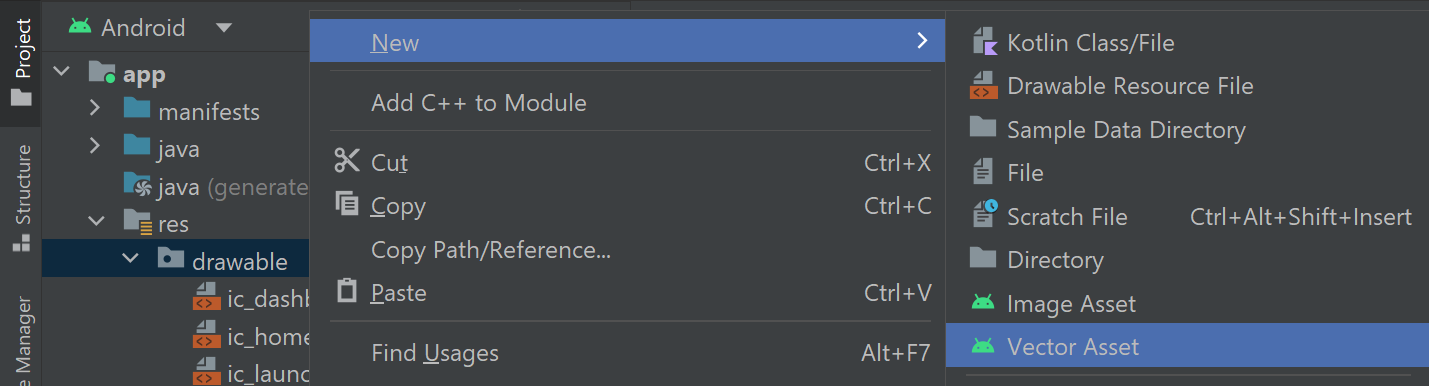
To the right-hand side of the product image, there is a vertically oriented LinearLayout widget containing two TextView widgets. The TextView widgets will display information about the name and price of the product. The LinearLayout is constrained so that it will sit between the product image on the left side of the layout and an ImageButton widget on the right side of the layout. The ImageButton will contain an image of a bin icon that will allow the user to remove the product from their shopping basket. We need to manually create the icon that will be used for the button. To do this, right-click the drawable folder (project > app > res) then select New > Vector Asset.
In the Asset Studio window, click the image of the Android next to the phrase Clip Art. Next, in the Select Icon window, search for and select the delete icon then click OK.
When you return to the Asset Studio window, set the name to ic_delete then press Next followed by Finish to save the icon.
Moving on, let’s create the adapter class that will coordinate the product summaries in the checkout fragment. Right-click the checkout directory then select New > Kotlin Class/File. Name the file CheckoutAdapter and select Class from the list of options. Once the CheckoutAdapter.kt file opens in the editor, edit the class’s code so it reads as follows:
// TODO: Note you may need to replace the 'com.example.store' part of the below import statement to reflect your app's project declaration as specified on line 1
import com.example.store.Currency

class CheckoutAdapter(private val activity: MainActivity, private val fragment: CheckoutFragment) : RecyclerView.Adapter<CheckoutAdapter.ProductsViewHolder>() {
   var products = mutableListOf<Product>()
   var currency: Currency? = null

   inner class ProductsViewHolder(itemView: View) :
           RecyclerView.ViewHolder(itemView) {

       internal var productImage = itemView.findViewById<ImageView>(R.id.productImage)
       internal var productName = itemView.findViewById<TextView>(R.id.productName)
       internal var productPrice = itemView.findViewById<TextView>(R.id.productPrice)
       internal var removeFromBasketButton = itemView.findViewById<ImageButton>(R.id.removeFromBasketButton)
   }

   override fun onCreateViewHolder(parent: ViewGroup, viewType: Int): ProductsViewHolder {
       return ProductsViewHolder(LayoutInflater.from(parent.context).inflate(R.layout.basket_product, parent, false))
   }

   override fun onBindViewHolder(holder: ProductsViewHolder, position: Int) {
       val current = products[position]

       Glide.with(activity)
               .load(current.image)
               .transition(DrawableTransitionOptions.withCrossFade())
               .centerCrop()
               .override(400, 400)
               .into(holder.productImage)

       holder.productName.text = current.name
       val price = if (currency?.exchangeRate == null) current.price
       else current.price * currency?.exchangeRate!!

       holder.productPrice.text = activity.resources.getString(R.string.product_price, currency?.symbol, String.format("%.2f", price))

       holder.removeFromBasketButton.setOnClickListener {
           fragment.removeProduct(current)
       }
   }

   override fun getItemCount() = products.size
}
The CheckoutAdapter class defined above contains parameters called activity and fragment in its primary constructor. The parameters will allow the adapter to access the data and methods in the MainActivity and CheckoutFragment classes, respectively. In the body of the adapter, two variables called products and currency are defined, which will be populated with the list of Product objects and the currently active Currency object from the StoreViewModel class. Next, an inner class called ProductsViewHolder is established. The inner class will assign the basket_product.xml layout’s widgets to variables so they can be accessed elsewhere in the adapter. The adapter knows to use the basket_product.xml layout to display items in the RecyclerView because this is the layout that is inflated by the onCreateViewHolder method.
The next method in the adapter class is called onBindViewHolder, which determines how data is displayed at each position in the RecyclerView. It does this by finding the corresponding Product object in the products list for the current position in the RecyclerView. Next, an image-loading framework called Glide retrieves the drawable resource referenced in the Product object’s image parameter and displays it in the productImage ImageView. The code directs Glide to use a fade animation when loading the image into the ImageView, crop the image if necessary, and set the image’s dimensions to 400 pixels * 400 pixels.
The name of the product is loaded into the productName TextView. Next, a variable called price is defined that will contain the result of the price of the product multiplied by the exchange rate stored in the Currency object. If the exchange rate is null then no price adjustment will occur. The output price and the currency symbol specified in the Currency object are then loaded into the productPrice TextView widget to display the price to the user. Finally, an onClick listener is attached to the removeFromBasket button. The listener will run a CheckoutFragment method called removeProduct (which we’ll define shortly) and remove the product from the user’s shopping basket. At the end of the adapter, there is a method called getItemCount, which calculates how many items will be loaded into RecyclerView. This value will equal the size of the products list.
The adapter is now set up, so let’s integrate it with the CheckoutFragment class and apply it to the RecyclerView widget. To do this, open the CheckoutFragment.kt file and add the following variable to the list of variables at the top of the class to allow the fragment to access and interact with the CheckoutAdapter class:
private lateinit var adapter: CheckoutAdapterNext, add the following code below the onCreateView method to direct the onViewCreated stage of the fragment lifecycle to initialise the CheckoutAdapter instance and apply it to the RecyclerView:
override fun onViewCreated(view: View, savedInstanceState: Bundle?) {
   super.onViewCreated(view, savedInstanceState)

   adapter = CheckoutAdapter(mainActivity, this)
   binding.cartRecyclerView.itemAnimator = DefaultItemAnimator()
   binding.cartRecyclerView.adapter = adapter
}
The above code initialises the checkoutAdapter variable and supplies an instance of the MainActivity class and ‘this’ (in this case ‘this’ refers to the CheckoutFragment class) for the activity and fragment parameters in the CheckoutAdapter class’s primary constructor. Next, a default item animator is applied to the RecyclerView to provide some basic animations when items are added, removed or updated. Finally, the CheckoutAdapter instance is assigned to the RecyclerView to help manage its content.
Displaying the user’s shopping basket
The checkout fragment will display a summary of each Product object that has an inCart parameter set to true, which indicates that the user has added the product to their shopping cart. To facilitate this, add the following code to the bottom of the CheckoutFragment class’s onViewCreated method:
storeViewModel.products.observe(viewLifecycleOwner) { products ->
   val basket = products.filter { product -> product.inCart }

   if (basket.isEmpty()) binding.emptyCart.visibility = View.VISIBLE
   else binding.emptyCart.visibility = View.GONE

   when {
       basket.size > adapter.products.size -> {
           val newProducts = basket - adapter.products.toSet()
           for (product in newProducts) {
               adapter.products.add(product)
               adapter.notifyItemInserted(adapter.products.size - 1)
           }
       }
       basket.size < adapter.products.size -> {
           val removedProducts = adapter.products - basket.toSet()
           for (product in removedProducts) {
               val index = adapter.products.indexOf(product)
               adapter.products.removeAt(index)
               adapter.notifyItemRemoved(index)
           }
       }
   }
   updateOrderTotal()
}
The above code registers an observer on the StoreViewModel view model’s products variable, which means the fragment will be notified each time the list of Product objects changes. Whenever there is a change, the code creates a variable called basket that contains a filtered list of all Product objects that have an inCart property set to true. If the filtered list of products is empty, then a TextView widget featuring the text “Your cart is empty” will be displayed. Otherwise, the TextView widget will be hidden.
Next, a when block is used to determine how best to update the adapter and RecyclerView. If the new basket is larger than the existing basket, then the newly added Product objects are isolated and added to the end of the adapter’s products list. The adapter’s notifyItemInserted command is then used to prompt the RecyclerView to display the new product(s) to the user. In contrast, if the new basket is smaller than the existing basket, then the Product object(s) that the user removed from their basket are deleted from the adapter. The RecyclerView widget is informed of this change using the adapter’s notifyItemRemoved method.
If the user presses the remove from basket button for an item in their shopping basket, then a method in the CheckoutFragment class called removeProduct will run. To define the removeProduct method, add the following code below the onViewCreated method:
fun removeProduct(product: Product) {
   product.inCart = !product.inCart
   val products = storeViewModel.products.value?.toMutableList() ?: return
   val position = products.indexOf(product)
   if (position != -1) {
       products[position] = product
       storeViewModel.products.value = products
       storeViewModel.calculateOrderTotal()
   }
}
The removeProduct method features an argument called product that will contain the Product object that the user is attempting to remove from their shopping basket. The method switches the Product object’s inCart property from true to false, then updates the list of Product objects held by the StoreViewModel view model accordingly. The observer that the fragment has registered on the view model’s products list will detect the change and update the RecyclerView to reflect the removed item.
Calculating the total price of the user’s order
The total price of the user’s order will be calculated by the MainActivity class and uploaded to the StoreViewModel view model so it can be accessed by the checkout fragment. To arrange this, open the StoreViewModel.kt file and add a variable called orderTotal to the top of the class. The orderTotal variable will store a MutableLiveData number in Double format and will equal 0.00 by default.
var orderTotal = MutableLiveData(0.00)Next, let’s define a method called calculateOrderTotal, which will recalculate the total price of the customer’s order whenever the active Currency object (and hence exchange rate) changes, or the customer adds or removes items in their shopping basket. To define the calculateOrderTotal method, add the following code below the variables in the StoreViewModel class:
fun calculateOrderTotal() {
   val basket = products.value?.filter { product ->
       product.inCart
   } ?: listOf()

   var total = basket.sumOf { product -> product.price }
   if (currency.value != null) total *= currency.value?.exchangeRate ?: 1.00

   orderTotal.value = BigDecimal(total).setScale(2, RoundingMode.HALF_EVEN).toDouble()
}
Note you may need to add the following import statement to the top of the file:
import java.math.BigDecimalThe calculateOrderTotal method filters the total list of Product objects to select the products that have an inCart value of true and have been added to the user’s shopping basket. Next, a variable called total is defined. Initially, the total variable will be set to the sum of the price of every product in the user’s shopping basket; however, the total price will also be multiplied by the exchange rate of the user’s selected currency (if applicable). The value of the view model’s orderTotal variable must be two decimal digits long to be accepted by the Braintree Payments API. To achieve this, the value of the total variable, which contains the new order total, is processed by the BigDecimal class’s setScale method with the scale set to two decimal places and the rounding preference set to HALF_EVEN. The fully processed total price is then assigned to the view model’s orderTotal variable so it can be accessed from elsewhere in the app.
The HALF_EVEN rounding preference rounds excess digits to the nearest even neighbour. For example, 21.343 will become 21.34 because 21.34 is the nearest even number. Alternative rounding strategies include ROUND_UP and ROUND_DOWN, which always round the number up or down, respectively; however, these rounding strategies are not ideal when calculating prices because they are biased towards one direction. The ROUND_EVEN strategy helps eliminate this bias because the price could go up or down depending on where the nearest even number is.
To configure the checkout fragment to receive the order total amount, return to the CheckoutFragment class and add the following variables to the top of the class:
private var amount: Double? = null
private var currency: Currency? = null
Note you may need to import the Currency data class:
import com.example.store.CurrencyThe amount variable defined above will store the total price of the order and the currency variable will store the active Currency object. To update these variables based on the data in the view model, add the following code to the bottom of the onViewCreated method:
storeViewModel.orderTotal.observe(viewLifecycleOwner) { total ->
   this.amount = total
   updateOrderTotal()
}

storeViewModel.currency.observe(viewLifecycleOwner) { currency ->
   this.currency = currency
   if (currency?.symbol != adapter.currency?.symbol) {
       adapter.currency = currency
       adapter.notifyItemRangeChanged(0, adapter.itemCount)
   }
   updateOrderTotal()
}
The above code registers observers on the StoreViewModel class’s orderTotal and currency variables. The orderTotal observer will set the fragment’s amount variable to the total price of the customer’s order. It will also run a method called updateOrderTotal to update the price that is displayed in the orderTotal TextView in the fragment_checkout layout. Meanwhile, the currency observer will transfer the active Currency object to the currency variable. The Currency object will also be delivered to the CheckoutAdapter class if it is different to the Currency object currently held by the adapter. Once that is done, the updateOrderTotal method will update the user interface because the new Currency object may require a different currency symbol to be displayed next to prices.
To define the updateOrderTotal method, add the following code below the removeProduct method:
private fun updateOrderTotal() {
if (currency == null || amount == null) return
val total = currency!!.symbol + String.format("%.2f", amount)
binding.orderTotal.text = resources.getString(R.string.order_total, total)
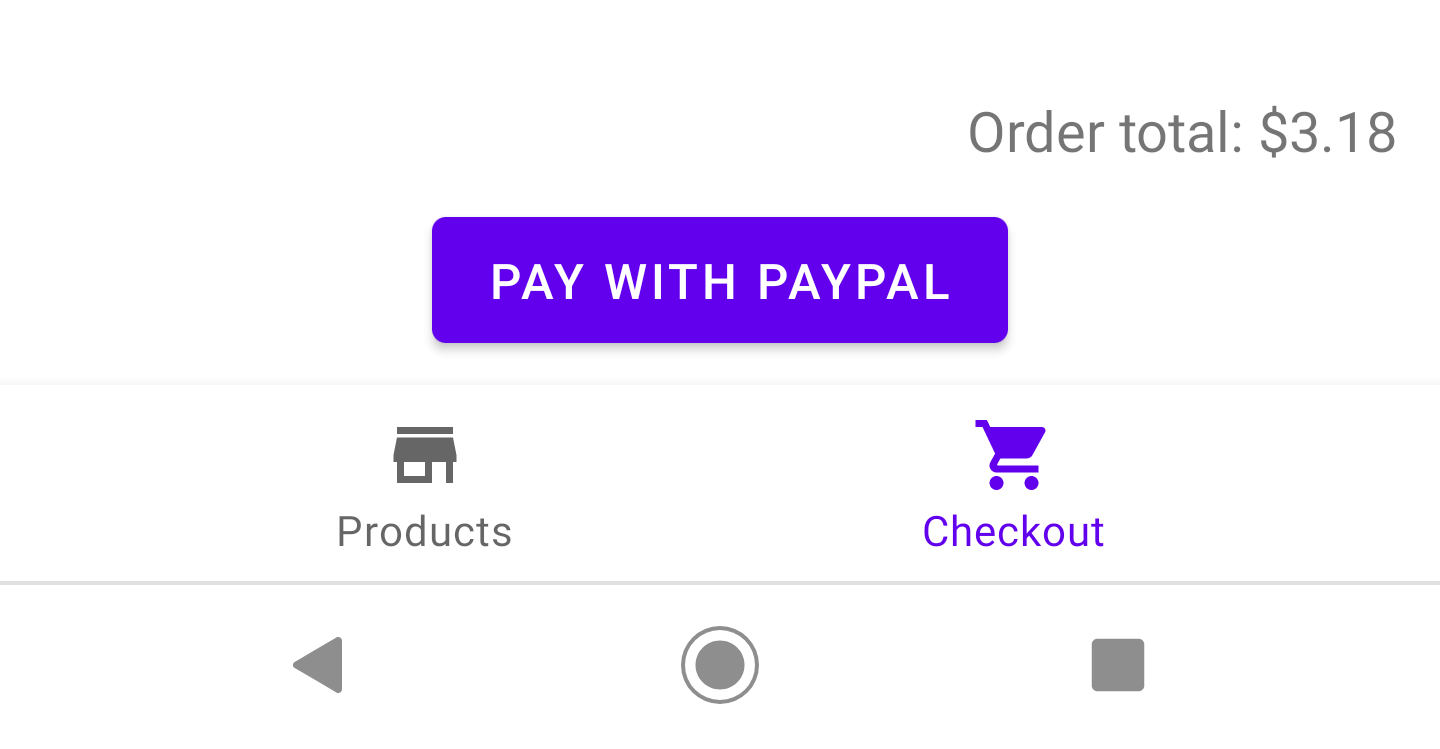
}The updateOrderTotal method starts by checking if either the currency or amount variables are null. The method requires both variables to have a value, so if the variables have not yet been initialised then a return command is used to exit the method. If both the currency and amount variables have been set, then a variable called total is defined that builds a string comprising the symbol for the active currency and the total order amount. The total order amount will be converted to a string using the “%.2f” format, which outputs a floating-point number with two digits after the decimal point. This is a necessary condition because otherwise trailing zeroes on prices such as £23.00 may be omitted. The total variable is input into the order_total string resource to form a message such as “Order total: £23.43”. Next, the compiled string is loaded into the fragment_checkout layout’s orderTotal TextView and displayed to the user.
Setting up the Braintree payments API
The app will use the Braintree payments API to authenticate payments and process transactions. To communicate with Braintree, you will need to create a Braintree account and register a tokenization key that will identify your application. There are two different types of Braintree accounts: Sandbox, which is used for testing your application and running mock transactions; and Production, which is used to process genuine transactions and handle real funds. Both accounts are distinct and use separate API keys. For now, you only need to create a Sandbox account. If you ultimately decide to release the app and process genuine payments then you can create a Production account also (more on this in the section on Going Live).
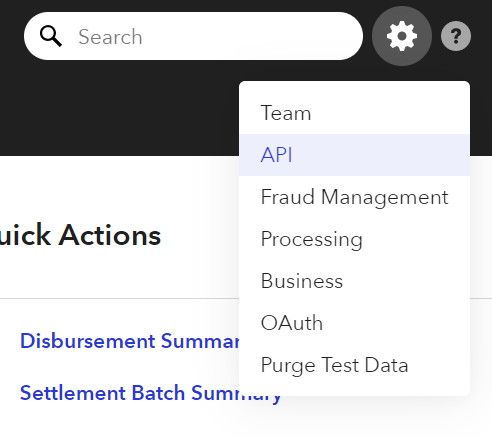
To create a Braintree Sandbox account, visit the following URL and complete the sign-up form. Once you have logged in, click the settings cog in the top-right corner and select API.
Next, locate and copy the tokenization key. Note you may need to press the Generate New Tokenization Key button if a tokenization key does not already exist.

To insert the tokenization key to the project, return to Android Studio and open the MainActivity.kt file (Project > app > java > name of the project). Add the following companion object above the onCreate method:
companion object {
   // TODO: Replace the value of the below variable with your Sandbox/Production Braintree tokenization key
   private const val TOKENIZATION_KEY = "YOUR-TOKENIZATION-KEY"
}
Replace YOUR-TOKENIZATION-KEY with the tokenization key you copied from your Sandbox Braintree account. The tokenization key provides a useful mechanism for processing one-off transactions; however, Braintree restricts certain payment pathways and customer preferences because the tokenization key is static and can be used across an indefinite number of installations of the app (see the Braintree documentation for more details). For this reason, we will also discuss an alternative payment authentication method involving generating a new client token on a session-by-session basis. The client token authentication method has access to more of Braintree's client API capabilities than the tokenization key authentication method and so will be the preferred method for this app. It is still useful to have the tokenization key method available though in case there is a problem generating a client token.
Next, let’s use the tokenization key to authenticate payments with Braintree and PayPal. To do this, add the following variables to the top of the MainActivity class:
private lateinit var braintreeClient: BraintreeClient
private lateinit var paypalClient: PayPalClient
The above variables will contain instances of classes required to handle network requests with the Braintree Payments API and process PayPal transactions. To initialise the variables, add the following code to the bottom of the onCreate method:
braintreeClient = BraintreeClient(this, TOKENIZATION_KEY)
paypalClient = PayPalClient(this, braintreeClient)
The above code initialises the BraintreeClient instance using the tokenization key that authorises your app to process payments. The BraintreeClient object is then applied to the PayPalClient object to enable the PayPal payment processing pathway.
Linking your Braintree account with your PayPal business account
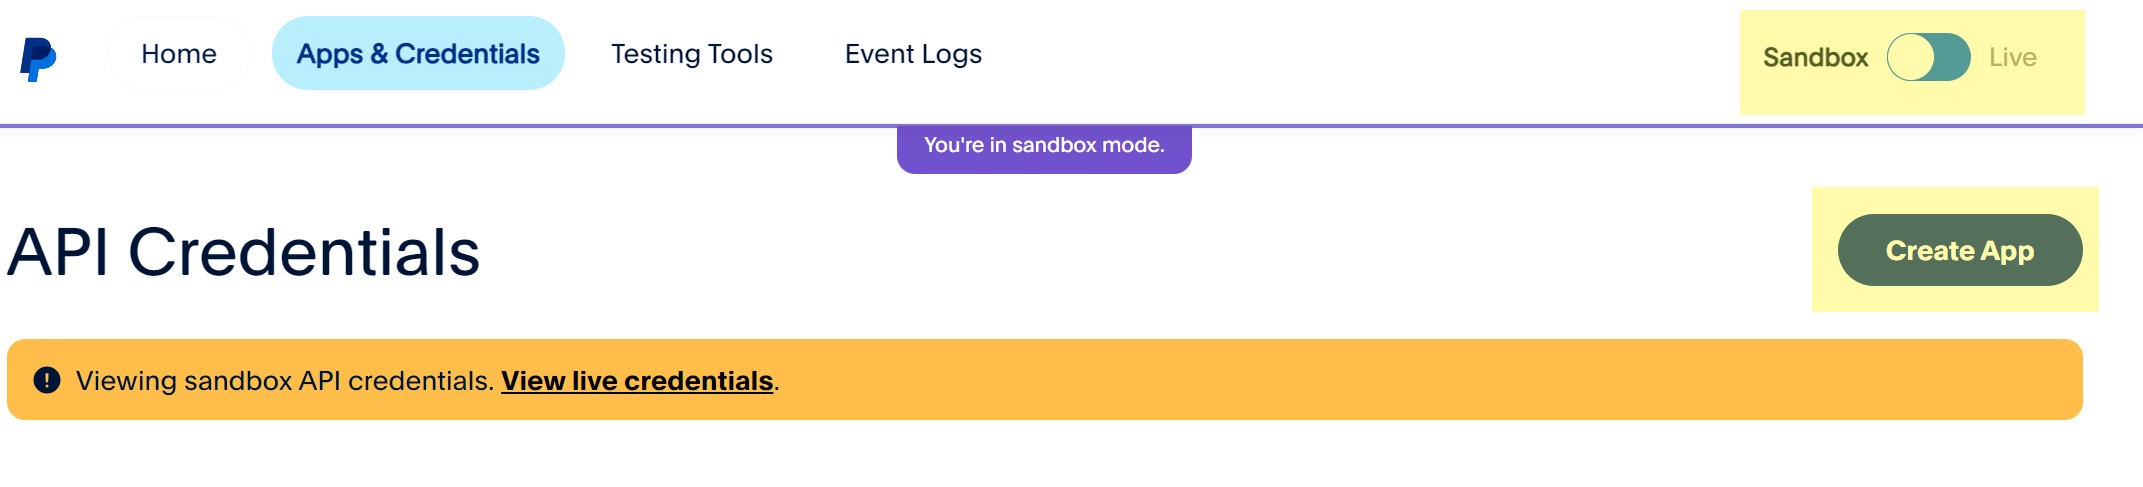
Braintree offers you the opportunity to link both its Sandbox and Production accounts with a PayPal business account that will receive funds following mock (Sandbox) or genuine (Production) PayPal transactions. To arrange this, you will require a PayPal business account. Once you have set up a PayPal business account details, log in to the PayPal developer dashboard. Next, navigate to the Apps & Credentials page. This is where you’ll create a PayPal app for your store so PayPal knows where to direct the funds when a customer makes a payment. Make sure you’re viewing the page in Sandbox mode, then click ‘Create App’.
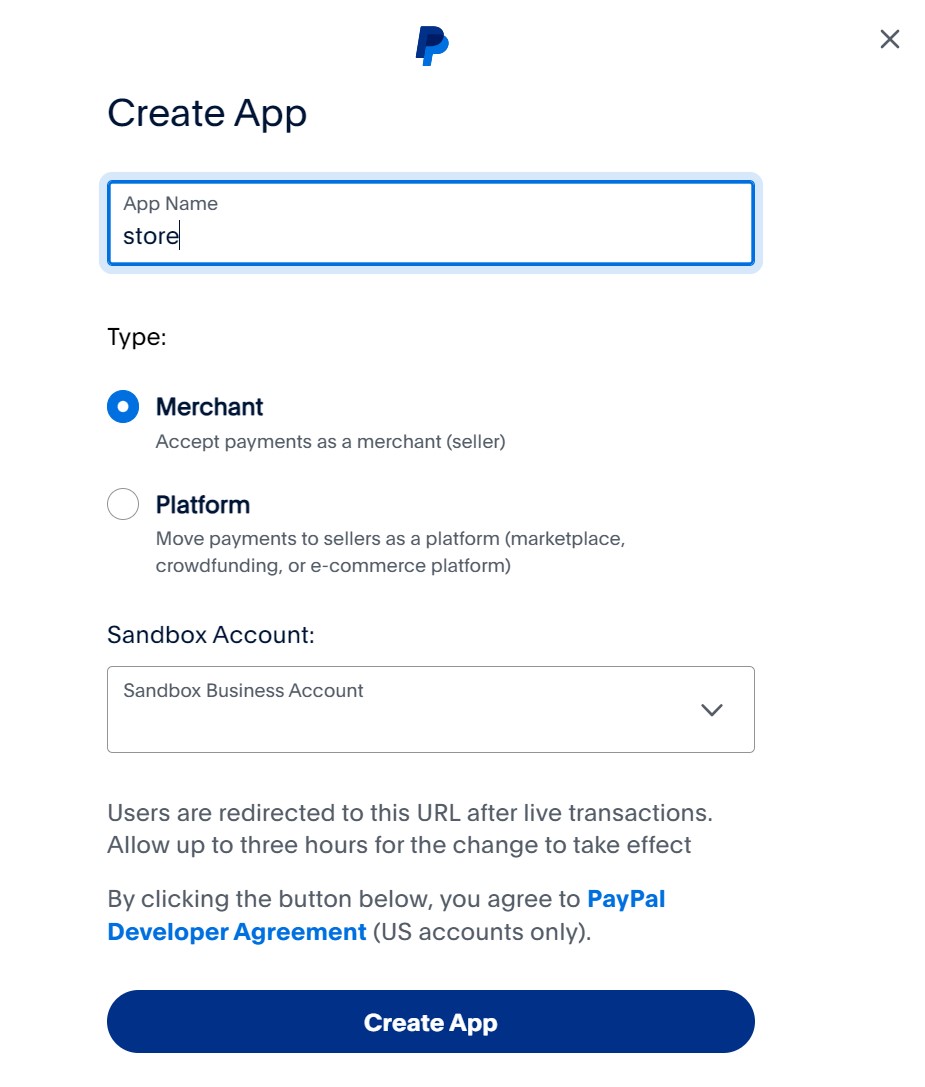
Name the app ‘store’ and leave the business account it is linked with unchanged. Once you submit those details you should be redirected to a page where you can view the credentials for the store app. Make a note of the Client ID and Secret and keep it somewhere safe because you will need those details again shortly. The Client ID and Secret are what we will use to communicate with PayPal’s server and receive the order details following a purchase.
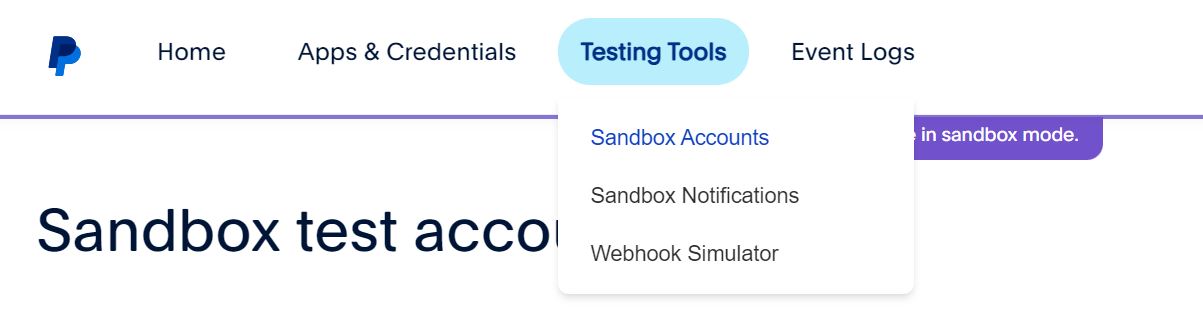
Next, navigate through Testing Tools > Sandbox Accounts.
In this section, you should see two sandbox accounts: one business and one personal. Locate the personal accounts, expand the overflow menu and click ‘View/Edit Account’. An Account Details window should open that allows you to view the email address and system-generated password for the account. These are the details you will use to log in to PayPal when you are running a test transaction. It may also be a good idea to add lots of money to the account so you can make as many trial purchases as you like. To do this, locate and edit the PayPal balance field in the Sandbox account info section. Set the balance to a large amount such as £100k then press Save Changes.
You can log in to sandbox business and personal accounts as if they were real PayPal accounts. Simply visit https://www.sandbox.paypal.com/signin. This is a great way of checking how your store’s/the customer’s PayPal accounts will look following a transaction.
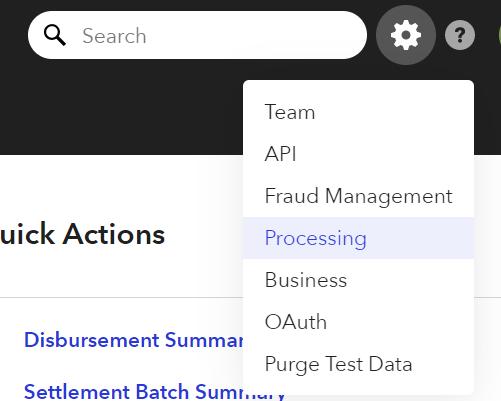
Once you have created the necessary accounts, make a note of your Sandbox PayPal app client ID and secret and return to your sandbox Braintree account. Click the settings cog in the top right corner of the screen and navigate to the Processing section.
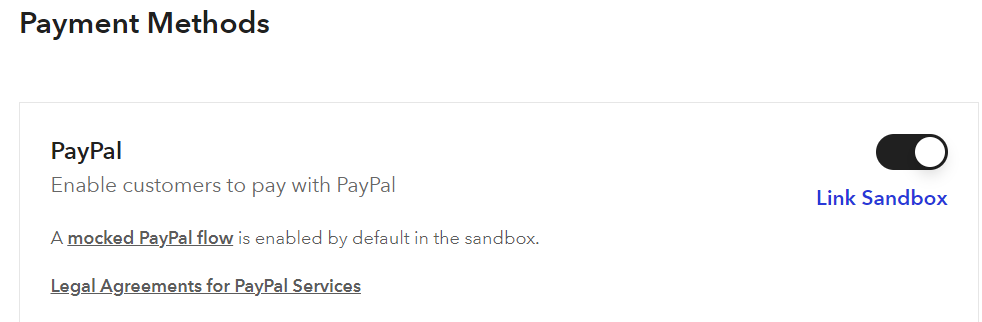
Ensure the PayPal item in the Payment Methods section is switched on then press ‘Link Sandbox’ to add the details of your Sandbox PayPal app.
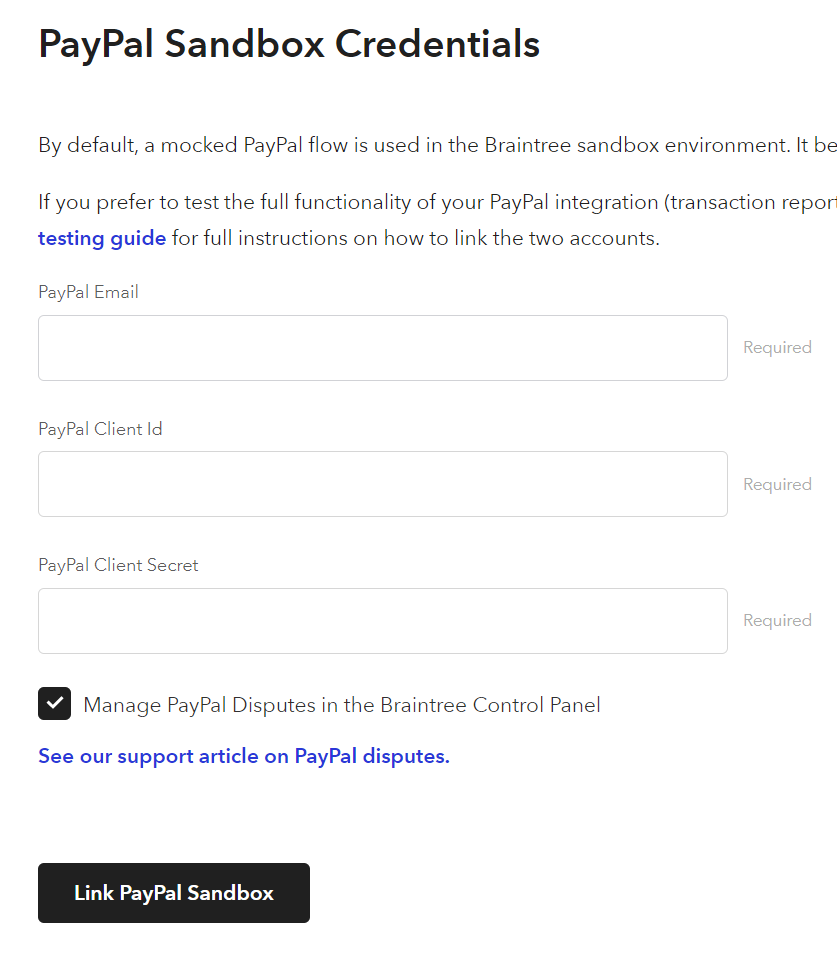
Fill in the details of your PayPal app including the mock business email address linked with your sandbox PayPal app and the app’s client ID and secret. Also, remember to press the Link PayPal Sandbox button to save any changes.
The Sandbox Braintree account and PayPal app are now linked and the funds from any transactions that are processed using PayPal will be sent to the business account linked with the PayPal app. These steps will need to be repeated for the Production Braintree account and Production PayPal app when you wish to begin processing genuine payments (more on this later!).
Configuring your Braintree account to accept payment in multiple currencies
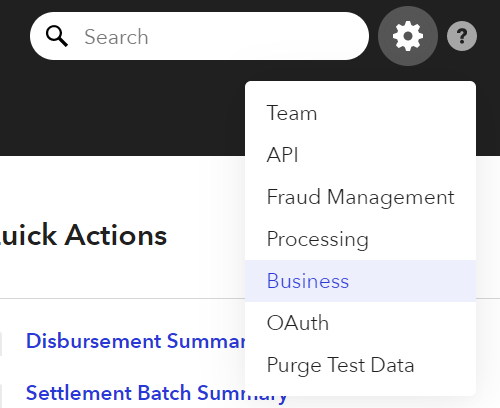
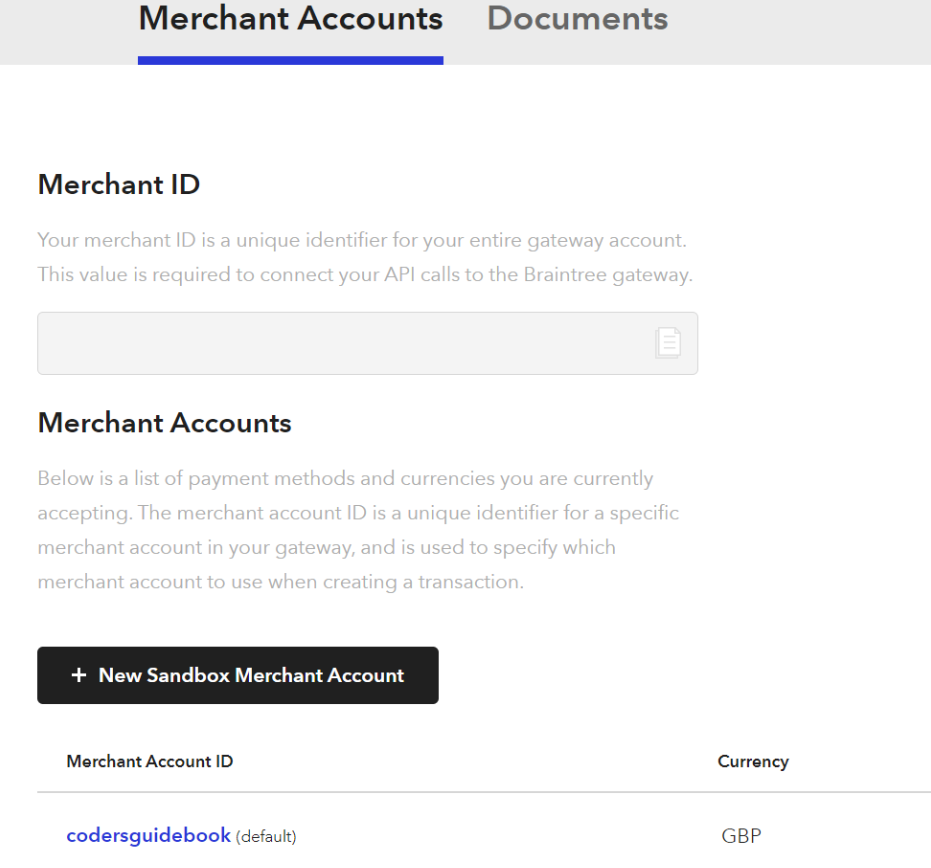
By default, your Braintree account will only accept payments in a single currency. This can lead to errors though if the user changes the store’s currency. For example, they could be charged the incorrect amount and some payment methods such as PayPal may fail. To resolve this, you must manually configure your Braintree account to accept each additional currency your store will support. Log in to your Braintree account, click the cog in the top right corner and navigate to the Business section.
In the Merchant Accounts section, you should find your default Merchant Account ID and its associated currency. You must create a new Merchant Account for each additional currency your store will support. For example, if your default merchant account was associated with Great British Pounds (GBP) but you also wanted to process transactions in United States Dollars and Euros, then you must create Merchant Accounts that will process USD and EUR.
To create a new Merchant Account, click the New Sandbox Merchant Account button. Next, complete the New Sandbox Merchant Account form by assigning the merchant account an ID (such as currency_usd), leave the ‘Make this my default merchant account’ option unchecked, but check the ‘Accept PayPal...’ option so the merchant account can accept PayPal payments. Finally, select the appropriate underlying currency from the dropdown menu. For the currency_usd merchant account, select USD - United States Dollar.
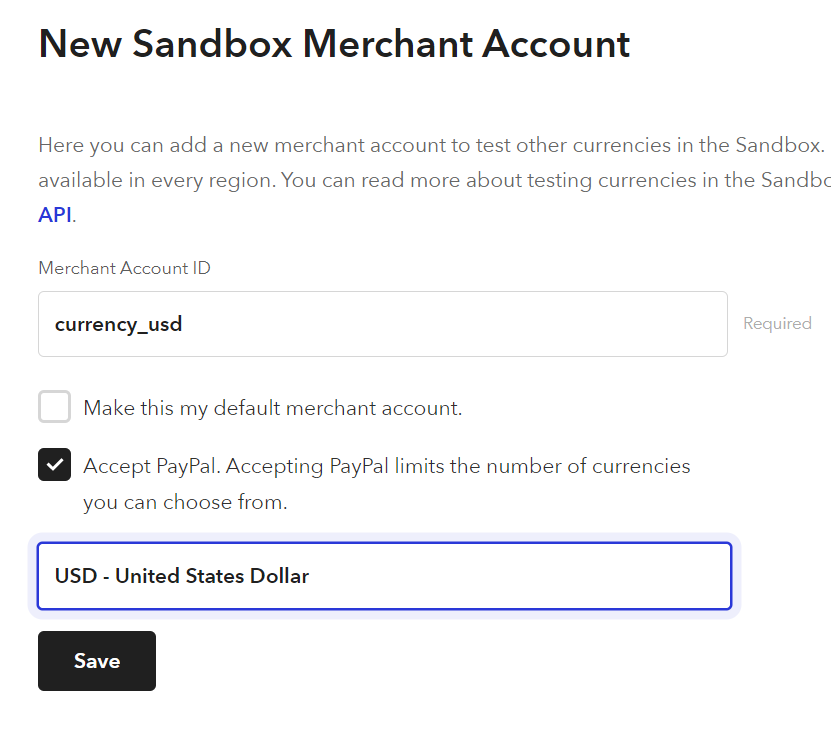
Repeat this process to create another Merchant Account with an ID of currency_eur that accepts the currency EUR - Euro. Remember to make a note of all of the merchant account IDs (including the default ID) because you will need to refer to them later.
Generating a client token
To access the full capabilities of the Braintree Payments API, the app will generate a client token each time it is launched. The client token is a JSON Web Token that provides access to Braintree’s payment tools and authorises the app to prepare transactions. Your website is responsible for generating client tokens, and each token is valid for 24 hours. To begin the process of generating a client token, add the following line of code to the bottom of the MainActivity class’s onCreate method:
getClientToken()The above line of code runs a method called getClientToken, which will submit the request to your website server for the client token. To define the getClientToken method, add the following code below the setCurrency method:
private fun getClientToken() {
   // TODO: Replace YOUR-DOMAIN.com with your website domain
   AsyncHttpClient().get("https://YOUR-DOMAIN.com/store/client_token.php", object : TextHttpResponseHandler() {
       override fun onSuccess(statusCode: Int, headers: Array<out Header>?, responseString: String?) {
           braintreeClient = BraintreeClient(this@MainActivity, responseString ?: TOKENIZATION_KEY)
           paypalClient = PayPalClient(this@MainActivity, braintreeClient)
       }

       override fun onFailure(statusCode: Int, headers: Array<out Header>?, responseString: String?, throwable: Throwable?) {
           braintreeClient = BraintreeClient(this@MainActivity, TOKENIZATION_KEY)
           paypalClient = PayPalClient(this@MainActivity, braintreeClient)
       }
   })
}
The getClientToken method generates an instance of the AsyncHttpClient class, which is what we use to query the currency exchange API. This time, however, we will query your website. Your website will attempt to generate a client token. If the request is successful, then the client token will be returned to the app in the onSuccess callback method as the responseString parameter. The above code uses the responseToken to reinitialise the BraintreeClient and PayPalClient objects with the client token instead of the tokenization key. However, if the responseString parameter is null or the request fails, then the tokenization key will be used. While it is preferable to initialise the BraintreeClient and PayPalClient objects using the client token because of the enhanced payment options and functionality such as remembering returning customer’s details, the tokenization key is a useful fallback option. For a full comparison between the functionality offered by client tokens and tokenization keys, then see the authorisation overview on Braintree’s website.
The client token will be generated by your website. If you do not have a website, then read this tutorial to get started: https://codersguidebook.com/how-to-build-a-website/how-to-use-ftp-to-upload-website-files. Next, edit the YOUR-DOMAIN.com part of the URL in the AsyncHttpClient object’s get command to reflect your website’s address. It is recommended to leave the /store/client_token.php part of the URL unchanged because later tasks will advise you to upload files to a subdirectory called store. If you want to upload the files to an alternative folder and are confident doing so then feel free.
Client tokens will be generated by a file that you will upload to your website called client_token.php. This file will use the Braintree PHP software development kit (SDK) to communicate with the Braintree Gateway and retrieve a client token. Your website will then deliver the client token to the Android app via the AsyncHttpClient object, which will assign the token to the MainActivity class’s clientToken. If the website is unable to retrieve a client token then the value of the MainActivity class’s clientToken variable will remain null and the app will attempt to use the tokenization key we discussed in an earlier section to authorise transactions instead; however, this is not preferable because the tokenization key has reduced privileges compared to the client token.
To upload files to your web server and create directories then you will need to use a file transfer protocol (FTP) client such as FileZilla. If you have not used FileZilla before then this tutorial on our website will teach you everything you need to know.
First, log in to your web server through FileZilla (or your preferred FTP client) and create a new folder in the root directory of your website called store.
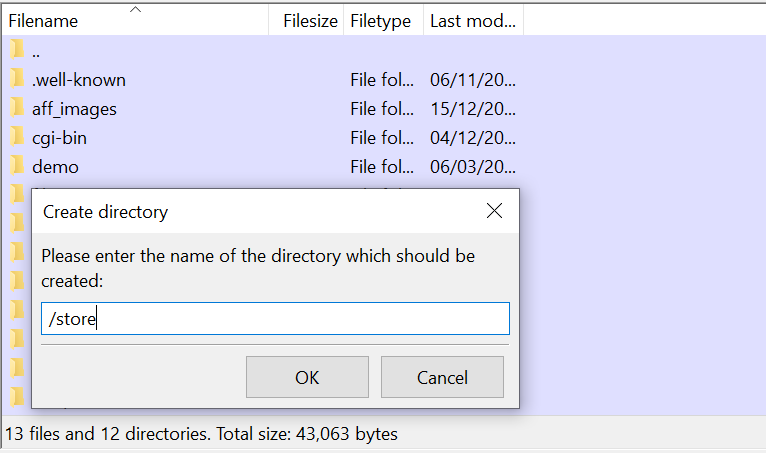
The store directory will contain the files required to interact with Braintree and process transactions. Backend server processing will be handled using a programming language called PHP. For the PHP code to communicate with the Braintree Gateway, you will need to upload the Braintree PHP SDK to your web server. The Braintree PHP SDK can be found in the lib folder in this GitHub repository. You are welcome to download the SDK from GitHub; however, it is also included in the example code repository for this project. To upload the SDK to your website, use your FTP client to navigate to the store directory you just created and upload the lib folder.
The store directory in the example code also contains a file called client_token.php and its contents read as follows:
<?php
	// Import the PHP library
	require __DIR__ . '/lib/autoload.php';
	use Braintree\Gateway;

	$gateway = new Gateway([
		'environment' => 'sandbox',
		'merchantId' => 'MERCHANT-ID',
		'publicKey' => 'PUBLIC-KEY',
		'privateKey' => 'PRIVATE-KEY'
	]);

	$clientToken = $gateway->clientToken()->generate();

	echo($clientToken);
?>
N.B. The PHP files are also included in the following folder of the git repository for this project: https://github.com/adam-codersgu/Store/tree/master/store
The above PHP code imports the contents of Braintree PHP SDK and then creates an instance of the Gateway class. The Gateway class will authenticate your application with Braintree and request information such as the client token. For this reason, you will need to provide the information highlighted in blue above. The environment field can be set to either sandbox (for mock transactions) or production (for genuine transactions). The remainder of the information (merchantId, publicKey and privateKey) can be found by logging in to your sandbox or production Braintree account, clicking the settings cog in the top-right corner and selecting API.
The information you need to supply for the merchantId, publicKey and privateKey fields in the client_token.php file can be found in the API Keys Client-Side Encryption Keys sections as shown in the screenshots below. Note, for the private key you will need to press the View button to reveal the key.

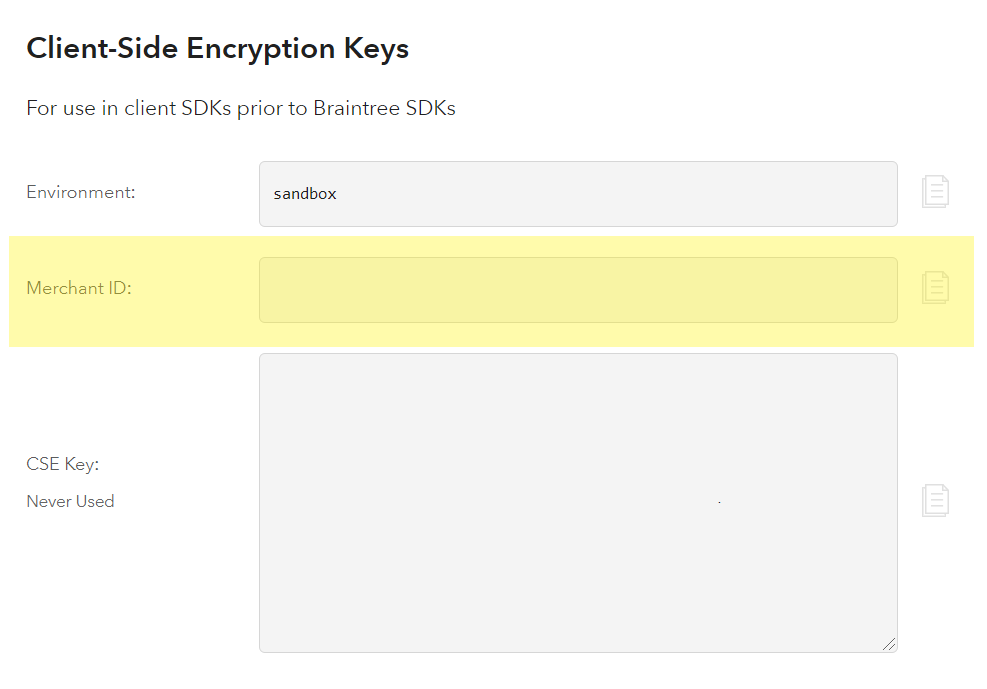
Once you have input the information required to build an instance of the Gateway object in the client_token.php file, upload the completed file to the store directory alongside the lib folder.

Your web server is now fully equipped to generate client tokens. The Store app simply needs to contact the client_token.php file, which will use the Gateway object with your Braintree account’s credentials to generate a client token and transmit the token back to the app using PHP’s echo command.
Initiating a PayPal transaction using Braintree
The user can pay for their order by clicking the payButton button in the fragment_checkout.xml layout. To make the button active, add the following code to the bottom of the onViewCreated method in the CheckoutFragment.kt file (Project > app > java > name of the project > ui > checkout):
binding.payButton.setOnClickListener {
   mainActivity.initiatePayment()
}
The onClick listener defined above runs a method in the MainActivity class called initiatePayment. The initiatePayment method will launch a web browser window that allows the user to pay using PayPal.
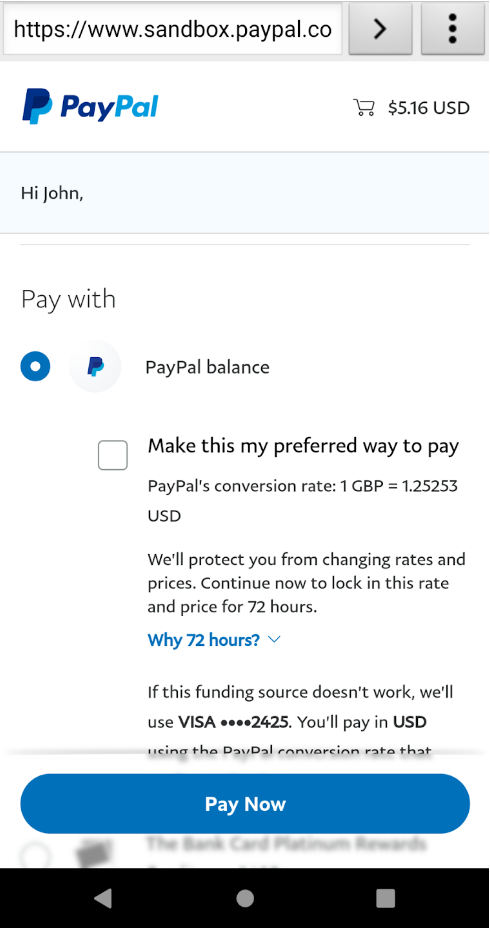
To define the initiatePayment method, open the MainActivity.kt file and add the following code below the getClientToken method:
fun initiatePayment() {
   if (storeViewModel.orderTotal.value == 0.00) return

   val orderTotal = storeViewModel.orderTotal.value.toString()
   // TODO - Save the total price to the share preferences file here

   val request = PayPalCheckoutRequest(orderTotal)
   request.currencyCode = storeViewModel.currency.value?.code ?: defCurrency
   request.userAction = USER_ACTION_COMMIT

   paypalClient.tokenizePayPalAccount(this, request)
}
If the order total is 0.00, then the initiatePayment method will exit early using the return command because no payment is necessary and the user’s shopping basket is likely empty. Otherwise, the method proceeds to construct a PayPalCheckoutRequest object that will enable checkout via PayPal. In constructing the PayPalCheckoutRequest object, the above code provides the order total amount, the ISO code for the currency that should be used in the transaction, and the user action. The user action dictates the call-to-action message when the user authorises a payment through PayPal. By default, PayPal will advise the user that there will be a further order confirmation for the customer to review their order before finalising the payment. However, in our app, the customer will already have had the chance to review their order in the checkout fragment. For this reason, we will process their payment immediately upon authorisation. Setting the userAction property of the PayPalCheckoutRequest object to USER_ACTION_COMMIT changes the wording of the PayPal authorisation window so that the user is aware that their payment will be processed immediately.
When testing your app, you may find that PayPal rejects transactions that use a foreign currency. To fix this, you need to log in to your Sandbox or Production PayPal account and access the payment preferences using one of the following links:
- Sandbox - https://www.sandbox.paypal.com/businessmanage/preferences/payments
- Production - https://www.paypal.com/businessmanage/preferences/payments
Next, locate the preference for accepting payments sent using currencies other than your primary account currency and set it to ‘Accept all payments and convert all to British pound.’. Note that British Pound may be a different currency based on the country your PayPal account is associated with.
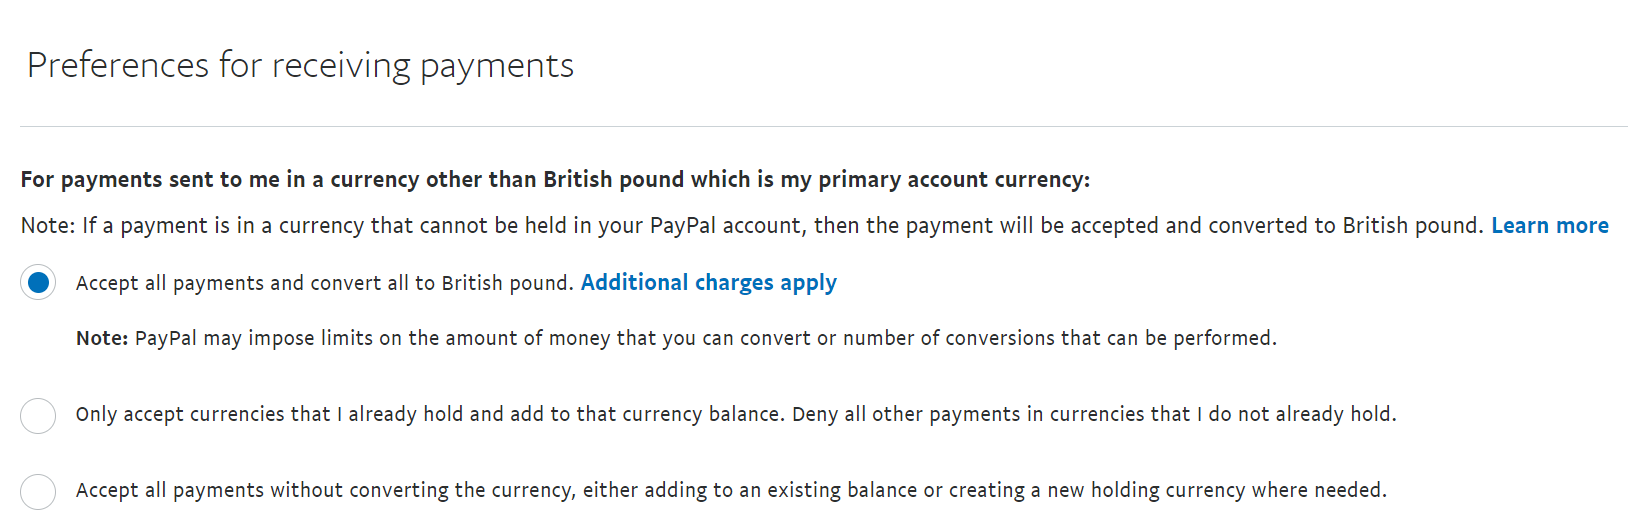
Your PayPal account is now configured to accept payments in any currency.
Once the PayPalCheckoutRequest object has been constructed, the PayPalClient object’s tokenizePayPalAccount method will prompt the customer to authorise the payment. In the initiatePayment method, you may notice a TODO comment that mentions saving the order total in the shared preferences file. This measure is there because after authorising the payment with PayPal in a popup browser window, the user will return to the app. Many components such as the MainActivity class and view model will restart and data including the total order price will be lost. Losing this data is not ideal because we need to refer to the total order price when finalising the transaction with Braintree. To address this, replace the TODO comment with the following code to run a method called saveOrderTotal that will save the total order price to the app’s shared preferences file. Data in the shared preferences file persists even when the app is shut down or restarted.
saveOrderTotal(orderTotal)Next, define the saveOrderTotal method by adding the following code below the initiatePayment method:
private fun saveOrderTotal(total: String?) = sharedPreferences.edit().apply {
   putString("orderTotal", total)
   apply()
}
The saveOrderTotal method will write the total order price to the shared preferences file under a key named orderTotal. Once the transaction is finalised, the value associated with the orderTotal key will be set to null. This is why the method has an argument called total, which features a question mark next to its type declaration (String?). The question mark signals that the argument is nullable. It can equal a string or a null value.
To equip the app to handle the result of the PayPal authentication request, we need to instruct the MainActivity class to extend an interface called PayPalListener and implement the interface's callback methods. To do this, locate the MainActivity class declaration and modify it so it reads as follows:
class MainActivity : AppCompatActivity(), PayPalListener {Next, add the following line of code to the bottom of the onCreate method to register MainActivity as a valid PayPal listener to the PayPal client instance:
paypalClient.setListener(this)Finally, we will implement two of the PayPalListener interface’s callback methods, which will handle successful and failed authentication requests, respectively. Add the following code below the saveOrderTotal method:
override fun onPayPalFailure(error: Exception) {
   Toast.makeText(this, getString(R.string.paypal_error, error.message), Toast.LENGTH_LONG).show()
}

override fun onPayPalSuccess(payPalAccountNonce: PayPalAccountNonce) {
   // TODO: Process the successful transaction here
}
The onPayPalFailure callback method handles failed PayPal authentication attempts. In the above code, a toast notification will advise the customer that there was an error processing their payment. You can change the logic here to handle errors differently if you wish. Meanwhile, if no error has occurred, then a PayPalAccountNonce object containing information about the payment is delivered to the onPayPalSuccess method. We will evaluate the PayPalAccountNonce object, process the payment and finalise the customer’s order in the next section.
Note, that while not covered in this project, you can retrieve detailed customer information from the PayPalAccountNonce object. For example, you could retrieve the customer’s contact details and billing and shipping address from PayPal by adding the following commands to the onPaypalSuccess method:
val email = payPalAccountNonce.email
val firstName = payPalAccountNonce.firstName
val lastName = payPalAccountNonce.lastName
val phone = payPalAccountNonce.phone
val billingAddress = payPalAccountNonce.billingAddress
val shippingAddress = payPalAccountNonce.shippingAddress
Such information may be useful for your business’s order flow. For a full list of details you can extract from the PayPalAccountNonce class, refer to the official documentation.
In this section, we have covered how to authenticate payments using PayPal. Braintree also supports other payment methods such as Venmo, Google Pay, Android Pay and more. You can incorporate these payment methods into your app and provide a wider range of payment options to your customers. To find the integration instructions for the additional payment methods then visit Braintree’s website.
Processing transactions
Once the user has authorised a payment and a PayPalAccountNonce object has been created, you must send the PayPalAccountNonce to your website to finalise the transaction. As well as sending the PayPalAccountNonce, it would also be beneficial to include device data for analysis by Braintree’s Premium Fraud Management Tools. Braintree’s Premium Fraud Management Tools attempt to detect and prevent fraud by following a set of rules involving geolocation and device data. Enabling the fraud management tools is relatively simple. First, log into your Braintree account, click the cog icon and navigate to the Fraud Management section.
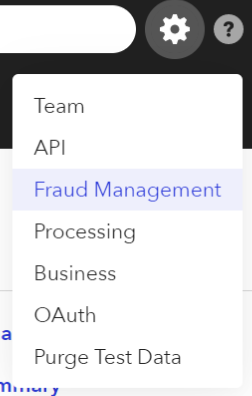
Next, enable either the regular or premium fraud prevention tools depending on which tools best suit your business needs. Note that using the premium fraud prevention tools may incur additional fees.
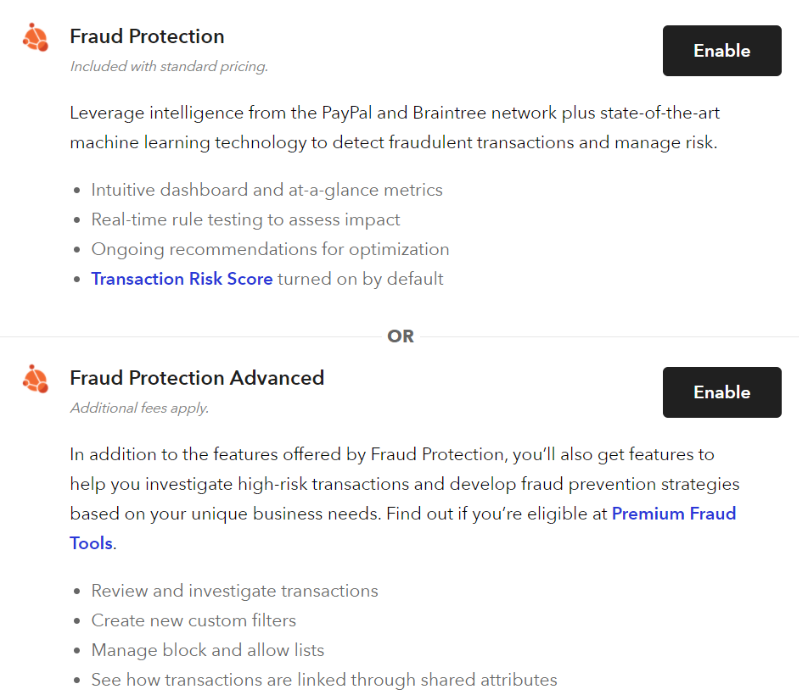
Once you have enabled either the regular or premium fraud prevention tools, return to Android Studio and add the following variable to the top of the MainActivity class:
private var deviceData = ""The deviceData variable will store the data that Braintree will use to assess whether the transaction could be fraudulent. The data will be gathered using Braintree’s DataCollector class. To define a method called collectDeviceData that gathers the data when required, add the following code below the onPayPalSuccess method:
private fun collectDeviceData() {
   DataCollector(braintreeClient).collectDeviceData(this) { data, _ ->
       deviceData = data ?: ""
   }
}
We will later direct the collectDeviceData method to run whenever the app requests a payment.
Moving on, let’s discuss the PHP code that will allow your website to process PaymentMethodNonce objects and the fraud detection device data. In the example code, you should find a file called process_transaction.php that reads as follows:
<?php
	// Import the PHP library
	require __DIR__ . '/lib/autoload.php';
	use Braintree\Gateway;

	$gateway = new Gateway([
		'environment' => 'sandbox',
		'merchantId' => 'MERCHANT-ID',
		'publicKey' => 'PUBLIC-KEY',
		'privateKey' => 'PRIVATE-KEY'
	]);

	$amount = $_POST["amount"];
	$currency = $_POST["currency_iso_code"];
	$nonceFromTheClient = $_POST["payment_method_nonce"];
	$deviceDataFromTheClient = $_POST["client_device_data"];

	// Define a separate case in the switch for each additional currency your store supports
	switch ($currency) {
		case "USD":
			$merchantAccount = "currency_usd";
			break;
		case "EUR":
			$merchantAccount = "currency_eur";
			break;
		default:
			$merchantAccount = "DEFAULT-MERCHANT-ID";
	}

	$result = $gateway->transaction()->sale([
	    'amount' => $amount,
	    'paymentMethodNonce' => $nonceFromTheClient,
	    'deviceData' => $deviceDataFromTheClient,
	    'merchantAccountId' => $merchantAccount,
	    'options' => [
			'submitForSettlement' => True
	    ]
	]);

	if ($result->success) {
	  // See $result->transaction for details
	  echo ($outcome = "SUCCESSFUL");
	} else {
	  // see $result->message for the error message
	  echo ($outcome = "UNSUCCESSFUL");
	}

?>
The above PHP code begins similarly to the client_token.php file we created earlier by importing the Braintree PHP SDK and creating an instance of the Gateway class. To construct the Gateway class, you will need to fill in the same fields as in the client_token.php file and provide your sandbox Braintree account’s merchantId, publicKey and privateKey (see the ‘Generating a client token’ section for instructions on how to find these details). When the app contacts the process_transaction.php file, it will supply the total order amount, the PaymentMethodNonce object associated with the customer’s payment method, the device data that was collected for fraud detection purposes, and the ISO code for the user’s selected currency. The process_transaction.php file retrieves these bits of information using POST-based HTTP commands and uses the data to prepare a Transaction response object.
Each transaction currency that your store supports is associated with a different Braintree merchant account, as discussed in the section ‘Configuring your Braintree account to accept payment in multiple currencies’. To determine the appropriate merchant account, the above code uses a PHP switch to match the ISO code associated with the user’s selected currency with the appropriate merchant account ID. A PHP switch expression is equivalent to a when block in Kotlin. You must define a case in the switch for each currency that your store supports, as illustrated for the USD and EUR currencies in the above code. Simply add the ISO code for the currency, then set the merchantAccount variable to equal the merchant account ID you created for that currency in your Braintree account. The switch also contains a default block, which defines the merchant account that will be used if none of the previous cases applies. In this instance, the default block should use the default merchant account ID for your Braintree account.
The PHP code proceeds to create a Transaction response object that Braintree will use to charge the amount specified in the amount variable to the payment method supplied in the PaymentMethodNonce object. Braintree will also analyse the supplied device data for potential indications of credit or debit card fraud. If the transaction appears to be legitimate, then the payment is processed immediately because the submitForSettlement option is set to true. The above code details all the necessary steps that are required to process the payment; however, you can also supply additional information such as the customer’s billing address and personal information if you wish. For a full list of details you can supply when creating the Transaction response object then refer to Braintree’s official documentation.
The outcome of the transaction is stored in a variable called result. If the transaction is successful, then the PHP file will emit a variable called outcome which is set to “SUCCESSFUL”. Otherwise, the emitted outcome variable will contain the text “UNSUCCESSFUL”. The Android app can then use this text response to determine the appropriate course of action. The if expression that emits the outcome variable is also where you will perform any post-transaction processing that is required for your business such as sending order confirmation emails or logging the order in a database.
Upload the completed process_transaction.php file to the store directory on your website using your FTP client such as FileZilla.
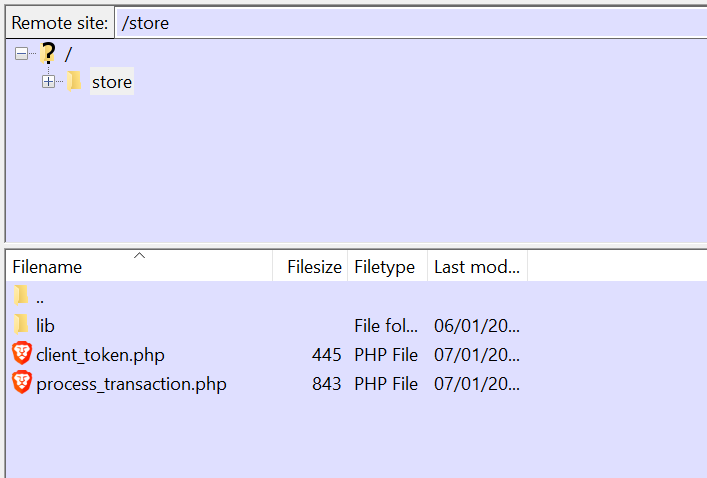
Let’s now return to Android Studio and write the code that will send the payment information to the process_transaction.php file. Locate the onPayPalSuccess method in the MainActivity class and replace the TODO comment with the following code:
collectDeviceData()

val params = RequestParams().apply {
    put("amount", sharedPreferences.getString("orderTotal", null) ?: return)
    put("currency_iso_code", storeViewModel.currency.value?.code ?: defCurrency)
    put("payment_method_nonce", payPalAccountNonce.string)
    put("client_device_data", deviceData)
}

saveOrderTotal(null)

// TODO: Replace YOUR-DOMAIN.com with your website domain
AsyncHttpClient().post("https://YOUR-DOMAIN.com/store/process_transaction.php", params,
    object : TextHttpResponseHandler() {
        override fun onSuccess(statusCode: Int, headers: Array<out Header>?, outcome: String?) {
            if (outcome == "SUCCESSFUL") {
                Toast.makeText(this@MainActivity, resources.getString(R.string.payment_successful), Toast.LENGTH_LONG).show()
                clearCart()
            } else Toast.makeText(this@MainActivity, resources.getString(R.string.payment_error), Toast.LENGTH_LONG).show()
        }

        override fun onFailure(statusCode: Int, headers: Array<out Header>?, outcome: String?, throwable: Throwable?) { }
    }
)
The above code uses the AsyncHttpClient class to communicate with your website via an HTTP request. To facilitate the HTTP request, an instance of the RequestParams class is prepared using supplementary data that should be included with the request. In this instance, we supply the order amount, the ISO code associated with the customer’s chosen currency, the payment method nonce and fraud prevention device data. The process_transaction.php file can retrieve the data from the HTTP request payload based on each item’s key. For example, the payment method nonce is stored under the key payment_method_nonce and can be retrieved using the following PHP code:
$_POST["payment_method_nonce"];Once all of the request parameters have been defined, the saveOrderTotal method is run with a null value passed as the total parameter. The saveOrderTotal method will clear the total order price from the shared preferences file because the order is complete. Next, the AsyncHttpClient object submits the request to the process_transaction.php web page. Remember to modify the YOUR-DOMAIN.com part of the get request URL to reflect the address of your web domain. The TextHttpResponseHandler object’s onSuccess callback method is used to process the response from the process_transaction.php web page. Remember, the process_transaction.php file will echo a value of “SUCCESSFUL” if the payment was processed successfully, and a value of “UNSUCCESSFUL” if the transaction could not be completed. If the transaction was completed successfully, then a toast notification will inform the user their order is complete and a method called clearCart will empty the shopping basket. Meanwhile, if the transaction is unsuccessful, then a toast notification will inform the user that there was an error processing their payment.
Once the user has completed their order, their shopping basket can be emptied. To handle this, add the following code to the MainActivity class below the collectDeviceData method:
private fun clearCart() {
   storeViewModel.products.value?.forEach {
           product -> product.inCart = false
   }
   storeViewModel.orderTotal.value = 0.00
}
The clearCart method defined above retrieves the list of Product objects from the StoreViewModel view model and sets the inCart field of each object to false using Kotlin’s forEach function. It also sets the value of the orderTotal variable to 0.00.
The BottomNavigationView widget
The app is almost finished; the user can add products to their shopping basket and pay for their order via PayPal. The last thing we need to do is configure the BottomNavigationView widget. The BottomNavigationView was created automatically by Android Studio as part of the Bottom Navigation Activity project template. It will allow the user to navigate between the key top-level destinations in the app, which in this case is the products fragment and checkout fragment.
The different destinations are defined in a navigation graph resource file called mobile_navigation.xml, which can be found by navigating through Project > app > res > navigation. Open the file in Code View and edit the file so it reads as follows:
<?xml version="1.0" encoding="utf-8"?>
<navigation xmlns:android="http://schemas.android.com/apk/res/android"
   xmlns:app="http://schemas.android.com/apk/res-auto"
   xmlns:tools="http://schemas.android.com/tools"
   android:id="@+id/mobile_navigation"
   app:startDestination="@+id/navigation_products">

   <fragment
       android:id="@+id/navigation_products"
       android:name="com.example.store.ui.products.ProductsFragment"
       android:label="@string/title_products"
       tools:layout="@layout/fragment_products" />

   <fragment
       android:id="@+id/navigation_checkout"
       android:name="com.example.store.ui.checkout.CheckoutFragment"
       android:label="@string/title_checkout"
       tools:layout="@layout/fragment_checkout" />
</navigation>
The above code defines separate navigation destinations for the products and checkout fragments. For each destination, the ID attribute identifies the destination in the navigation graph. Additional attributes include a name attribute, which defines the destination’s location in the app, a label attribute which defines the text that is displayed in the app toolbar when that destination is active, and a layout attribute which defines the layout file that is associated with the destination.
The navigation destinations that are displayed in the BottomNavigationView widget are defined in a menu resource file that should automatically have been generated by Android Studio. To locate the file, navigate through Project > app > res > menu and open the file called bottom_nav_menu.xml. Switch the file to Code view and edit the file so it contains the following two menu items:
<item
   android:id="@+id/navigation_products"
   android:icon="@drawable/ic_store"
   android:title="@string/title_products" />

<item
   android:id="@+id/navigation_checkout"
   android:icon="@drawable/ic_cart"
   android:title="@string/title_checkout" />
The menu items define different options that will appear in the BottomNavigationView widget. The ID of each menu item should match the ID of the corresponding navigation destination in the mobile_navigation.xml navigation graph. Each menu item also contains an icon and a title, which will be displayed in the BottomNavigationView.
The icons referenced for the navigation_products and navigation_checkout menu items have not yet been created. To address this, right-click the drawable directory (Project > app > res) then select New > Vector Asset. For the clip art, search for and select the icon called ‘shopping cart’ then press OK.
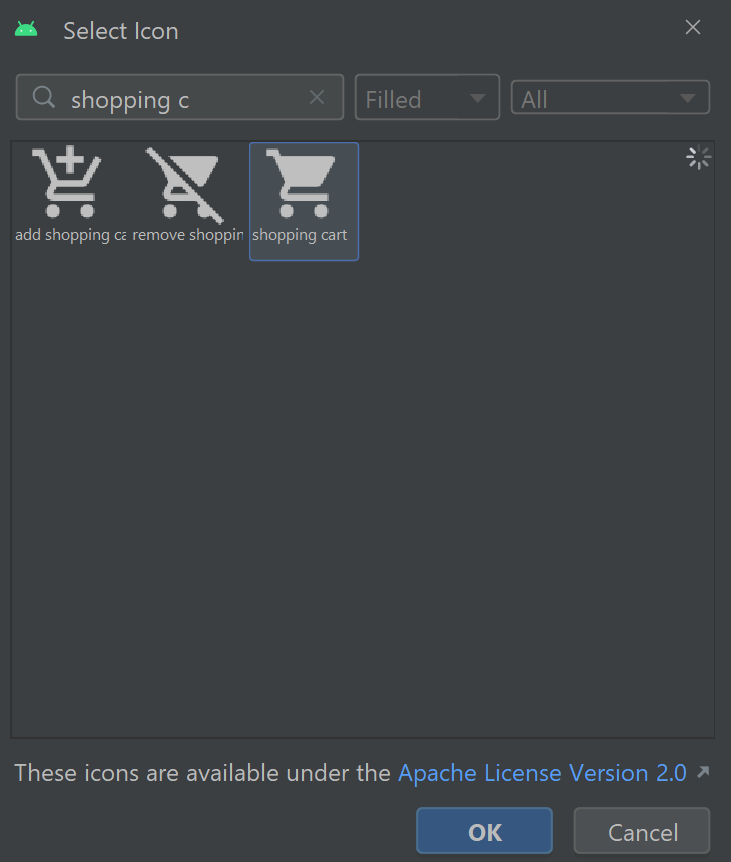
Set the name of the vector asset to ‘ic_cart’ then press Next and Finish to save the icon. To create the store drawable, repeat the above steps, except this time select the icon called ‘store’ and name the drawable ‘ic_store’.
The BottomNavigationView widget can be found in the activity_main.xml layout (Project > app > res). The activity_main layout is the main layout of the activity and will load when the app is launched. It contains the BottomNavigationView widget and a fragment, which will display the content of the user’s current destination in the app. It is now convention to use a FragmentContainerView widget rather than a regular fragment to display content, so replace the fragment with the following code:
<androidx.fragment.app.FragmentContainerView
   android:id="@+id/nav_host_fragment"
   android:name="androidx.navigation.fragment.NavHostFragment"
   android:layout_width="match_parent"
   android:layout_height="0dp"
   app:defaultNavHost="true"
   app:navGraph="@navigation/mobile_navigation"
   app:layout_constraintTop_toTopOf="parent"
   app:layout_constraintBottom_toTopOf="@id/nav_view" />
The above code defines a FragmentContainerView widget that will source its content from the mobile_navigation.xml navigation graph. The height of the FragmentContainerView is set to 0dp, which means its height will occupy the maximum available space according to its constraints. In this case, the FragmentContainerView is constrained to the top of the parent layout and the BottomNavigationView is at the bottom of the layout. These constraints mean the FragmentContainerView will occupy the maximum available space once it has left enough room for the BottomNavigationView.
Note the root ConstraintLayout in the activity_main.xml layout may contain the following paddingTop attribute:
android:paddingTop="?attr/actionBarSize" The above padding attribute is designed to leave space for an action bar; however, this attribute will not be necessary for this app and can be deleted.
To make the BottomNavigationView widget operational, return to the MainActivity.kt file and replace the navController and appBarConfiguration variables in the onCreate method with the following code:
val navHostFragment = supportFragmentManager.findFragmentById(R.id.nav_host_fragment) as NavHostFragment
val navController = navHostFragment.navController
val appBarConfiguration = AppBarConfiguration(setOf(R.id.navigation_products, R.id.navigation_checkout))
The onCreate method now initialises a NavHostFragment object, which will provide access to the FragmentContainerView widget from the activity_main.xml layout. The FragmentContainerView will allow the user to navigate between the destinations defined in the mobile_navigation.xml navigation graph. We also defined a variable called appBarConfiguartion, which details the app’s top-level destinations. A top-level destination is the origin of a navigation pathway. In the Stope app, the products fragment and the checkout fragment are top-level destinations.
Going live
In this final section, we will discuss the changes required to switch from sandbox to production mode and begin processing genuine payments. Naturally, you should only follow these steps once you have confirmed your store works correctly in sandbox mode. First, you will require a production Braintree account, which you can apply for by completing this online form: https://signups.braintreepayments.com/. It is important to remember that your sandbox and production Braintree accounts are not linked. For this reason, you will have to replace all of the information in your app and web server PHP files that are specific to the sandbox account. A full list of items you need to change is included below:
- Tokenization key - Replace the value of the TOKENIZATION_KEY variable in the MainActivity class’s companion object with the tokenization key for your production Braintree account.
- Merchant ID, public key and private key - In both the client_token.php and process_transaction.php files you need to update the Gateway object with your production Braintree account details and switch the environment to ‘production’:
$gateway = new Gateway([ 'environment' => 'production', 'merchantId' => 'PRODUCTION-MERCHANT-ID', 'publicKey' => 'PRODUCTION-PUBLIC-KEY', 'privateKey' => 'PRODUCTION-PRIVATE-KEY' ]); - Merchant account IDs - In the Business section of your production Braintree account, you will need to create separate merchant accounts for each currency your store will support. For simplicity, it will be best to use the same merchant account IDs for each currency as in your sandbox Braintree account. Otherwise, you will need to update the process_transaction.php file with the new production merchant account IDs.
To process PayPal payments, you will require a live PayPal app for your store. To create a live app. log in to your PayPal developer account and navigate to the Apps & Credentials page. Ensure you are viewing the page in Live mode then click Create App.

Give your app a name (e.g. store) then click Create App. Once the live app has been created, note down the client ID and secret and keep these details safe. Next, you need to link the live PayPal app with your production Braintree account. To do this, navigate to the Processing section of your production Braintree account and ensure the PayPal item in the Payment Methods section is switched on. You can then fill in the details of your live PayPal app and business PayPal account.
Once all the above steps have been implemented, your mobile store should be ready to begin processing genuine transactions. It might be worthwhile testing your store with a couple of low-value orders to confirm all the processes work correctly following the transition from sandbox to production mode.
Summary
Congratulations on completing the Store app! In creating the app, you have covered the following skills and topics:
- Create an application using the Bottom Navigation Views Activity project template.
- Display products that the user can add to, or remove from, their shopping basket.
- Incorporate a currency exchange API that allows the user to shop in multiple different currencies.
- Integrate the Braintree Payments API with your project.
- Utilise Braintree’s fraud prevention tools to protect your store against fraudulent transactions.
- Process payments via PayPal.
- Customise the PayPal payment flow.
- Use your website to generate Braintree client tokens and authenticate your app.
- Use the AsyncHttpClient class to manage HTTP requests and send data to web pages.