How to add navigational buttons to your Android app
An android app will often comprise multiple destinations. For example, an app for an online store may have separate destinations for the homepage, product pages, and checkout. Each destination will likely need a different user interface. In Android programming, user interfaces are designed by creating XML layout files. A layout file contains all the text, images, and buttons (collectively referred to as widgets) required to display content to the user and handle user interactions. In this tutorial, we will explore how to create layout files for the different areas in your app and use buttons to allow the user to navigate from one destination to another.
Adding a new user interface layout
When you start a new project, Android Studio will often create an XML file called activity_main.xml. The activity_main.xml layout is the default layout for the app and will be displayed first when the app loads (unless advised otherwise). To create a new layout file for another area of the app, navigate through Project > app > res then right-click the layout folder. Next, select New > Layout resource file.

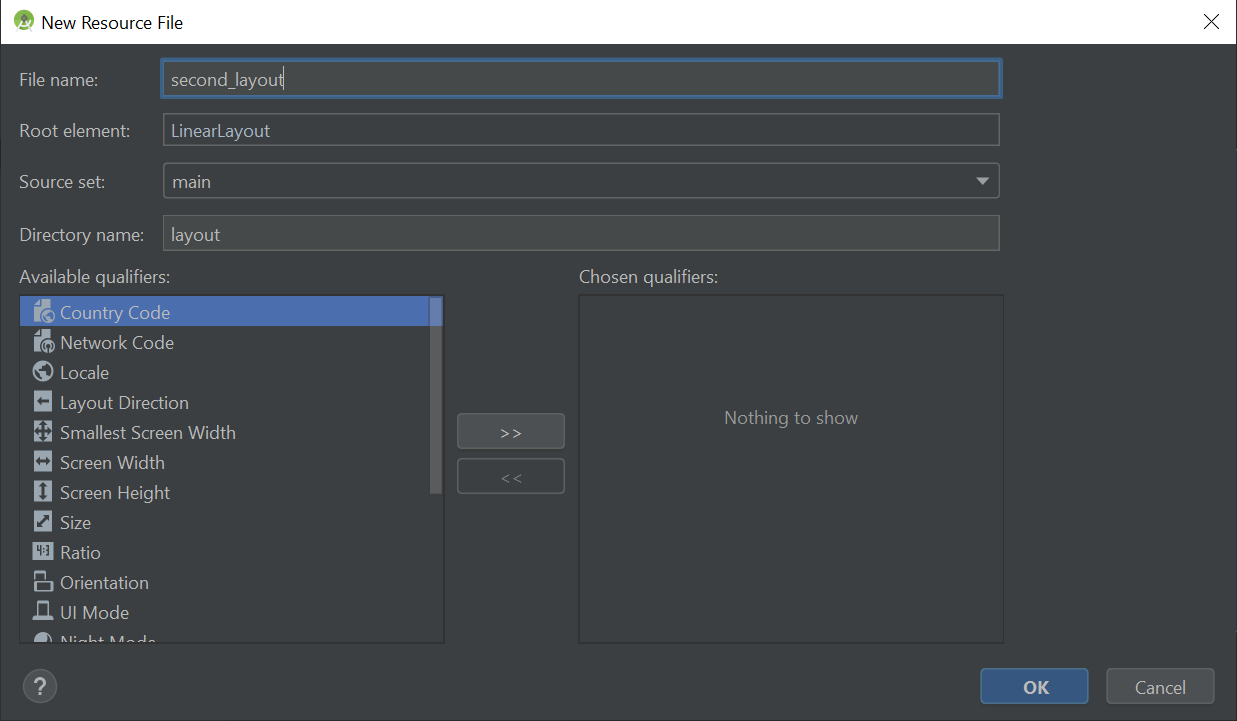
In the New Resource File window, enter the file name for the new layout (e.g. 'second_layout') then press OK. The other options can be left at their default values in this example.
Android Studio will now create and open a new file called second_layout.xml (or the file name you entered). The file can be found in the layout folder alongside the activity_main.xml file.
Adding buttons to the layout
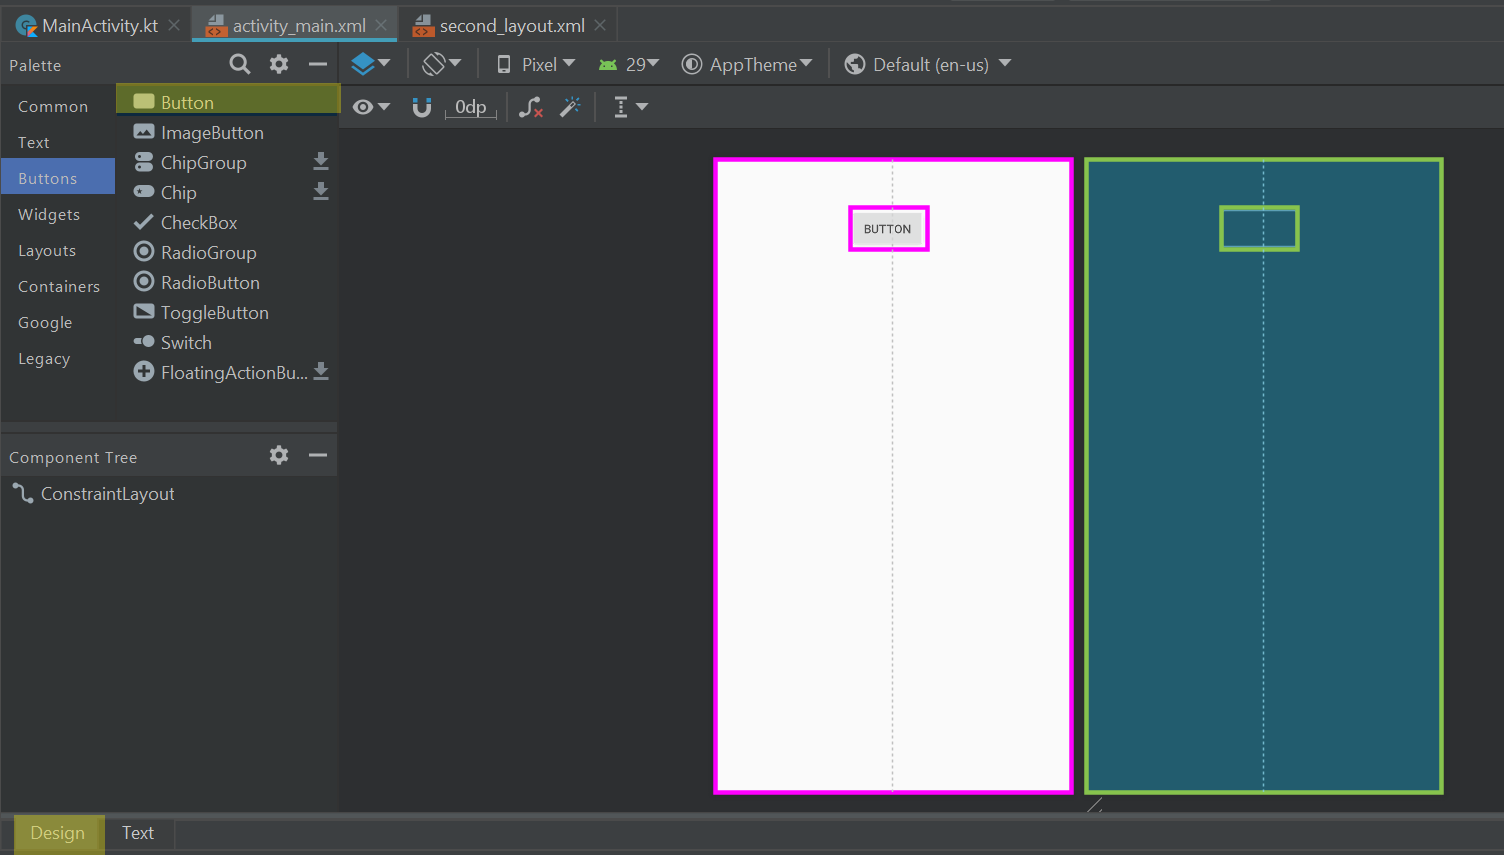
To allow the user to navigate between the activity_main and second_layout destinations, we will add button widgets to the layout files. First, open the activity_main.xml file in Design mode then navigate to the Buttons category in the Palette. Locate the Button widget and drag and drop it onto the layout.
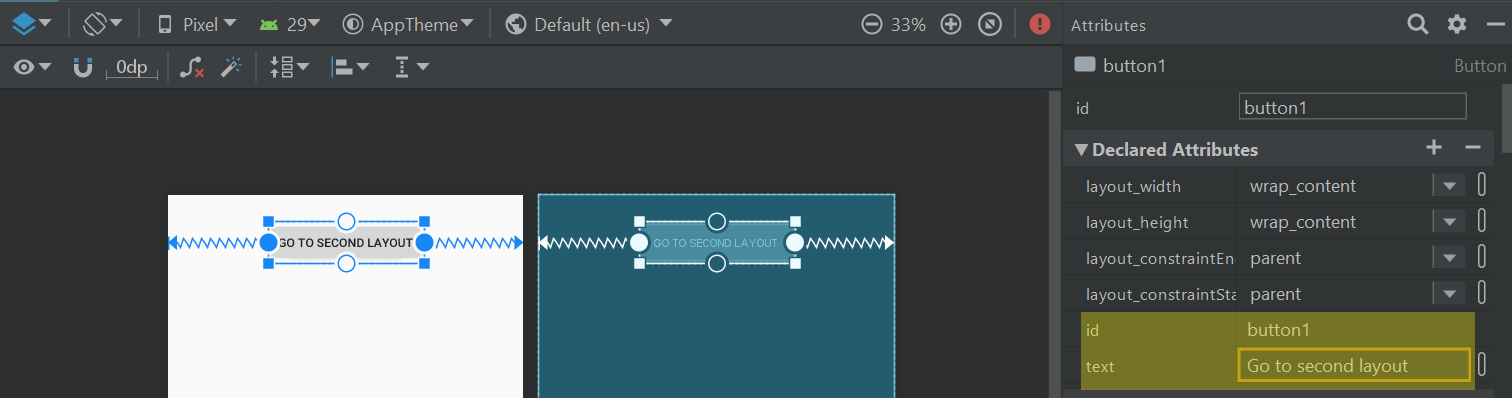
Select the button you just added and open the Attributes panel. Change the id attribute to 'button1' and set the text attribute to 'Go to second layout'.
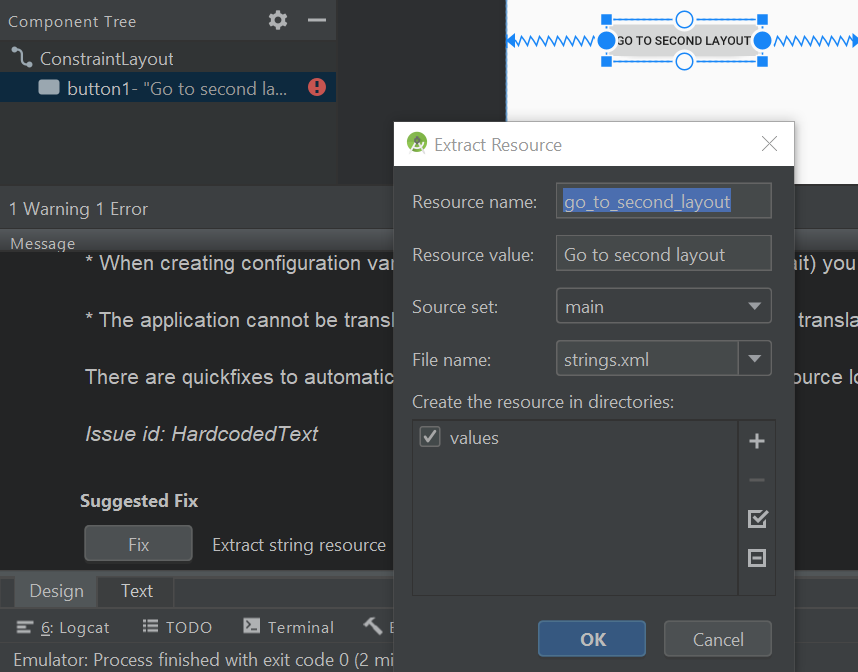
You may notice a red warning sign in the top right-hand corner.
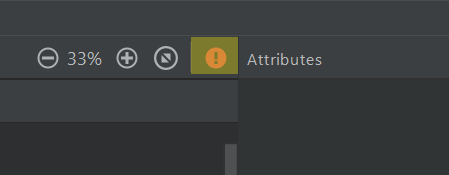
The warning sign is there because the layout is missing constraints and contains hardcoded text. Constraints coordinate the positioning of elements within the user interface layout. Meanwhile, hardcoded text is user-facing text that is entered directly into the XML layout file's code, rather than being imported as a String resource. If you want to learn more about missing constraints and hardcoded text errors then we have a dedicated tutorial that you can check out. In brief, to fix the errors, you simply need to click the infer constraints button in the editor window and the 'Fix' button in the hardcoded text warning, as shown below.

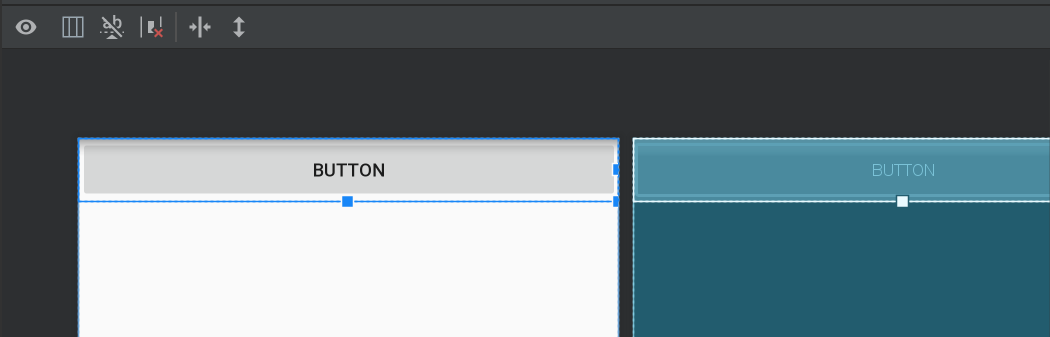
Once you have an error-free button in the activity_main.xml layout, you can switch to the second_layout.xml layout and add a button there too. You may notice the button looks a little different when dragged and dropped onto the second_layout.xml layout. It stretches across the width of the layout and does not create a missing constraints error. This is because the second_layout.xml file uses a vertical linear layout, while the activity_main.xml file uses a constraint layout. The differences between these different layout formats will be explored further in later tutorials.
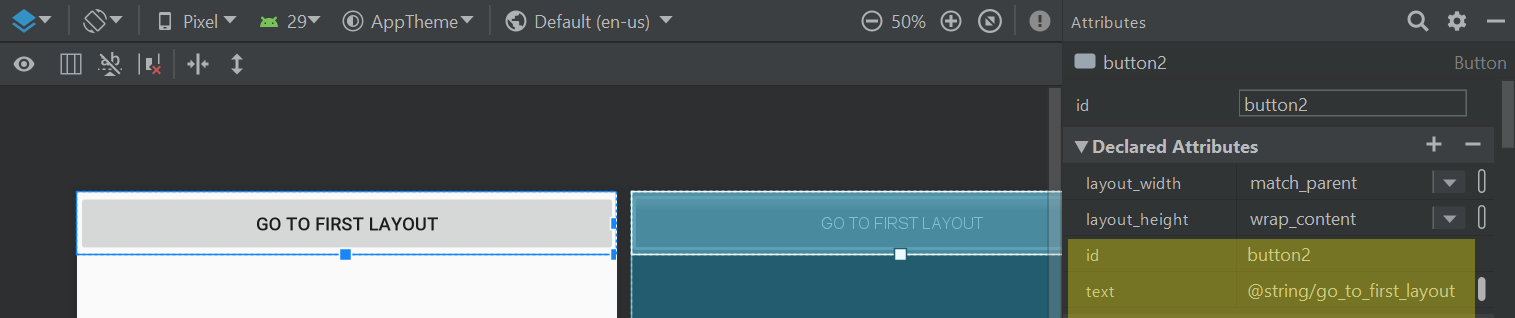
Select the button and open the Attributes panel. Change the id to 'button2' and the text to 'Go to first layout'. Lastly, resolve the hardcoded text warning in the same way as before.
Making the buttons operational
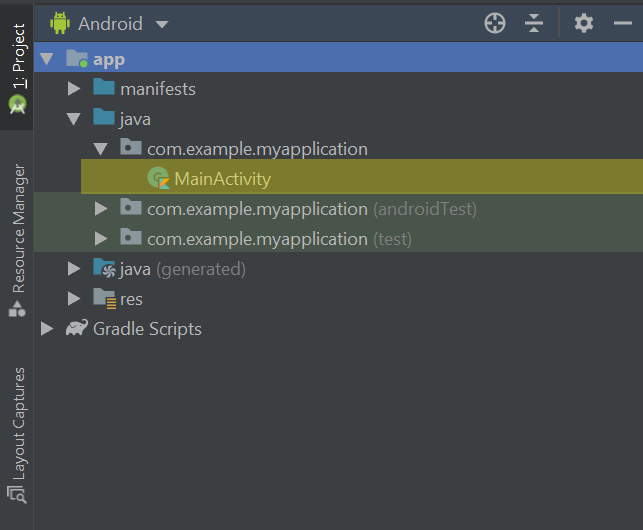
We'll now write the code which makes the buttons functional. Functions are defined in Kotlin files, such as the MainActivity.kt file that Android Studio automatically generates when you create a new project. To locate the MainActivity.kt file, navigate through Project > app > java > folder with the name of your project.
Kotlin functions begin with the fun keyword followed by the name of the function. We will name our functions loadMain and loadSecond because they will load the main and second layouts, respectively. The full code for the functions will look like this:
fun loadMain(v: View) {
    setContentView(R.layout.activity_main)
}

fun loadSecond(v: View) {
    setContentView(R.layout.second_layout)
}
The functions should be added below the override fun onCreate(savedInstanceState: Bundle?) function:
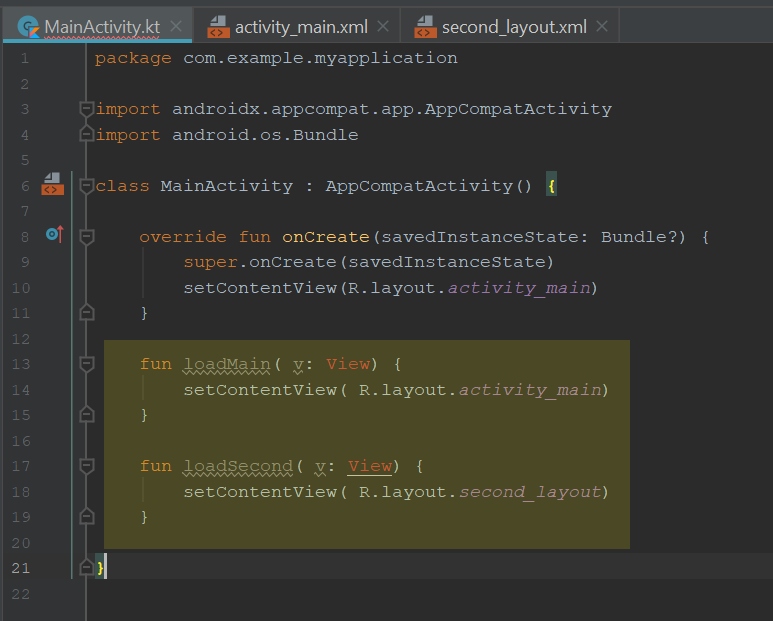
In the brackets following the function name are the details of any arguments the function takes. The above functions take the argument v: View. At present, View is in red because Android Studio does not recognise this argument. To resolve this, click the View word then press the alt and enter keys on your computer keyboard. In the resulting dropdown menu, select Import to import the View class into the MainActivity.kt file.
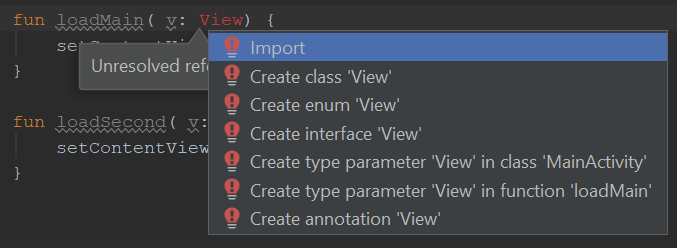
The View word should now no longer be red for either function.
The contents of the functions are written within the curly braces. setContentView(R.layout.activity_main) means that when the function is called, the activity_main.xml layout will be displayed to the user. Likewise, setContentView(R.layout.second_layout) will display the second_layout.xml file.
Once the functions have been written, the only thing that remains to do is enable the buttons to call the functions when they are pressed. To do this, navigate back to the activity_main.xml file and select the button. In the Attributes panel, search for the onClick attribute and assign it the value loadSecond. This will ensure the button runs the loadSecond function when pressed and allow the user to navigate to the second layout.
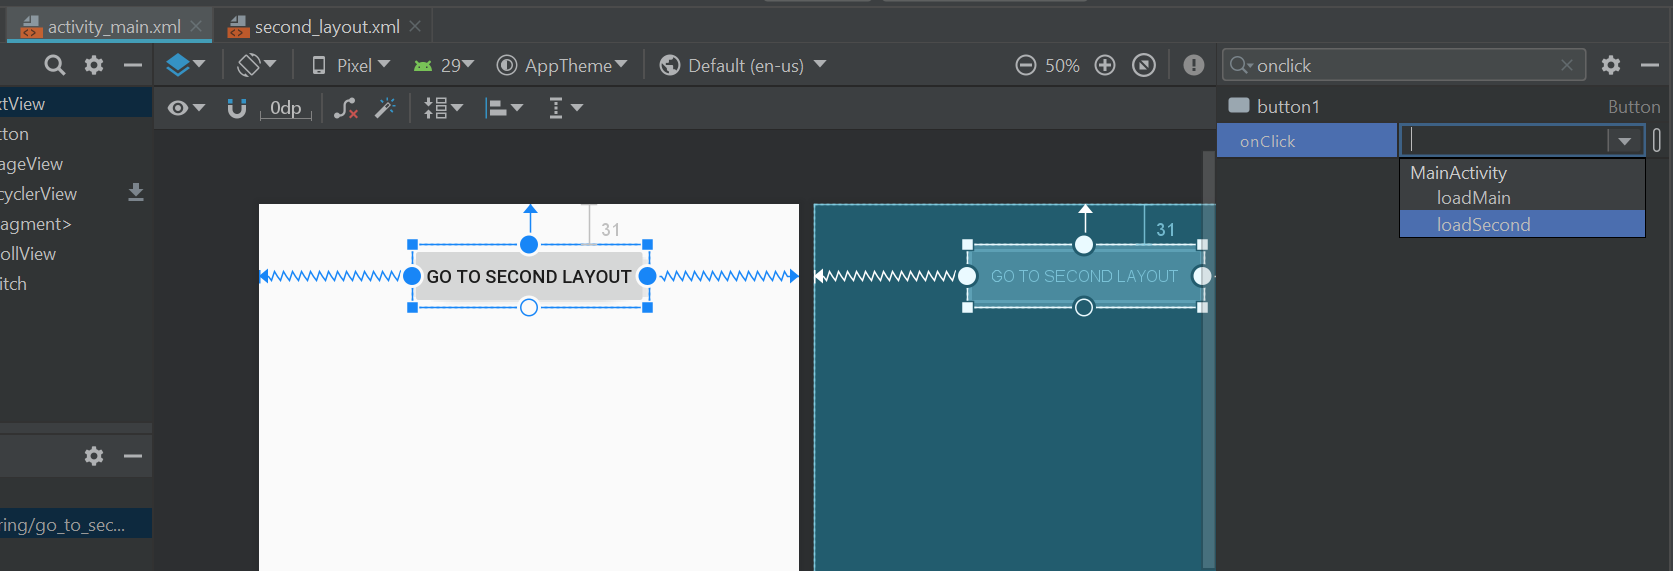
Repeat the above steps with the button in the second_layout.xml file, except this time set the onClick attribute to loadMain. This will allow the user to navigate from the second layout to the activity_main layout by pressing the button.